
Support Services
New for February 2026
The Support Services enable the administrators at the Network Zone level to provide advanced maintenance and troubleshooting services to member institutions.
Accessing the Support Services Page
This requires the Support Services role to be activated.
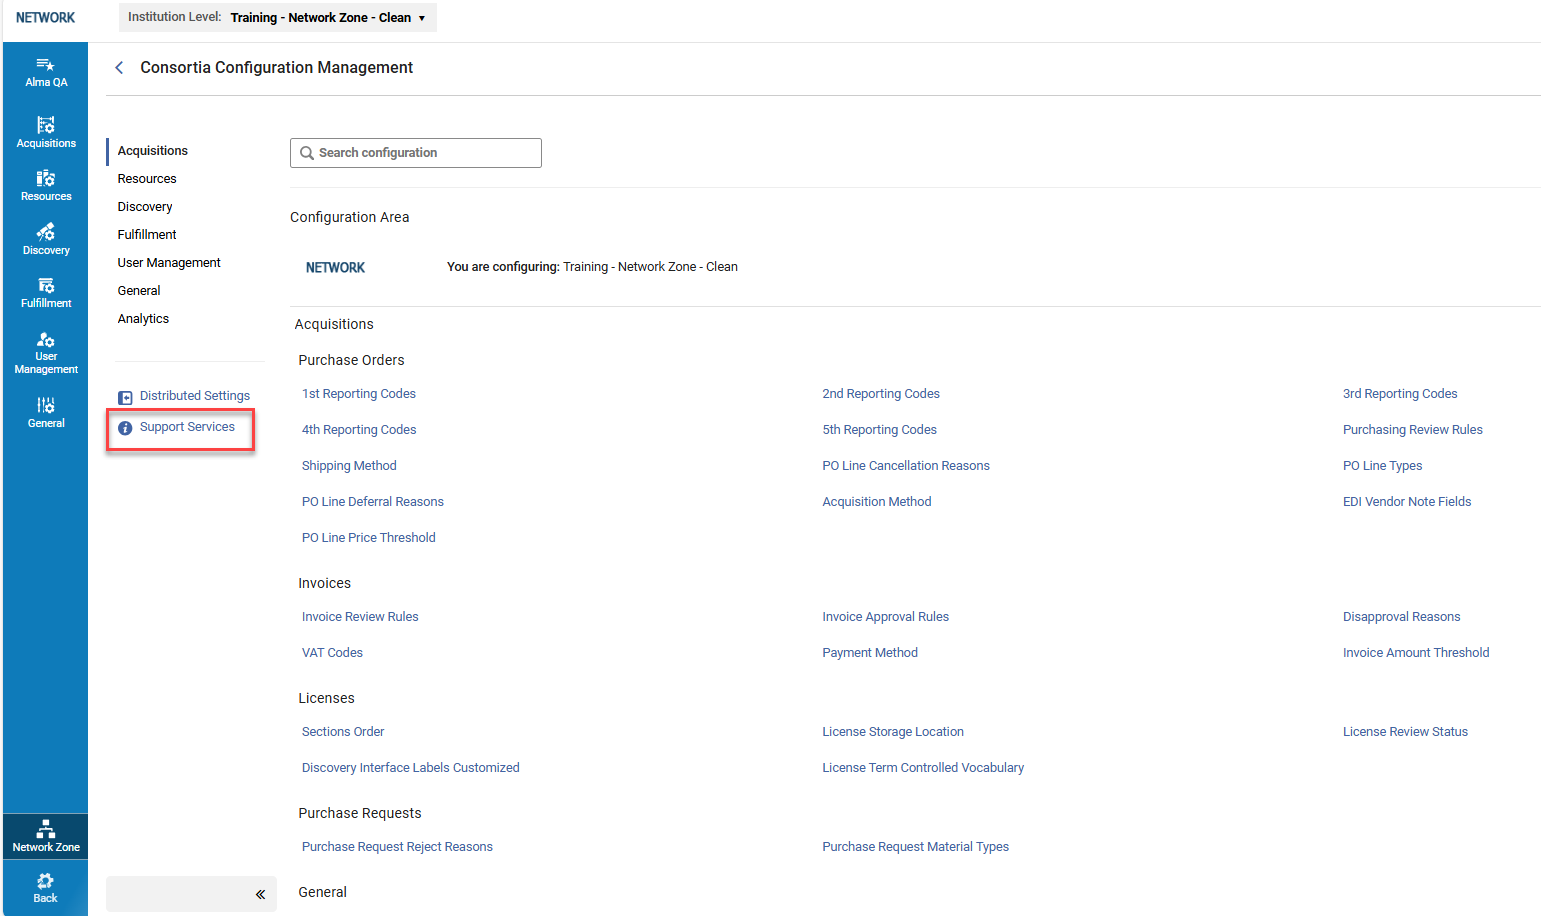
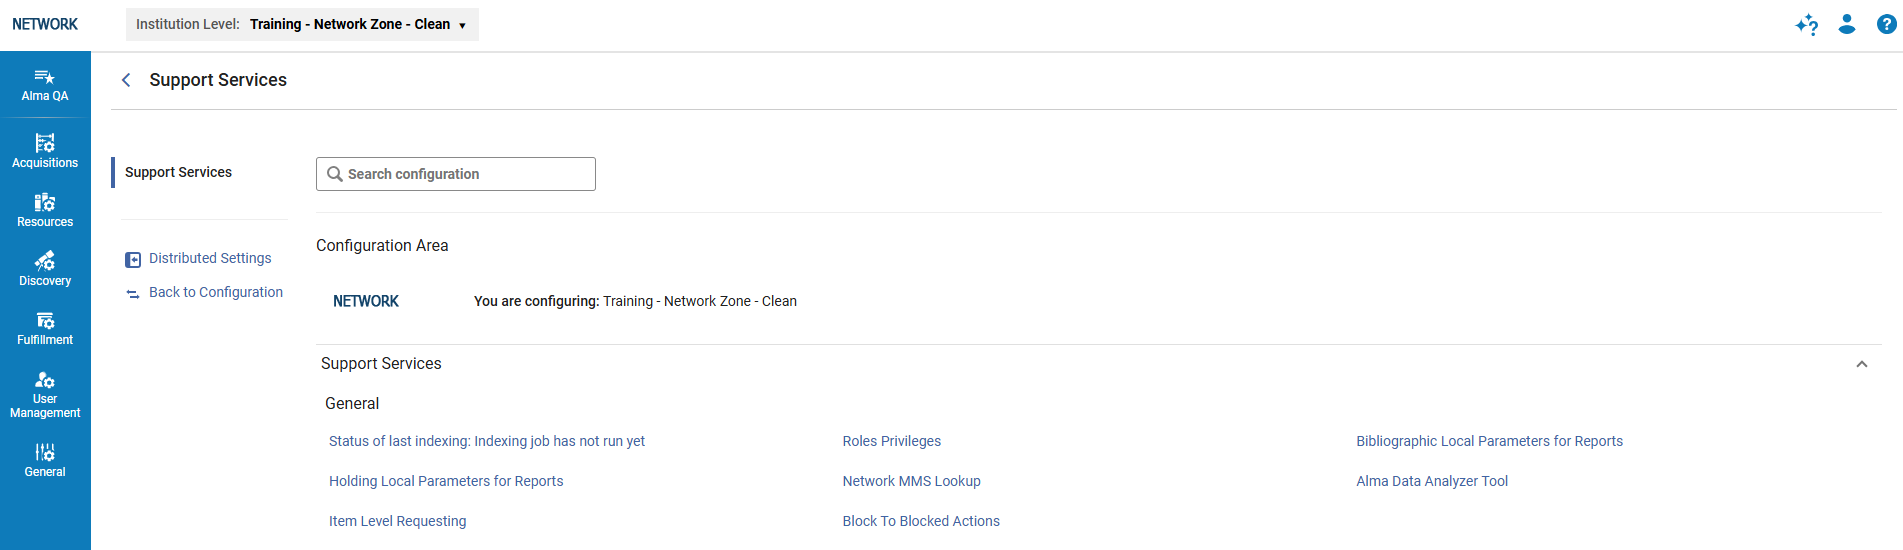
In the Consortia Configuration Management page, select Support Services to open the page.
Last Indexing Status
Select this option to view the last indexing report at the Network level and the member/s level.
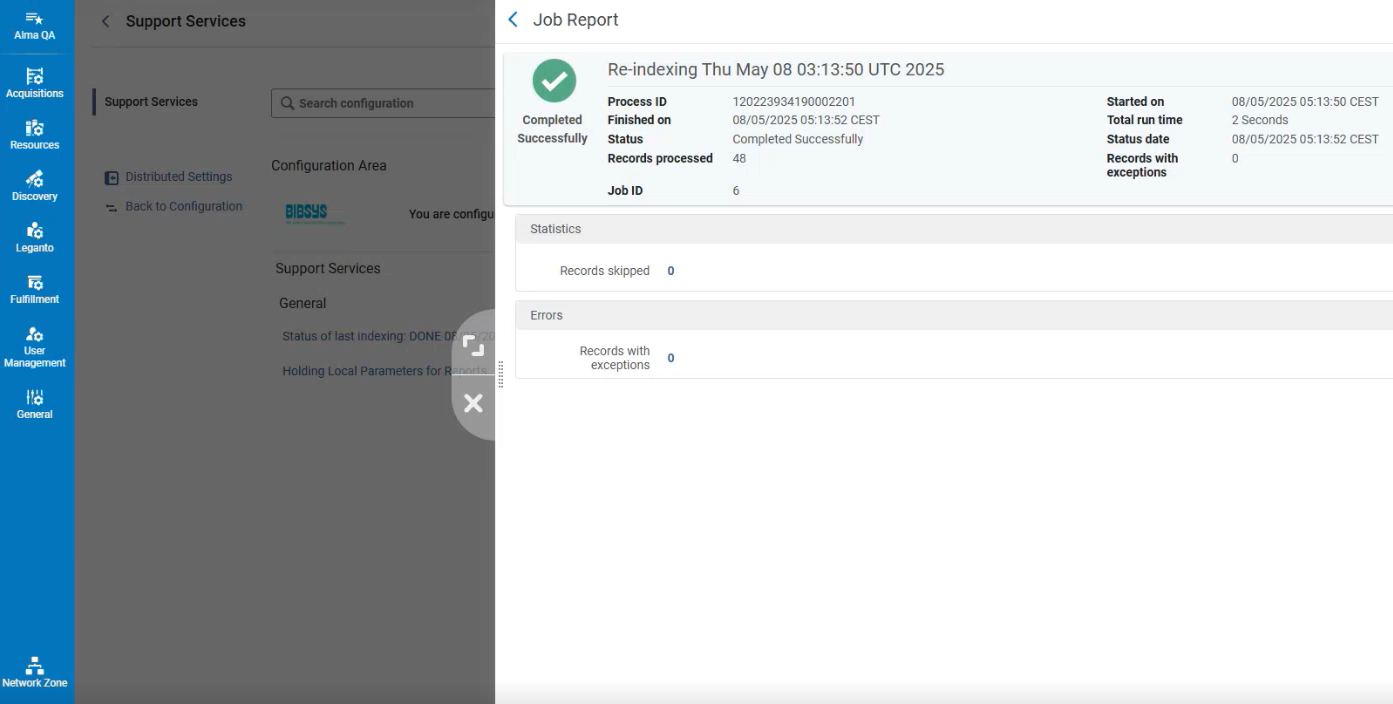
If records with errors appear, they are generally related to minor database inconsistencies that do not impact the data and do not require action from the user.
Roles Privileges
Select this option to turn on/off privileges for specific roles.
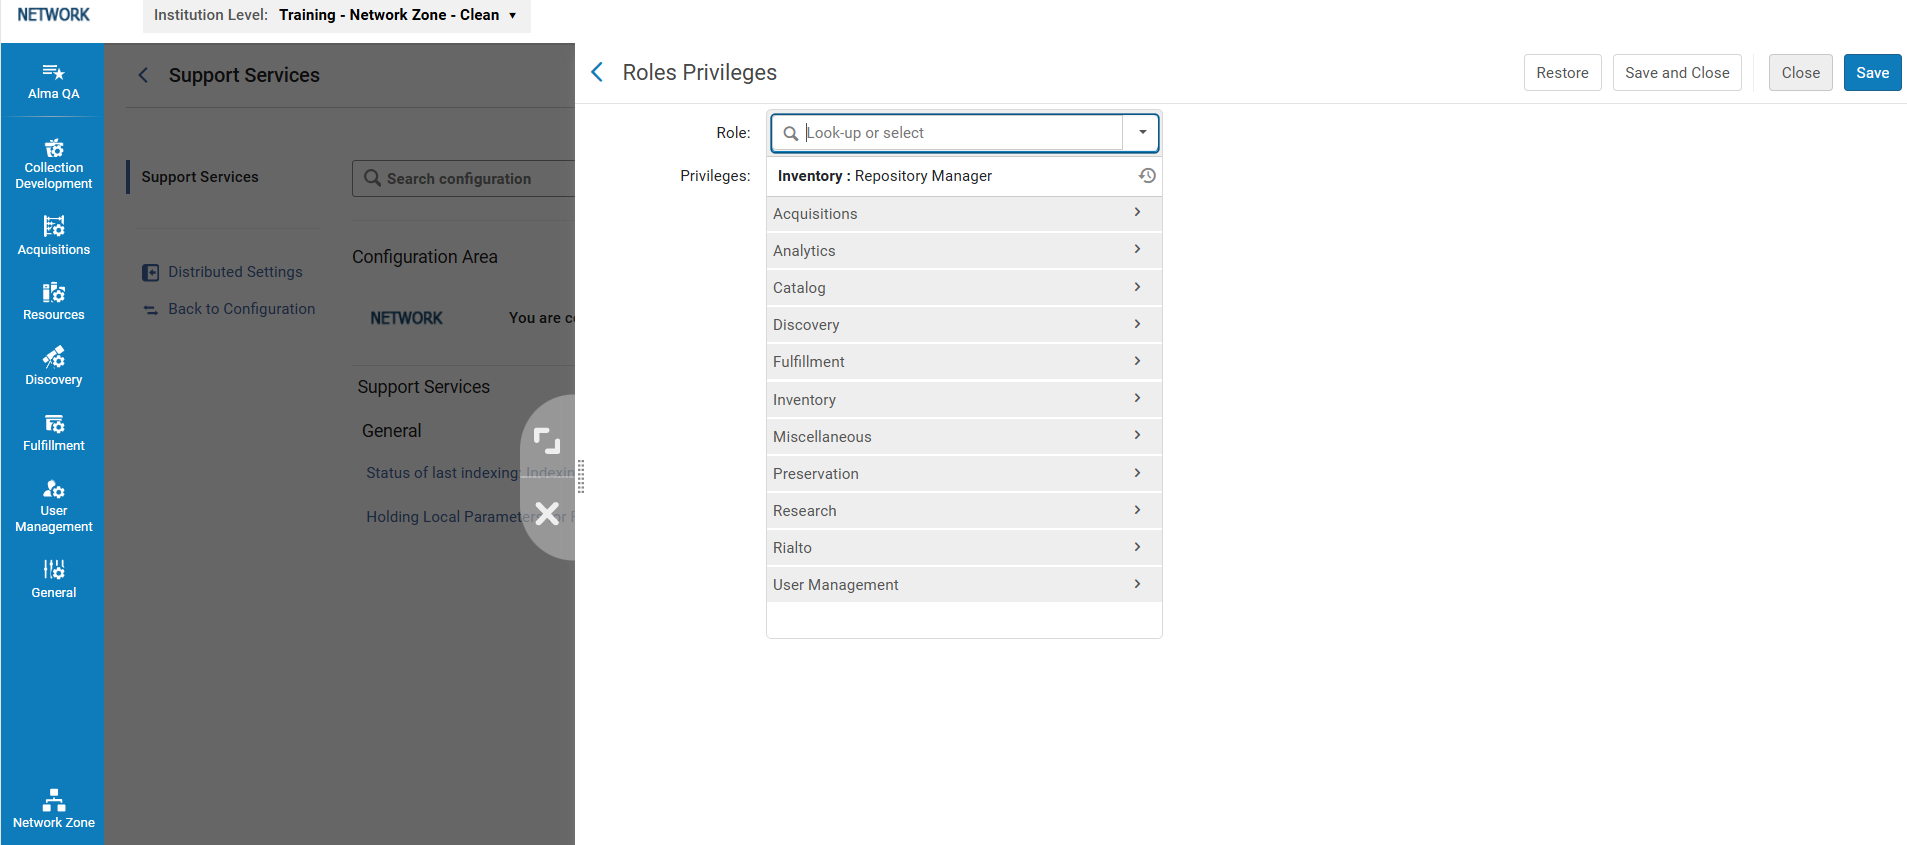
For more information, see Roles and Registration Configuration.
The network administrator can undo any unwanted changes by selecting the Restore button.
Bibliographic Local Parameters for Reports
This enables Consortia to add bibliographic local parameters for reports and run the distribution centrally to the members. For more information, seeAdd bibliographic fields to Alma analytics.
Changing the Bibliographic Local Parameters for Reports
-
In the Institution Level dropdown list, select your Network Zone.
-
Update the information in the table as required. Note that if the table has never been updated (out-of-the-box), you first need to select the Customize button in order to edit it.
-
Select Save. You now have two options:
-
Select Apply changes in the row of buttons at the top of the table to run a job that applies the changes to the Analytics data. The changes are applied at the network level but are not automatically distributed to the members.
-
Select Distribute All. A pop-up window opens, enabling you to choose a specific member/s or all members to distribute the changes to (see Consortia Central Configuration Dashboard). Ensure that the Apply Changes checkbox is selected in order to run the job that applies the changes to the Analytics data.
-
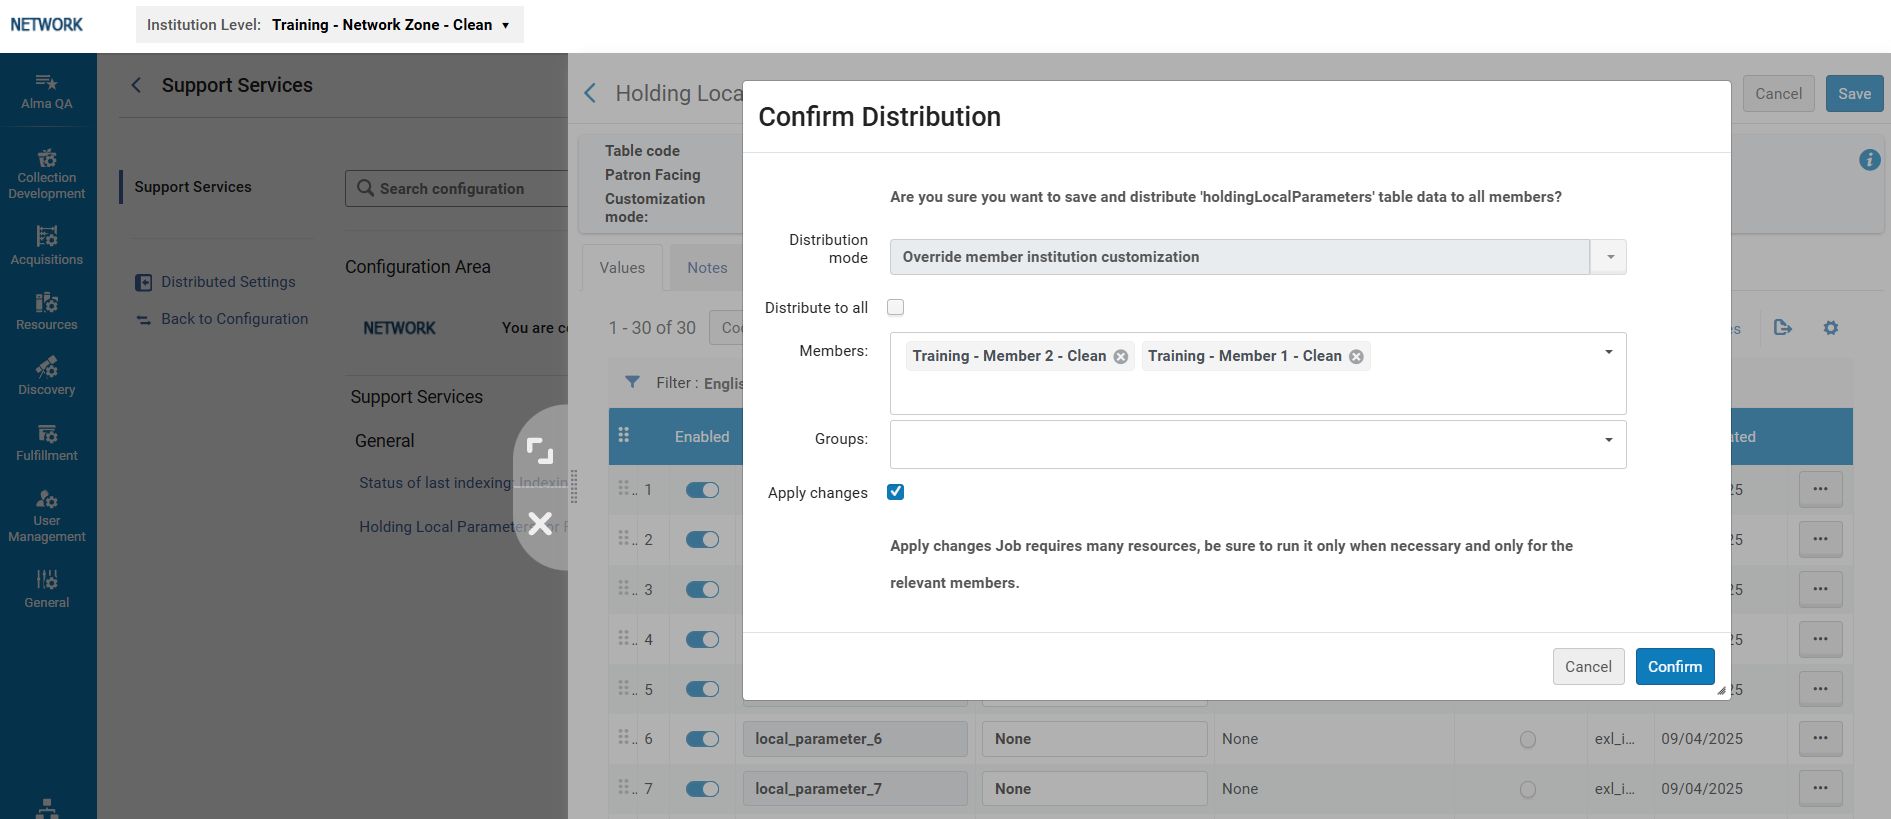
Distribution for bibliographic local parameters
- If a member was selected in the Institution Level drop-down list, the Network Zone administrator can update and save the parameters at the member level, and run the job that applies these changes to the analytics data by selecting the Apply changes button.
-
For bibliographic local parameters, an exception is thrown if the tag value is below 10.
- When editing subfields after the tag, the subfield range or list must be written without spaces between them (for example,100 a-c,k,j-m, which has no spaces between the subfields).
Holding Local Parameters for Reports
This enables Consortia to add holding local parameters for reports and run the distribution centrally to the members.
Changing the Holding Local Parameters for Reports
-
In the Institution Level dropdown list, select your Network Zone.
-
Update the information in the table as required. Note that if the table has never been updated (out-of-the-box), you first need to select the Customize button in order to edit it.
-
Select Save. You now have two options:
-
Select Apply changes in the row of buttons at the top of the table. This will run a job that applies the changes to the Analytics data. The changes are applied at the network level but will not be distributed automatically to the members.
-
Select Distribute All. A pop-up window opens, enabling you to choose a specific member/s or all members to distribute the changes to (see Consortia Central Configuration Dashboard). Ensure that the Apply Changes checkbox is selected in order to run the job that applies the changes to the Analytics data.
-
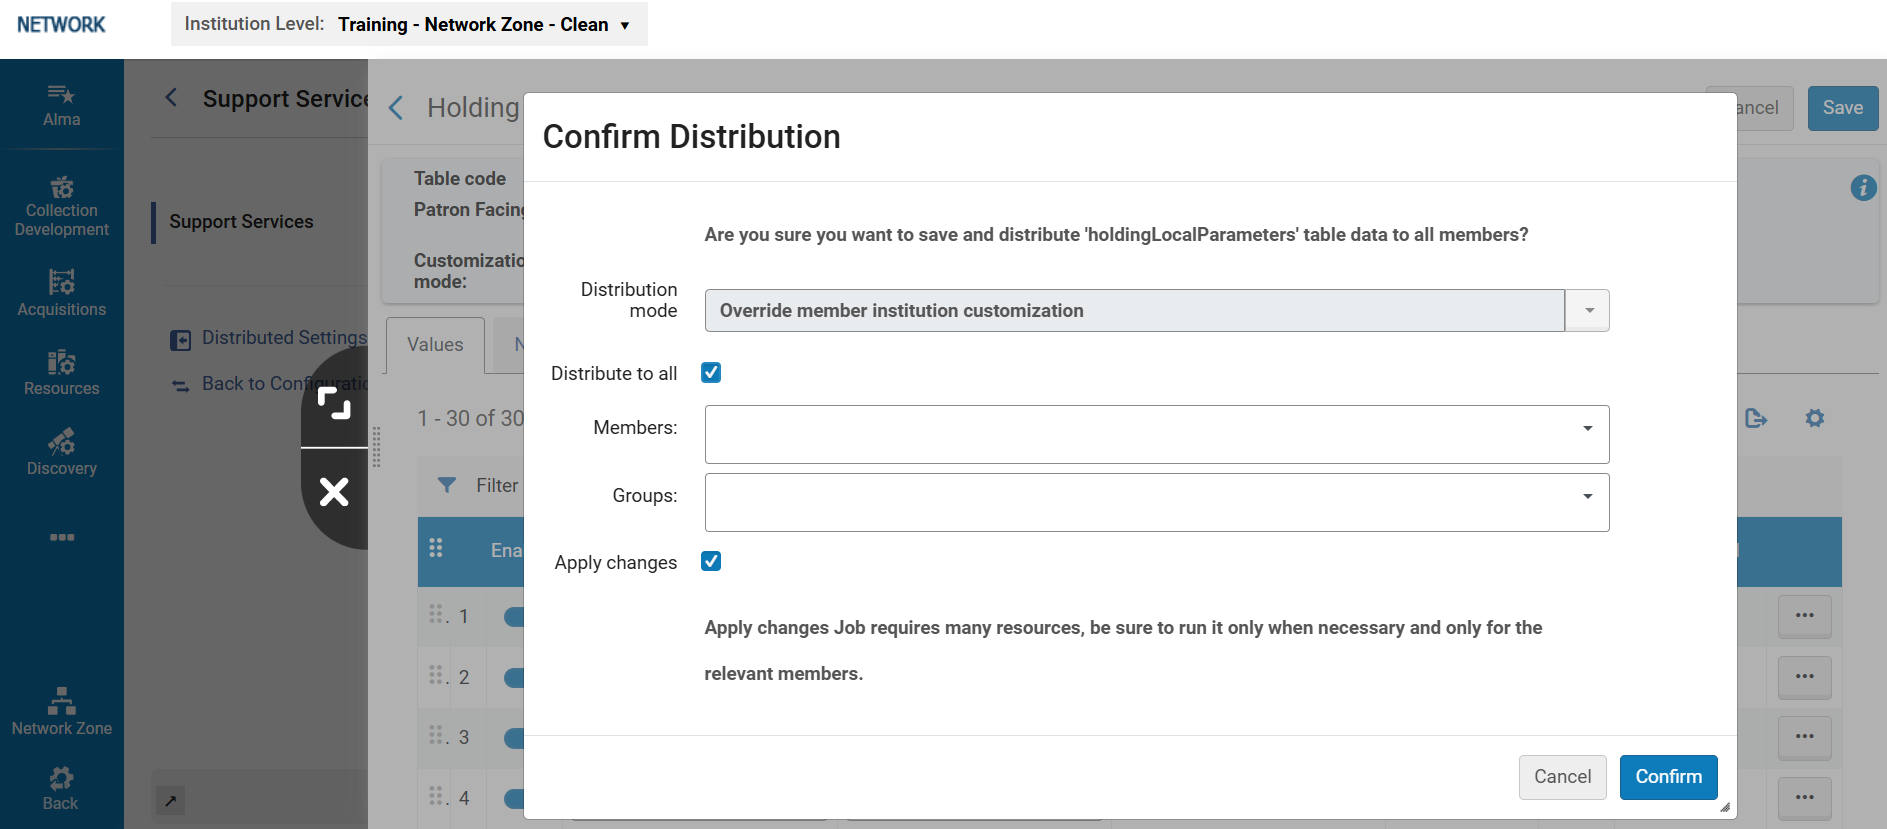
- If a member was selected in the Institution Level drop-down list, the Network Zone administrator can update and save the parameters at the member level, and run the job that applies these changes to the analytics data by selecting the Apply changes button.
- For holding local parameters, no validation is applied.
- When editing subfields after the tag, the subfield range or list must be written without spaces between them (for example,100 a-c,k,j-m, which has no spaces between the subfields).
Network MMS Lookup
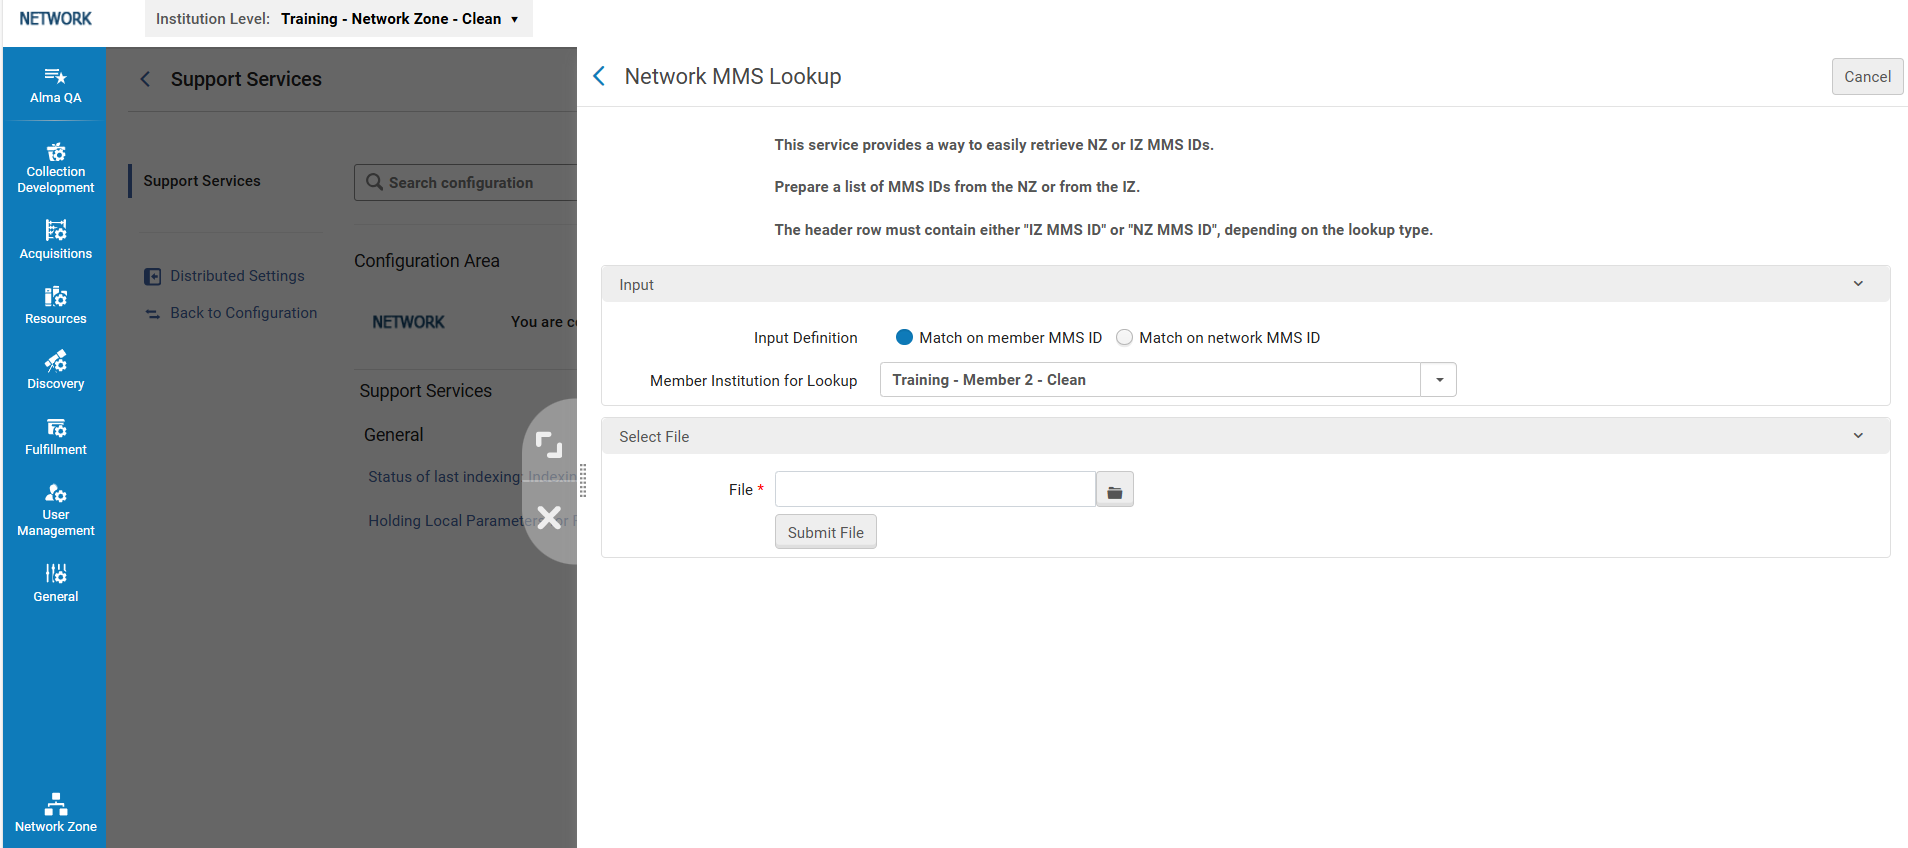
This enables the Network Zone operator to upload a list of MMS IDs for IZ bib records and then check if they are linked to a NZ bib record. If yes, they can get the NZ MMS ID. If the Match on network MMS ID is selected, the network zone operator can upload a list of MMS IDs in the NZ, choose a member IZ, and get the corresponding IZ MMS IDs.
-
Prepare the file with the MMS IDs. The IDs should come from either the Network Zone or the Institution Zone. Depending on where the IDs are from, the header row should contain either IZ MMS ID or NZ MMS ID.
The MMS IDs need to be from the same institutions, i.e., you cannot submit MMS IDs from more than one institution in the same file. -
For the Input Definition, select either Match on member MMS ID or Match on network MMS ID, depending on what you filled in the header row in the file.
-
Select the member institution for lookup.
-
Load the file and select Submit File. Alma analyzes the data and downloads the file to the user's computer when finished.
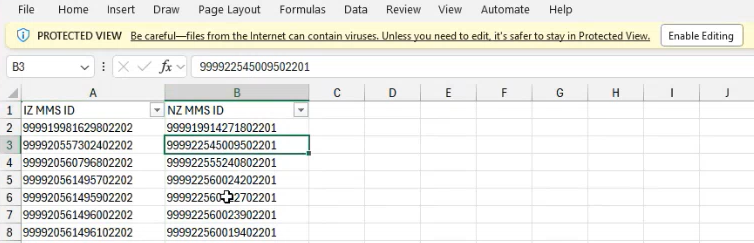
The report includes records linked to the Network Zone and Institution Zone. In cases where no match is found, this is indicated in the report.

Depending on the file size, the process takes some time to analyze the data before downloading the file. For example, for a file with 50,000 MMS IDs, you may need to wait around 30 seconds.
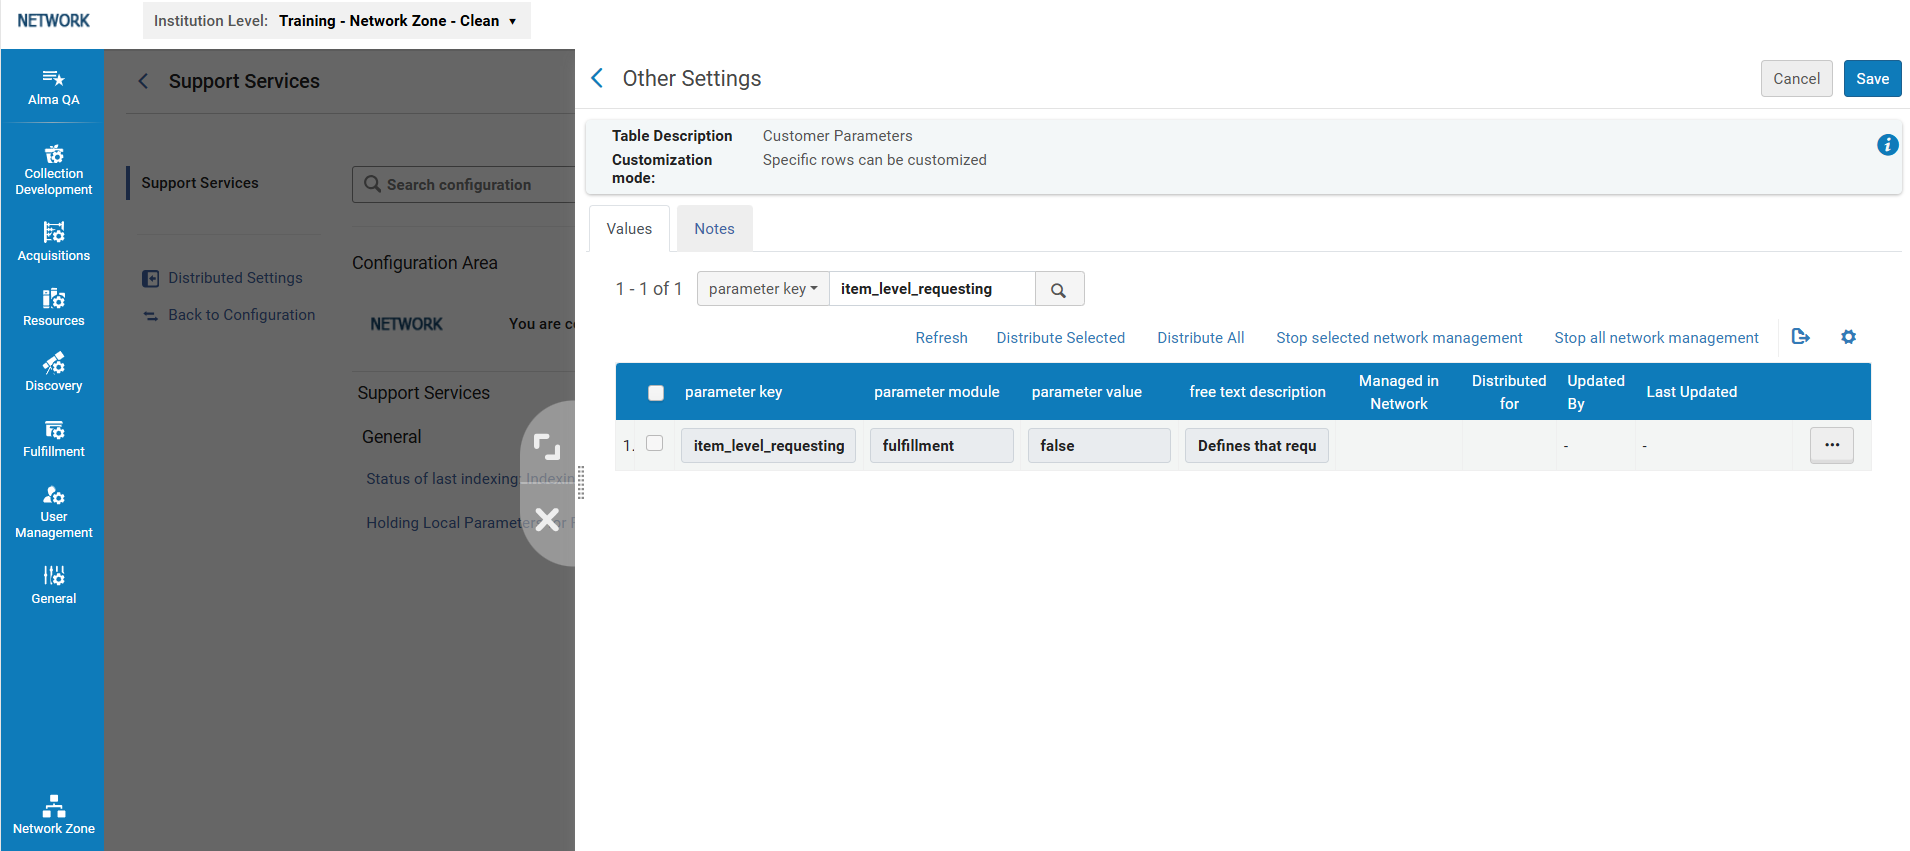
Item Level Requesting
This parameter defines whether an item without a description is requestable from the item level link in the Primo Get It tab. When set to True, the item request replaces title-level requesting. If set to False, which is the default, items without descriptions are requested via title level requesting.
If this parameter is changed to True, patrons will not be able to request from the title level at all. For example, if a patron wants to request a book with 10 identical items, before updating this parameter, they would see a single request link, and Alma would resolve which item to select according to availability, etc. However, if the parameter is changed to True, the patron sees 10 request links and must decide which one to choose. Depending on which one they select, the waiting time might be much longer.
Block to Blocked Actions
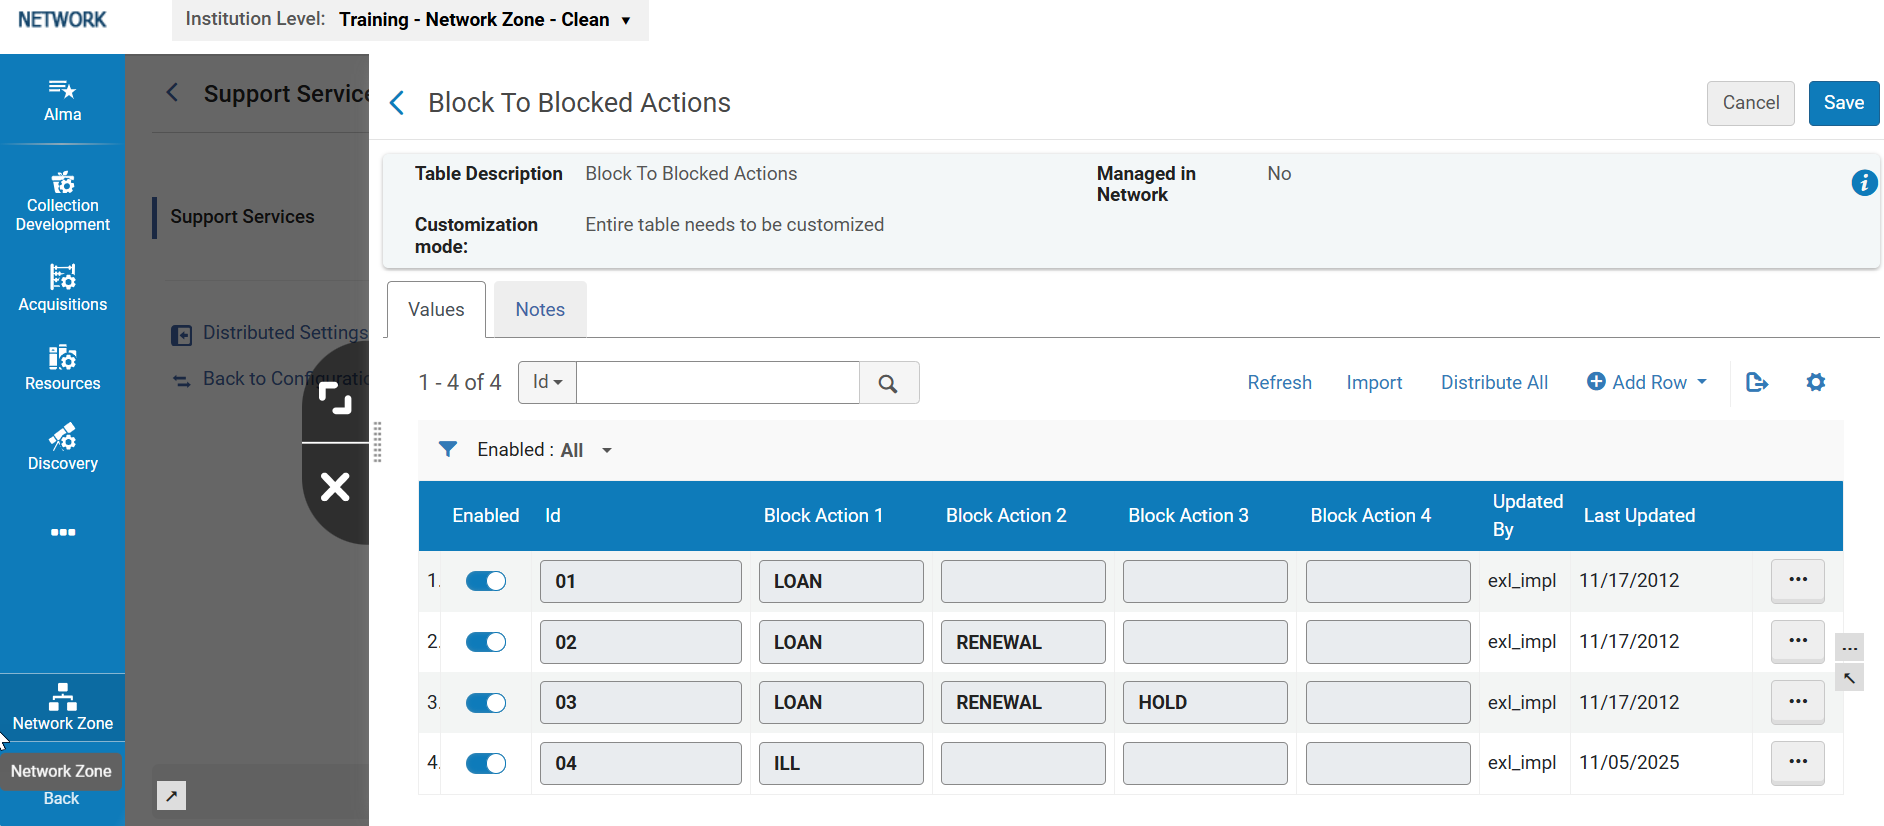
This table is used to configure the block actions that appear when adding user block definitions (see Configuring User Blocks).
Block to Blocked Actions
LOAN - Loans are blocked
RENEWAL - Renewals are blocked
HOLD - Physical requests are blocked
ILL - Resource sharing requests are blocked
The block actions must be written in capital letters.
Alma Data Analyzer Tool
Overview
The Data Correction Tool can be used to help analyze and fix issues with records in Alma for bibliographic and inventory data. This could be, for example, a bibliographic record that is found in Primo or analytics but not in Alma. With the Data Correction Tool, you can enter an MMS ID (see Record Numbers) and have it return and, in some cases, even fix the issue that needs to be addressed.
This tool is used by Network Zone administrators to analyze and fix data in the Institution Zone.
For more information, see Record Numbers.
How to Use the Tool
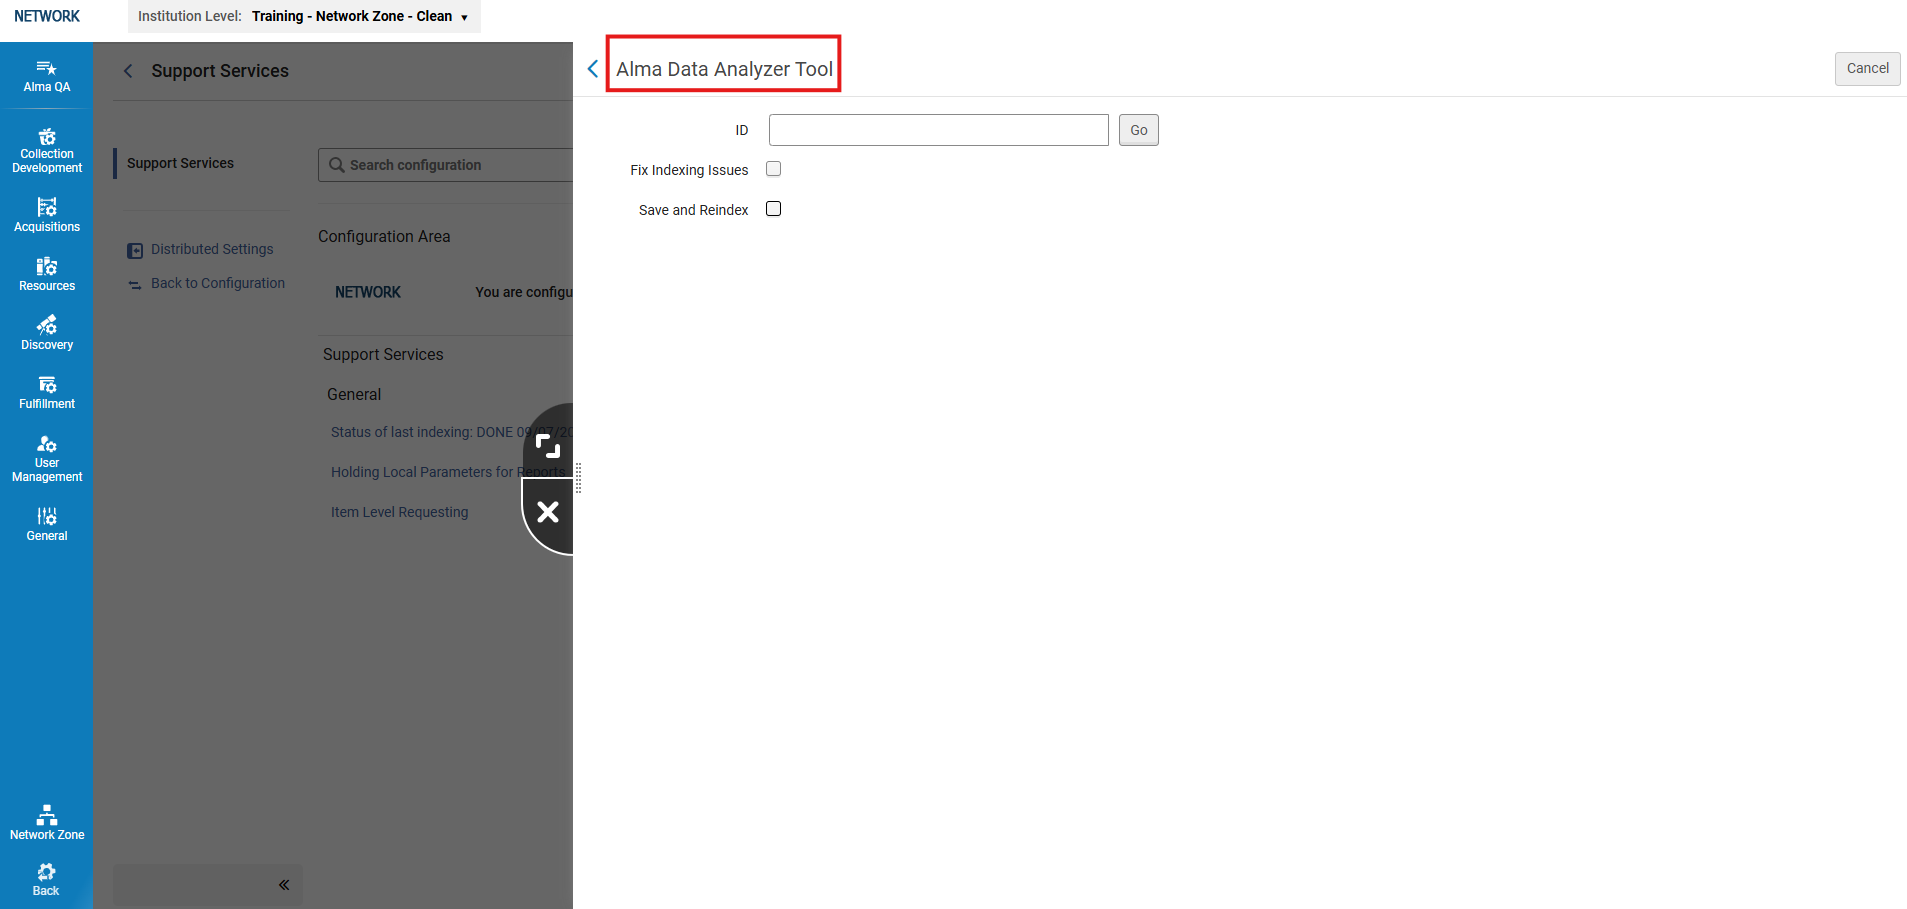
- Select the Alma Alma Data Analyzer Tool option from the Support Services page.
 Data Analyzer Tool
 - Enter the MMS ID(for the bibliographic or holding record) in the ID field.
- Select the following option/s as needed:
- Fix indexing issues — Fixes indexing issues for the MMS record.
- Save and Reindex — Saves and reindexes the MMS record.
- Select the Go button.
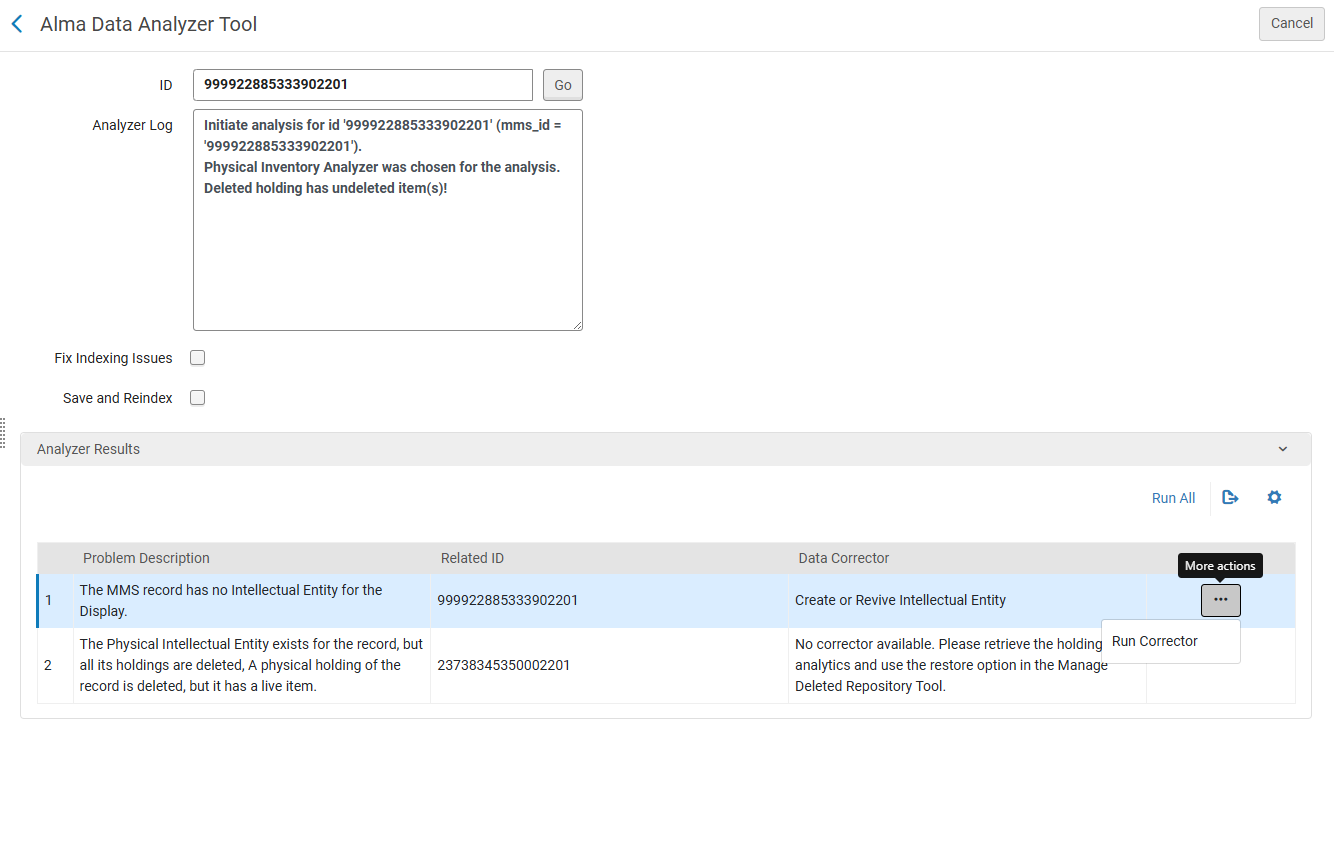 The following information appears on the screen:
- Analyzer Log - Displays the analyzed identifier and the type of analysis that was done
- Analyzer Results
- Problem Description - Description of the problem found.
- Related ID - The ID of the record that was found by the tool to be the source of the problem.
- Data Corrector - The job that needs to be run to fix the issue.
- Select Run Corrector from the actions menu to run the job.
If no data corrector is found by the tool for the issue, then the Run Corrector option does not appear.
