Fulfillment Networks
View network activity. Execute pickup anywhere or return anywhere within the fulfillment network.
This page describes fulfillment networks including viewing network activity, the pickup anywhere workflow (item belonging to another institution in the fulfillment network to be picked up at yet a third institution in the fulfillment network) and Get It at other institutions. For information on automated fulfillment networks see Automated Fulfillment Network Requests (AFN). For more information on the various workflows for resource sharing, including broker and peer to peer based, managing resource sharing partners, borrowing/lending requests and contributing to the resource sharing directory, see Resource Sharing.
For working with the Managing Patron Services page (working with patrons, loans, returns, etc.) see Managing Patron Services at a Circulation Desk.
A fulfillment network is a group of Alma institutions that have a predefined agreement to provide fulfillment services to the patrons of the other institutions in the network. Patrons can search the network members' collections and directly request resources from the institutions within the group. The requested items can be circulated at any institution in the network. This lowers the library involvement for configuration, maintenance of supplier lists, and staff mediation of requests. The fulfillment network can be set up regardless of whether the fulfillment network partners work with a Network Zone.
Unlike the classic resource sharing model, in which a patron's home library serves as an intermediary in providing access to resources it does not own, fulfillment networks allow for direct interaction between patrons of one library and another library in the fulfillment network. Fulfillment networks provide support for the following scenarios:
- Walk-in loans
- Direct requesting
- Return anywhere in the network
- Pickup anywhere in the network
- A network patron card in Primo
In a fulfillment network, the resource owning library is the patron's service provider. The resource owning library directly manages all aspects of the loan cycle with the requesting patron, including loan management (overdue, lost, renew etc.) and fine/fee related issues. The patron directly requests the resource from the library that owns the resource. The patron may request that the resource be picked up at the patron's home institution, the resource owning library, or another library within the fulfillment network.
Primo configuration may be required if a single PDS installation is not shared between the member institutions that would like to allow direct requesting.
A fulfillment network has the following additional attributes:
- Limited patron information is shared between the institutions in the network.
- The inventory of each fulfillment network member institution is discoverable by patrons of all fulfillment network members.
For information on configuring a fulfillment network or Pickup Anywhere/Return Anywhere, see Configuring Fulfillment Networks.
Fulfillment relationships define the services that one library is able to perform for another library within the same institution. For more information see Configuring Fulfillment Services Between Libraries Within an Institution.
Viewing and Working with the Network Activity for a Patron
Activity across all linked institutions can be viewed from the Patron Services page. The Network Activity tab contains the loan, request, and fines and fees balance data for the linked accounts for view purposes only. The loans and requests lists can also be exported.
The Network Activity tab is visible only from the patron's home institution, if the institution is part of a fulfillment network, and the staff operator has the consortialservices privilege as a part of the following roles:
- Circulation Desk Manager
- Circulation Desk Operator
- Circulation Desk Operator - Limited
- User Manager
- User Administrator.
If the patron is a linked user (see Require manual linked account registration), the Network Activity tab is only visible if cross consortia identifiers are enabled (see How to Setup and Test a Fulfillment Network).
A filter allows the user to select transactions for a specific institution or all institutions that have a linked account for this user. All active loans and requests will automatically be displayed with no option to filter the view for this session only.
Accessing the Network Activity Tab for a Patron
From the network tab you can view the activity across all linked institutions.
-
On the Patron Identification page (Fulfillment > Checkout/Checkin > Manage Patron Services), enter the patron's name in the Scan patron's ID or search for patron field and select Go. The Patron Services page appears. You can also enter a proxy user. For more details see Selecting a Patron.
-
On the left pane select the Network Activity tab icon.
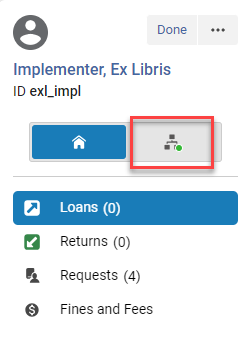 Note that a green dot on the tab indicates that actions (loans, requests, etc.) were done in the network.
 -
The Network Activity tab appears with the Loans button selected.
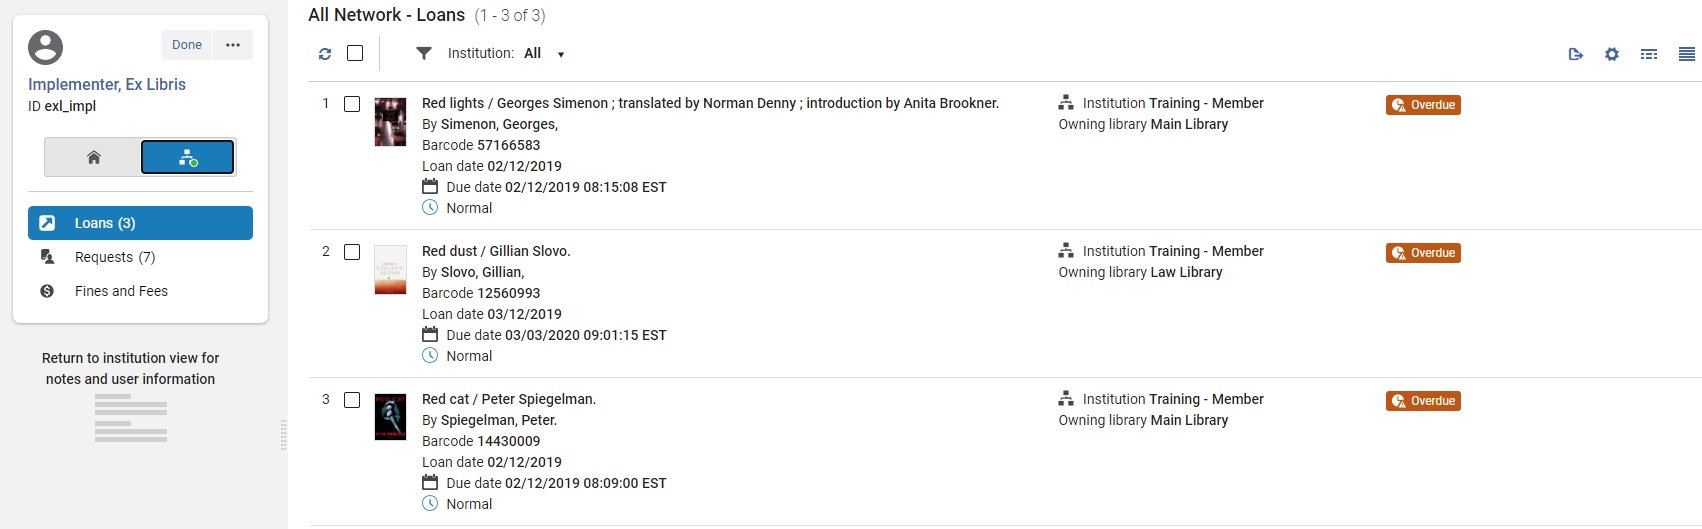 Only active tabs/activities appear, i.e., Returns are not diisplayed.
 -
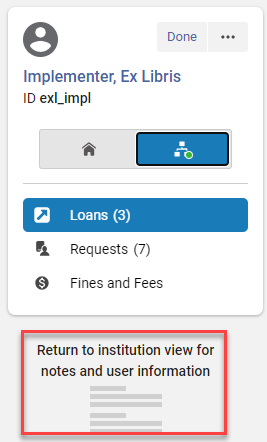
The user information and system notes are not displayed in the left hand pane of the Network Activity tab.
-
By default, the All institutions are selected.
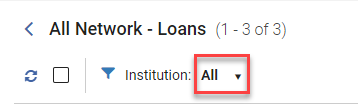
-
You can select from a list of institutions where the patron has active loans, requests or fees. Selecting All displays all the loans, requests or fees from all institutions. This is the default.
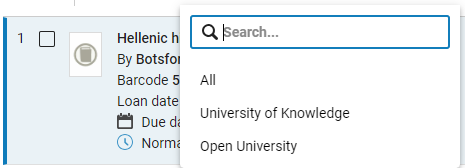
Viewing Patron Loans in the Network Activity Tab
Loans are selected by default in the Network Activity tab.
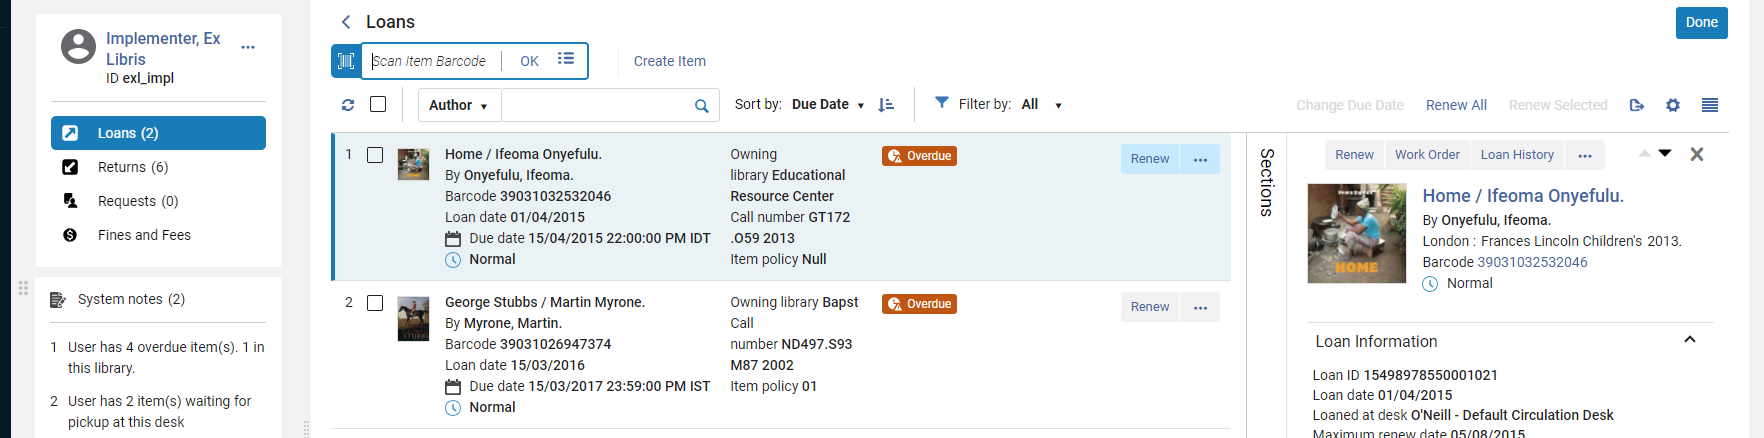
-
The number in the Loans button displays the number of loans in the selected institution or for All Networks if selected.
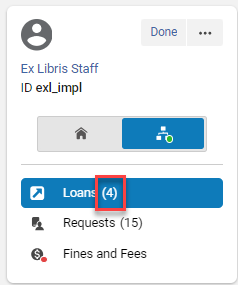
-
You can filter the list by institution. When doing so, the counter for the loans in the left hand pane is updated for the selected institution.
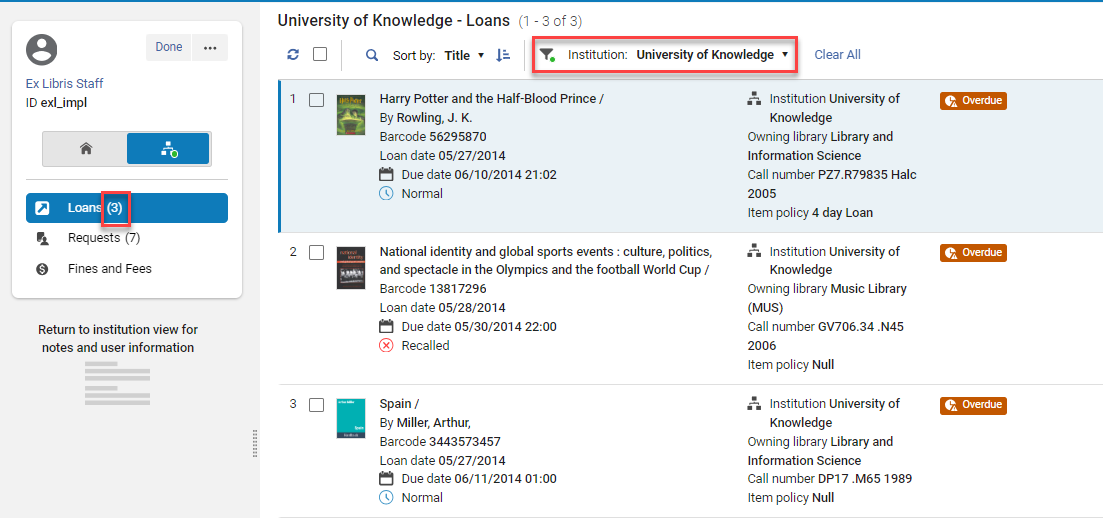
-
An additional field with the institution name appears for each loan.
 This field is customizable in the Record Customization menu (see Customizing the Display in Alma).
 -
When Loans is selected, the scan item bar does not appear and there is no Create item option or row actions.
Viewing Patron Requests in the Network Activity Tab
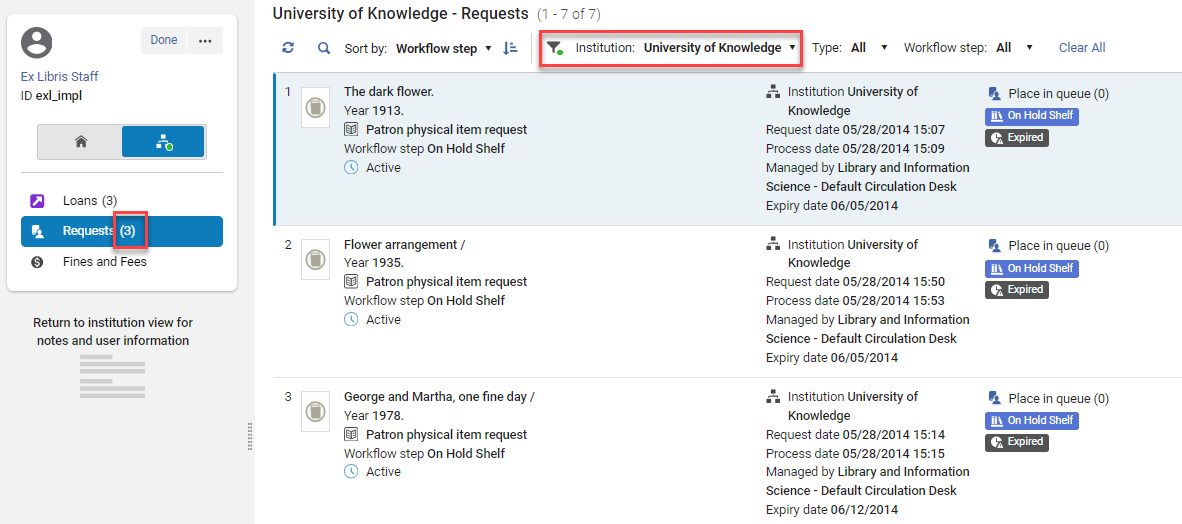
In the Network Activity tab, select the Requests button to view the patron's requests in the fulfillment network.
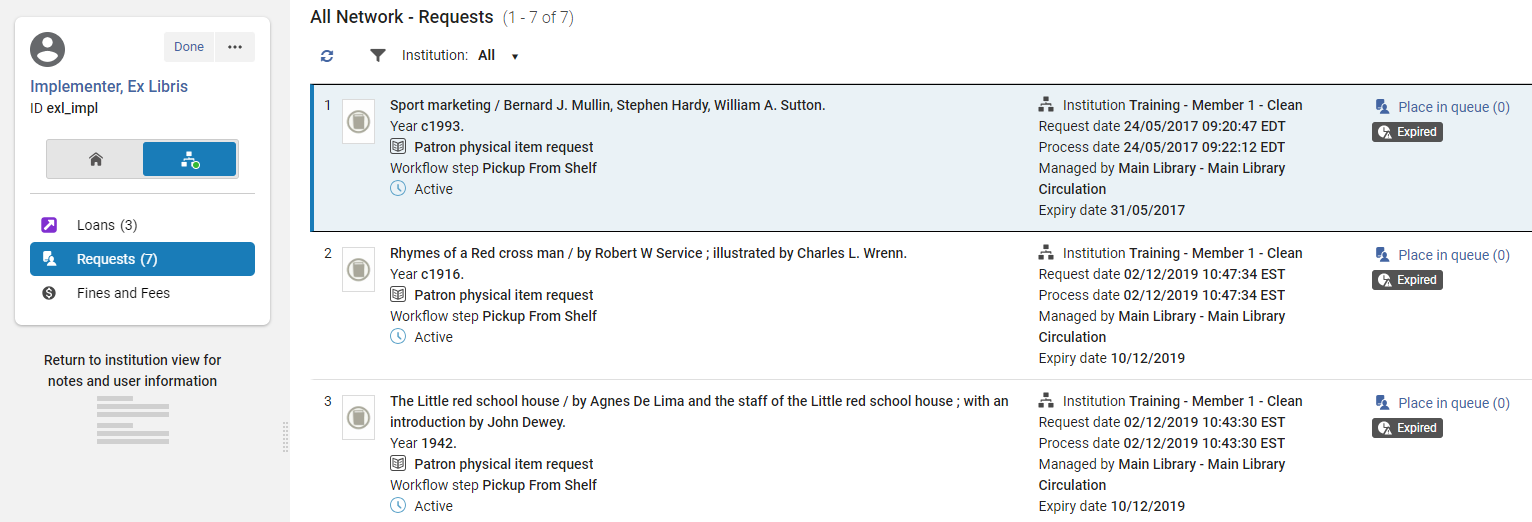
-
The number in the Requests button displays the number of requests in the chosen institution or for All Networks if selected.
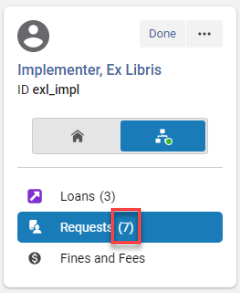
-
An additional field with the institution name appears for each request.
 This field is customizable in the Record Customization menu (see Customizing the Display in Alma).
 -
When Requests is selected there is no Create item option or row actions.
-
You can filter the list by institution. When doing so, the counter for the requests in the left hand pane is updated for the selected institution.
Viewing Fines and Fees in the Network Activity Tab
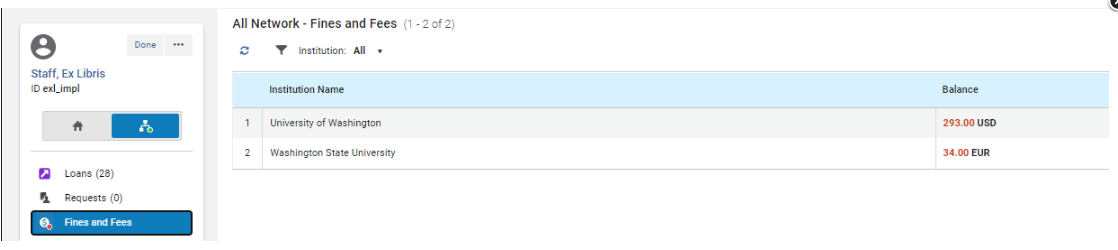
In the Network Activity tab, select the Fines and Fees button to view the fines and fees for the patron in the fulfillment network.
-
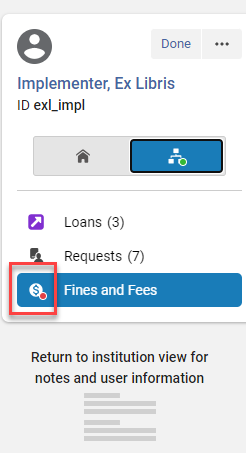
The Fines and Fees button displays a content indicator if fines/fees exist for the patron.
-
When Fines and Fees is selected in the Network Activity tab, there is no Create item option or row action.
Customizing the Display on the Patron Network Activity Tab
For instructions on customizing the display see Customizing the Display in Alma.
Customization to the Network Activity tab does not impact (and is not impacted by) customization for the main Patron Services page.
Switching Between Views on the Patron Network Activity Tab
For instructions see Views.
Exporting Records from the Network Activity Tab
For instructions see Exporting Records to Excel.
Walk-in Loans
A walk-in loan is where a patron from a different institution loans an item from the resource owning institution. For details see Registering Patrons from Other Institutions in the Fulfillment Network.
Pickup Anywhere Workflow
Creating a request within the fulfillment network, whether for pickup at a patron's home institution, the resource owning library, or another library within the fulfillment network is essentially the same process as a regular fulfillment process. The pages involved in creating and fulfilling the request stay the same, with just a variation in options offered in various drop-down lists and check boxes. The process may be just between the patron's home institution and the resource owning institution or the pickup of the requested resource may also take place at a third institution within the network. This is all handled within the standard workflow. For information on configuring Pickup Anywhere, see Configuring Pickup Anywhere/Return Anywhere.
Requesting an Item for Pickup Anywhere in the Network
The scenario below describes the workflow where a patron from one institution in the fulfillment network requests an item belonging to another institution in the fulfillment network to be picked up at yet a third institution in the fulfillment network. This workflow demonstrates the cross-institution request, loan, and return action.
For more information about pickup anywhere in fulfillment networks, see the Enhancements to Fulfillment Network video (1:41 min).
To request a pickup from a different institution, the patron signs in to Primo, searches for a resource, and selects from a list of institutions that have the resource available. The patron selects from the list of allowed pickup institutions and submits the request.
The patron's user information and resource request are copied to the library that owns the resource. Staff operators at that library see the requested pickup library in their task lists and pick slips.
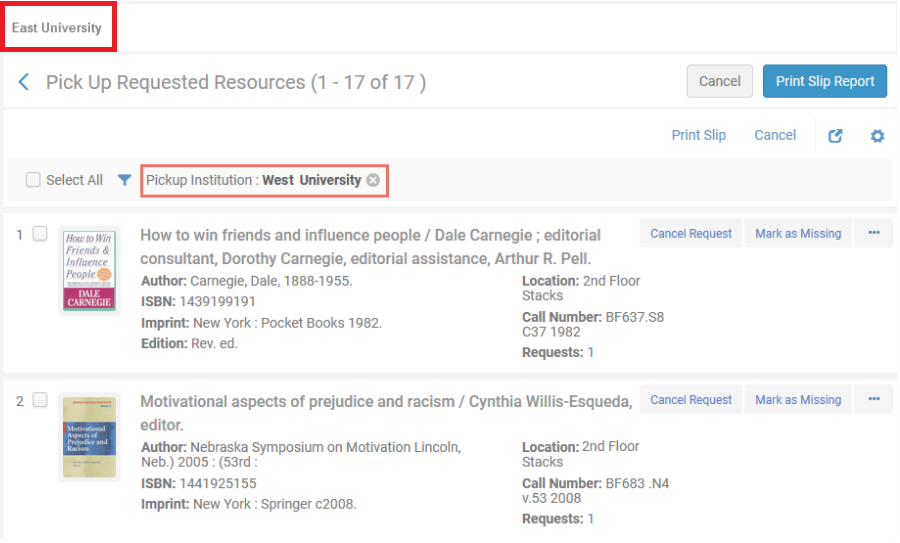
The item is scanned by the institution that owns the resource, the pickup destination is shown and the item put into transit from the institution that owns the resource to the pickup institution.
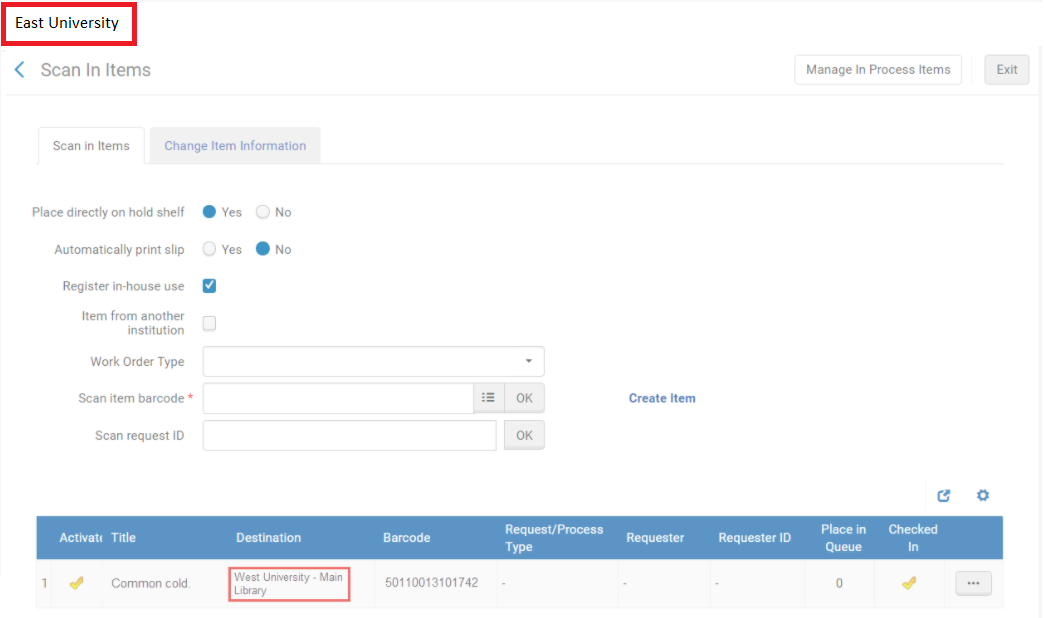
The item is received and scanned at the pickup institution with the owning institution selected.
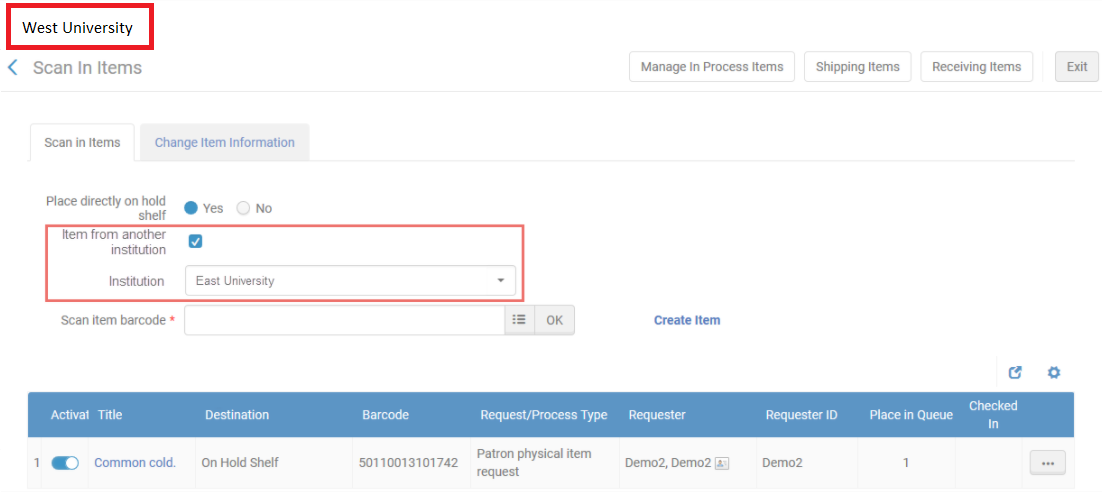
The patron's user information is automatically retrieved by the pickup institution and the patron is informed that their request is available for pickup. When loaning the item to the patron, the staff operator at the pickup location circulation desk selects the owning institution in the Patron Services page and checks out the item to the patron. The remainder of the loan life cycle is a standard process.
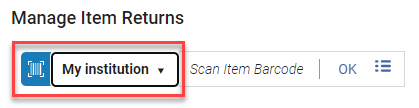
When the patron returns the resource to the pickup institution, the item is scanned as usual with the resource owning institution selected on the Manage Item Returns page. The Manage Item Returns interface indicates that the next step for the item is to transit back to its owning institution.
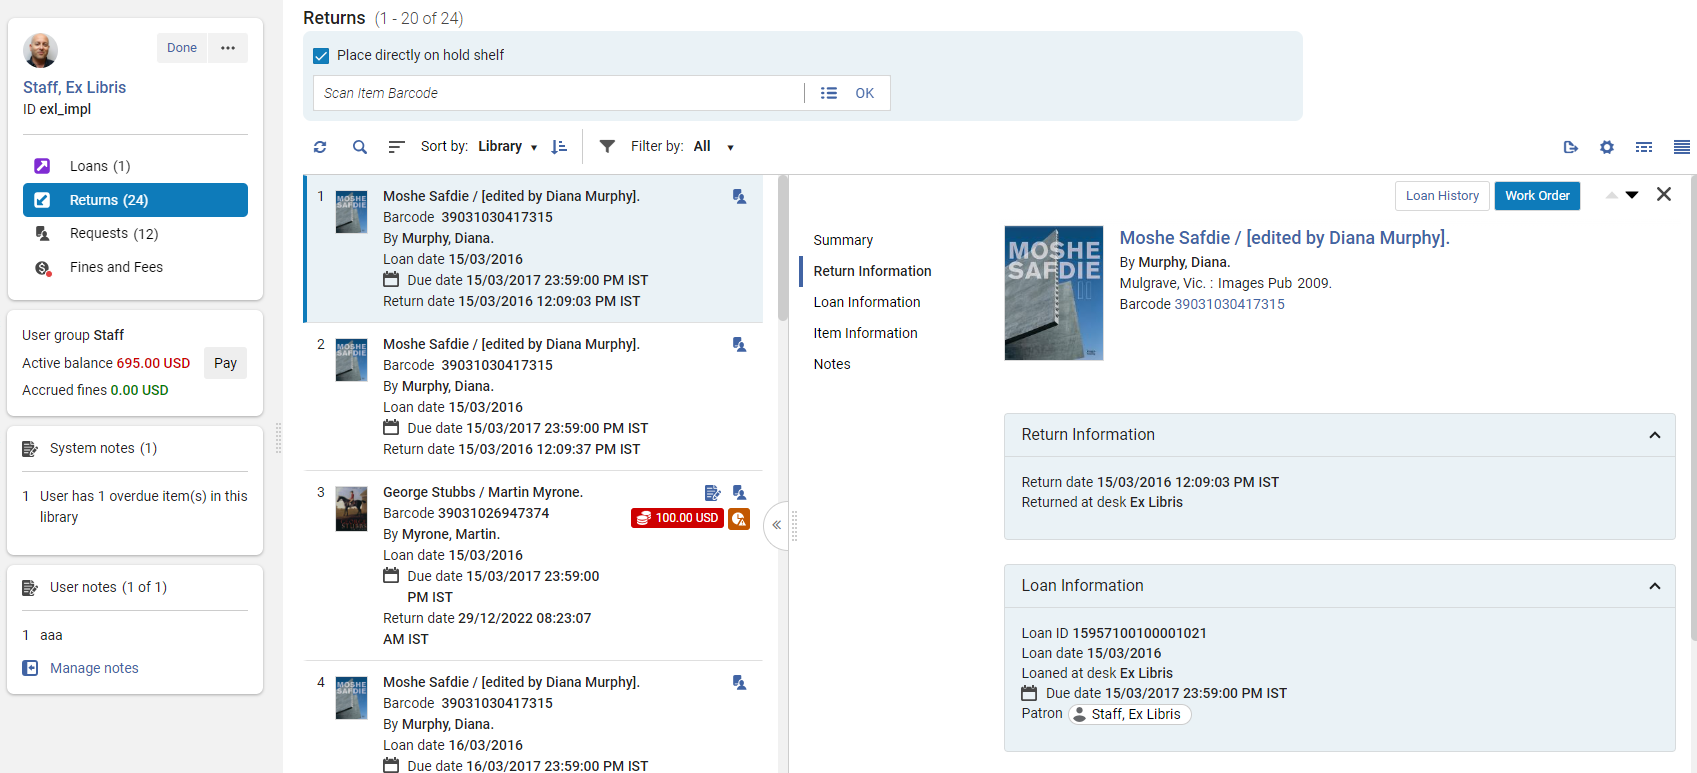
Get It at Other Institutions
Network inventory display may be based on a shared Network Zone in which all institutions take part, or based on a discovery network that is not utilizing a Network Zone. See Overview of Collaborative Networks with Primo VE for more information on the shared discovery options.
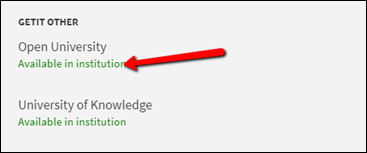
When the institution is part of a network, Primo will expose the discovered record's inventory at the patron's institution, as well as at other institutions of the network. The home institution's inventory and the network institutions' inventory are displayed in separate sections, as shown below.
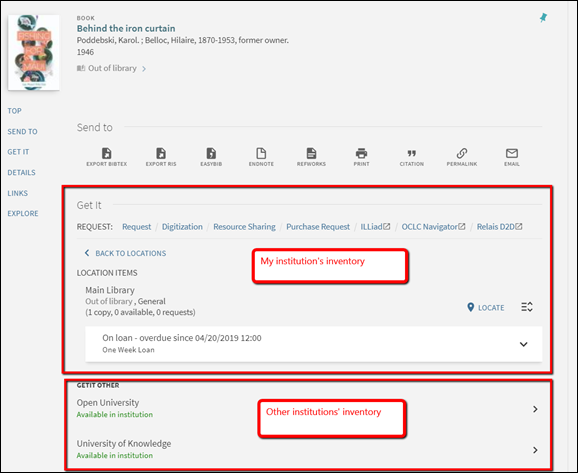
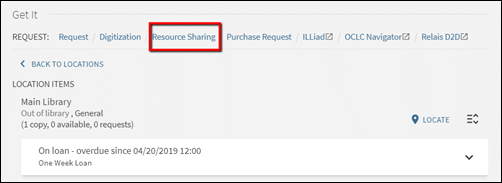
Other institutions' inventory may be displayed without allowing the patron to directly request the other institutions' resources. For example, if the institution implements a resource sharing or automated fulfillment network, network requests are placed via the resource sharing link.
Alternatively, the institution may allow the patrons to navigate into the other network members' inventory information and directly place a request.
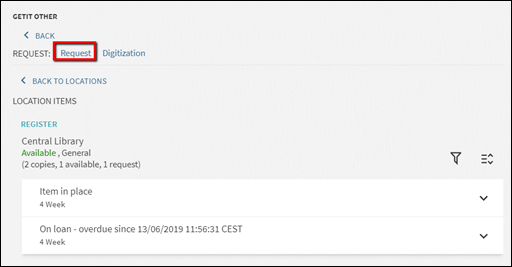
Below are some of the service types an institution may set up for network requesting.
Expose other institutions' availability only
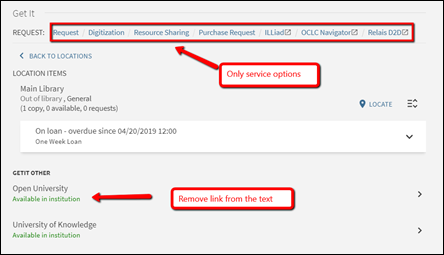
In this model the home institution may decide to expose only information about which institution holds available copies of the discovered resource. The institution may decide not to allow the patrons to further navigate into every institution's holdings information. This has the benefit of allowing less navigation in the full view page, minimizing the potential confusion that multiple options may cause. With this setup the patrons will only see that institutions do or do not own available copies, and will always use the same Resource Sharing Request link for requesting. The link for the Available in institution text can be deactivated. Please consult Primo configuration guides for achieving this type of set up.
Expose other institutions' holdings
In this model the home institution may decide to expose, in addition to information about which institution holds available copies of the discovered resource, also where the inventory is found, but not allow directly requesting the remote institutions' items. This would be a classic setup where the institutions allow patrons of one another to walk into each other's library and use the on shelf items, but require that the requesting be done only using the Resource Sharing option from the local inventory display.
As is shown below, in this setup the Available in institution text does allow navigating into the network institutions' inventory, but the remote institution's Get It information is shown without the patron being automatically logged into that institution. This causes the following:
-
The remote Get It has no request options.
-
The loanability information is either loanable or not loanable, and is calculated using the same procedures that are used for determining potential loanability when the patron is not logged in.
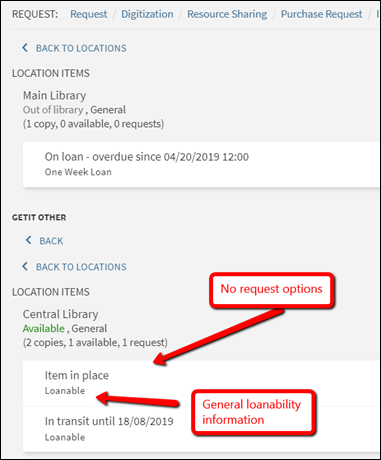
This is achieved by setting the uresolver_remote_register parameter to None in the Configuration Menu > Fulfillment > Other Settings page. Note that this parameter takes affect for the remote institution (i.e. not the patron's home institution).

Allow directly requesting other institutions' holdings
The institutions may decide to expose not only which institution holds available copies of the discovered resource and where the inventory is found, but also allow directly placing a request on the remote item. This would be a standard setup when the institutions do not utilize a resource sharing or an automatic fulfillment network based rota, but rather allow the patrons to directly find items of other institutions and directly request them.
Require manual linked account registration
It is possible to set Alma so that when the patron chooses to display a remote institution's Get It information, the default view will be as for a non-logged user. Alma will not automatically create a linked account at the remote institution, and will therefore not display detailed terms of use and will not show a request option. A ‘Register' option will allow the patron to explicitly request to create a linked account.
This type of set up may be done in order to make sure that linked accounts are only created when the patron explicitly requests to create them. This may serve privacy considerations, as well as prevent multiple linked accounts from being created unless the patron really wants to create a local request.
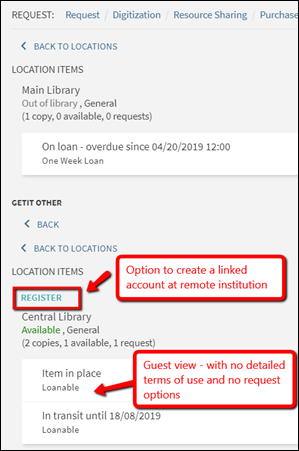
Using the ‘Register' option creates the linked account and reloads the remote Get It information with detailed terms of use and with request options, after having created the linked account.
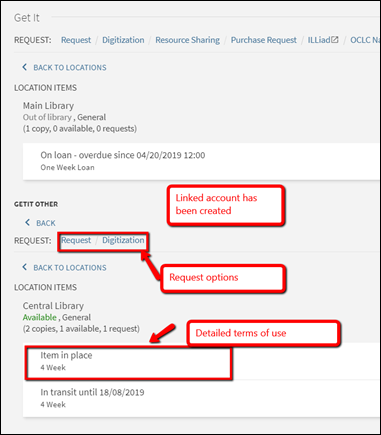
To do this, set the uresolver_remote_register parameter to Manual in the Configuration Menu > Fulfillment > Other Settings page. Note that this parameter takes affect the remote institution (i.e. not the patron home institution).
Allow automatic linked account registration
Set the uresolver_remote_register parameter to Auto to skip the Register step and always automatically create the linked account at the remote institution. This setup streamlines the request process and skips the need to manually register before getting request options, but may result in multiple linked accounts created at every institution which the patrons has navigated into for viewing request options.
Page tags: article:topicProd:Almacontype:documproduct:almacontent:Documentationlang:englishFulfillment Networkpickup anywhererequest item for pickup anywhere
