
Entity Extraction Workflow
This guide outlines the step-by-step process for using Entity Extraction.
 Step 1: Upload Resources to Collections
To extract entities from digital resources, start by adding digital representations to a collection.
Note: Supported formats include JPG, PNG, TIFF, and textual PDF.
Once the titles are uploaded, you can run the Entity Extraction process.
- Go to Specto > Data Management > Manage Collections.
- In the list of collections, locate the relevant collection that contains digital content.
- Select the More Actions (ellipses) button and select the Digital Metadata Assistant option. This is the Alma Specto homepage.
Step 2: Run Entity Extraction
Once on the Alma Specto homepage for your collection, follow the steps to run entity extraction:
For the best view of the titles and resources in your collection, switch to Gallery view in Specto by selecting the view options in the right-hand corner.
For each title, the Specto process will run against one Representation, following this order, as available:
-
First Derivative Representation
-
First Primary Representation
-
First Modified Primary Representation
-
If none of these exist, Specto will use the first available Representation, not including Auxiliary content.
Images
- Select the Entity Extraction button. This process reviews all relevant titles in the collection to identify and differentiate between images (pictures) and documents (containing text).
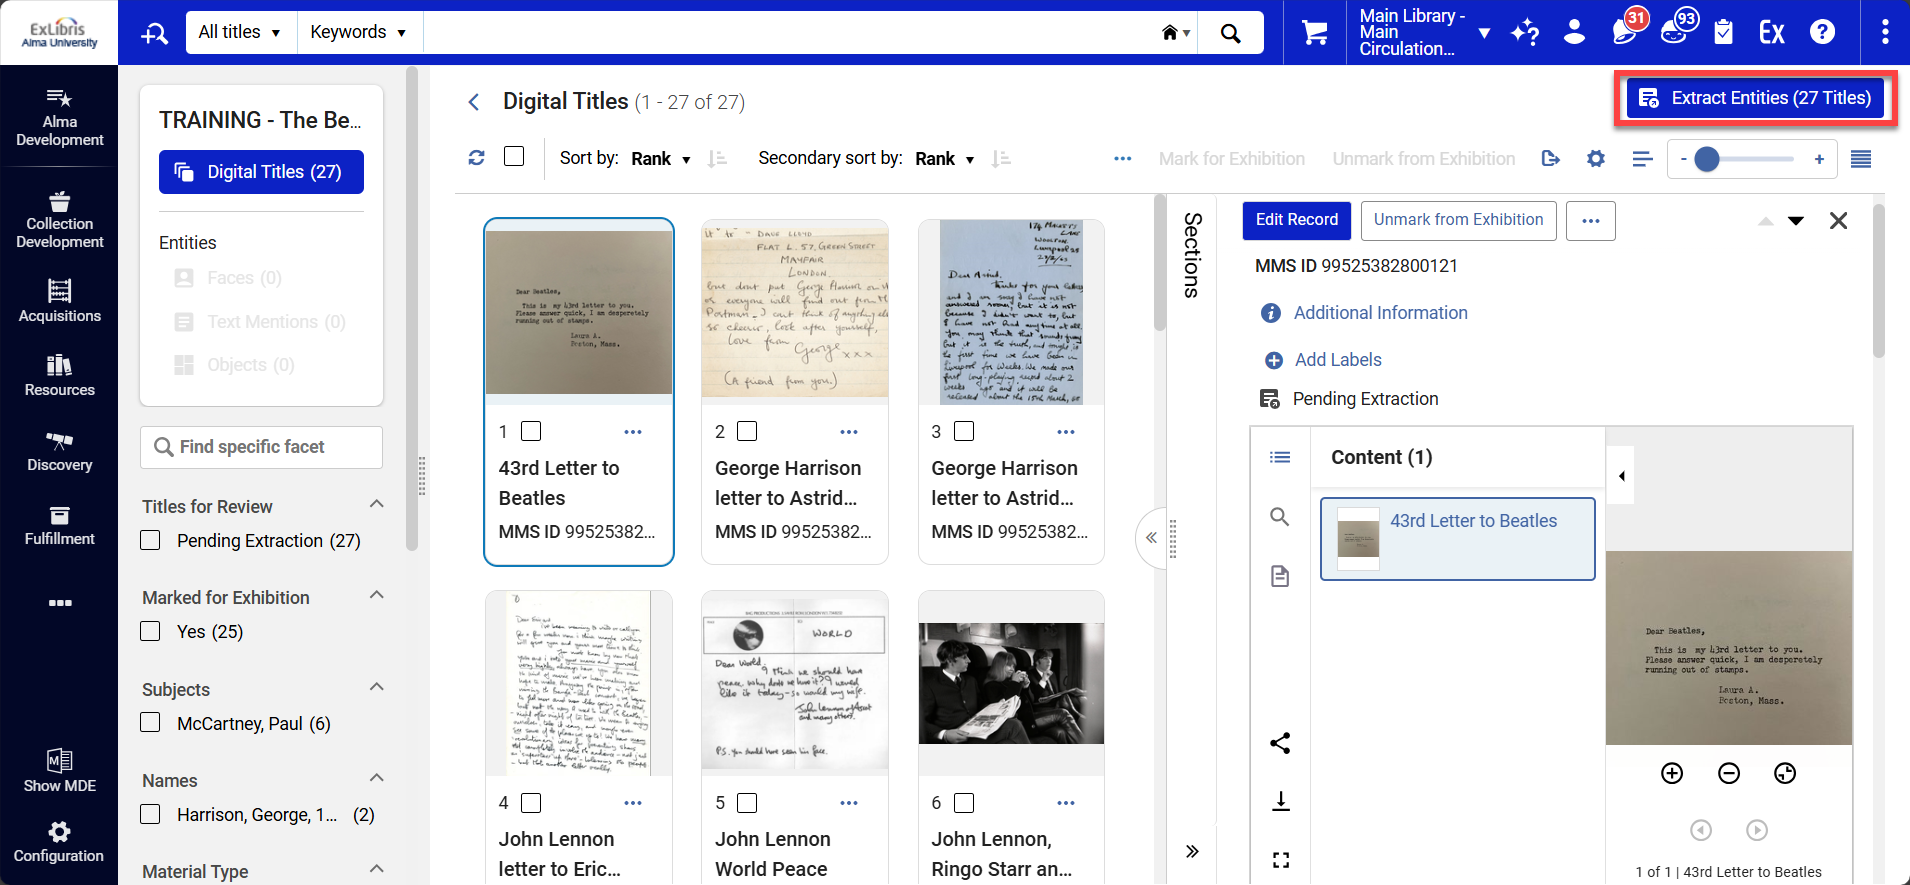
- The AI extracts faces and objects from the images. The process groups entities by similarity (e.g., all pictures of the same person are in one group).
- At each title level, face entities are visible in the image via a bounding box that highlights the extracted entity in the new Viewer.
Entities are listed on the Viewer's left pane under Entities, allowing users to select and highlight the bounding boxes.
To be detected, a face must be no smaller than 40x40 pixels in an image with 1920X1080 pixels. Images with dimensions higher than 1920X1080 pixels will need a larger minimum face size proportionally.
Documents
The purpose of the ALTO file is to enable hit highlighting for document search, where the search term is highlighted directly in the document. This happens in the Specto environment in Alma.
- If none are available, the AI generates a full-text document and a corresponding ALTO for each file.
- The AI extracts names of people, locations and organizations from images.
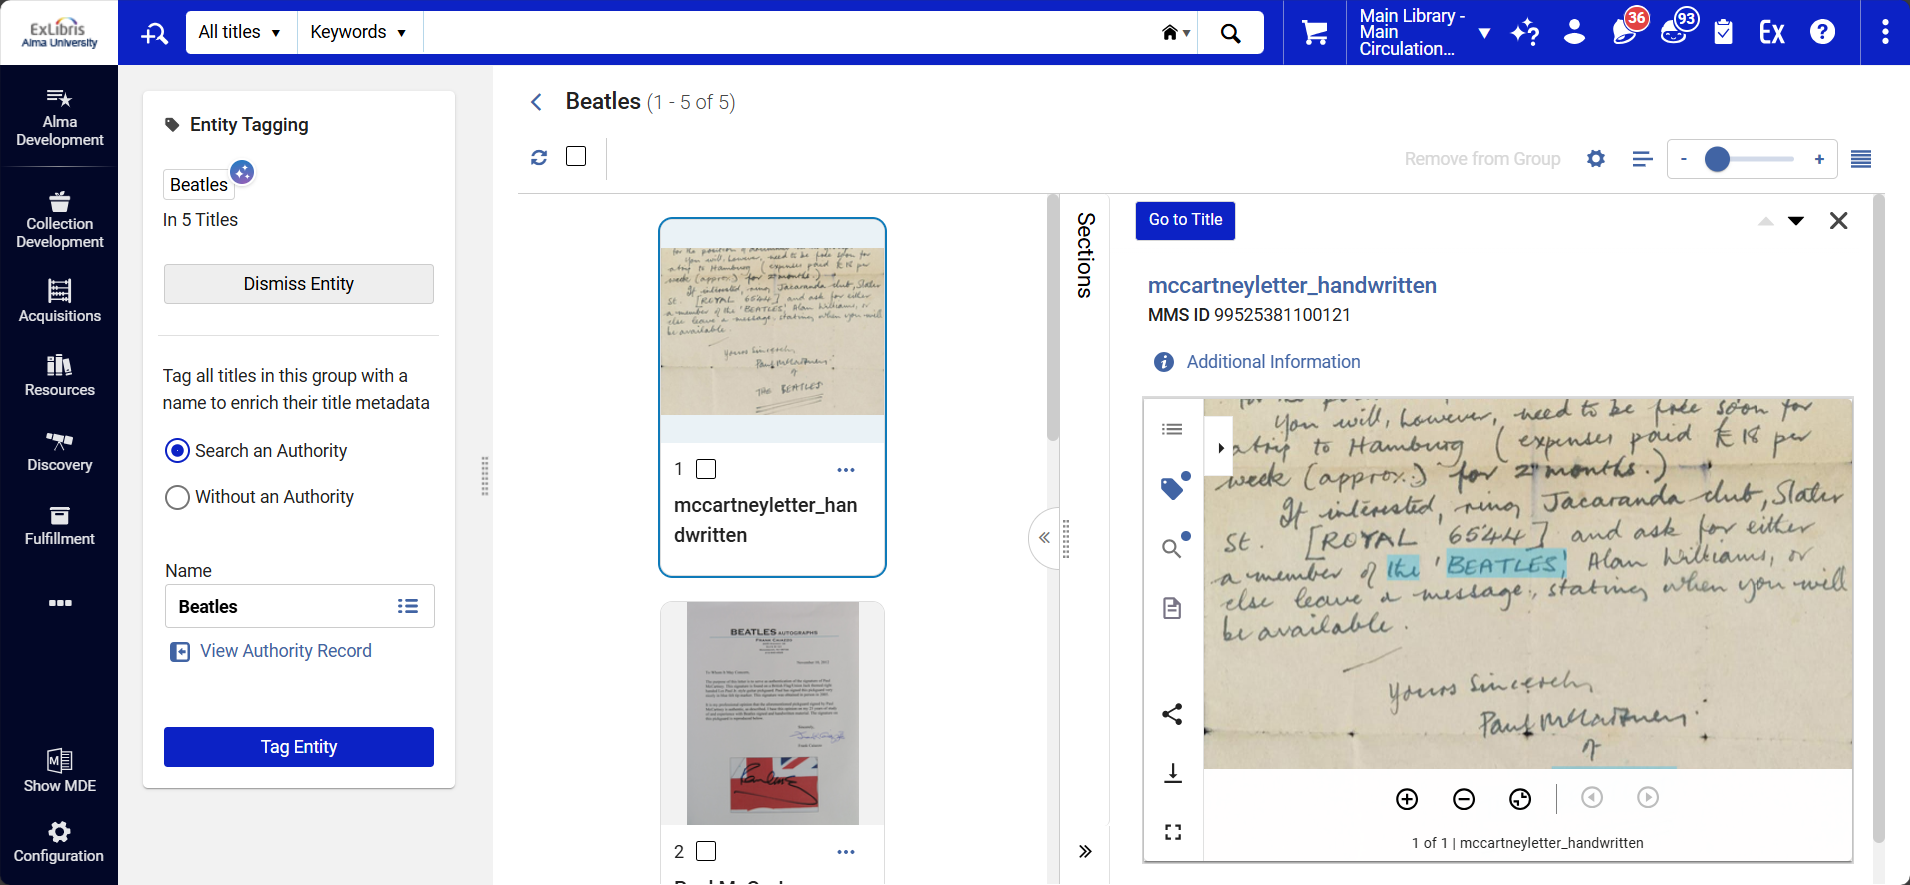
- The process groups these entities by similarity (e.g., all mentions of the same person are in one group, all mentions of the same city are in another group).
- At the title level, each entity appears in the document under the Viewer Entities pane.
- Selecting an entity highlights the entity's mentions.
- With the generated full-text, search functionality is also available in the Viewer's Search pane and highlights keyword search results in the document.
To learn more, see Tesseract OCR extraction and ALTO generation tool.
Step 3: Review Extracted Entities
- Once the extraction and grouping process is complete, the entities appear in the left-side panel, under the collection name.
- The Digital Titles section leads to the collection homepage and displays all the titles in the collection.
- Select the type of entity you would like to review:
- Faces – to review the groups of faces detected in the images.
- Text Mentions – to review the people, organizations and locations mentioned in the documents.
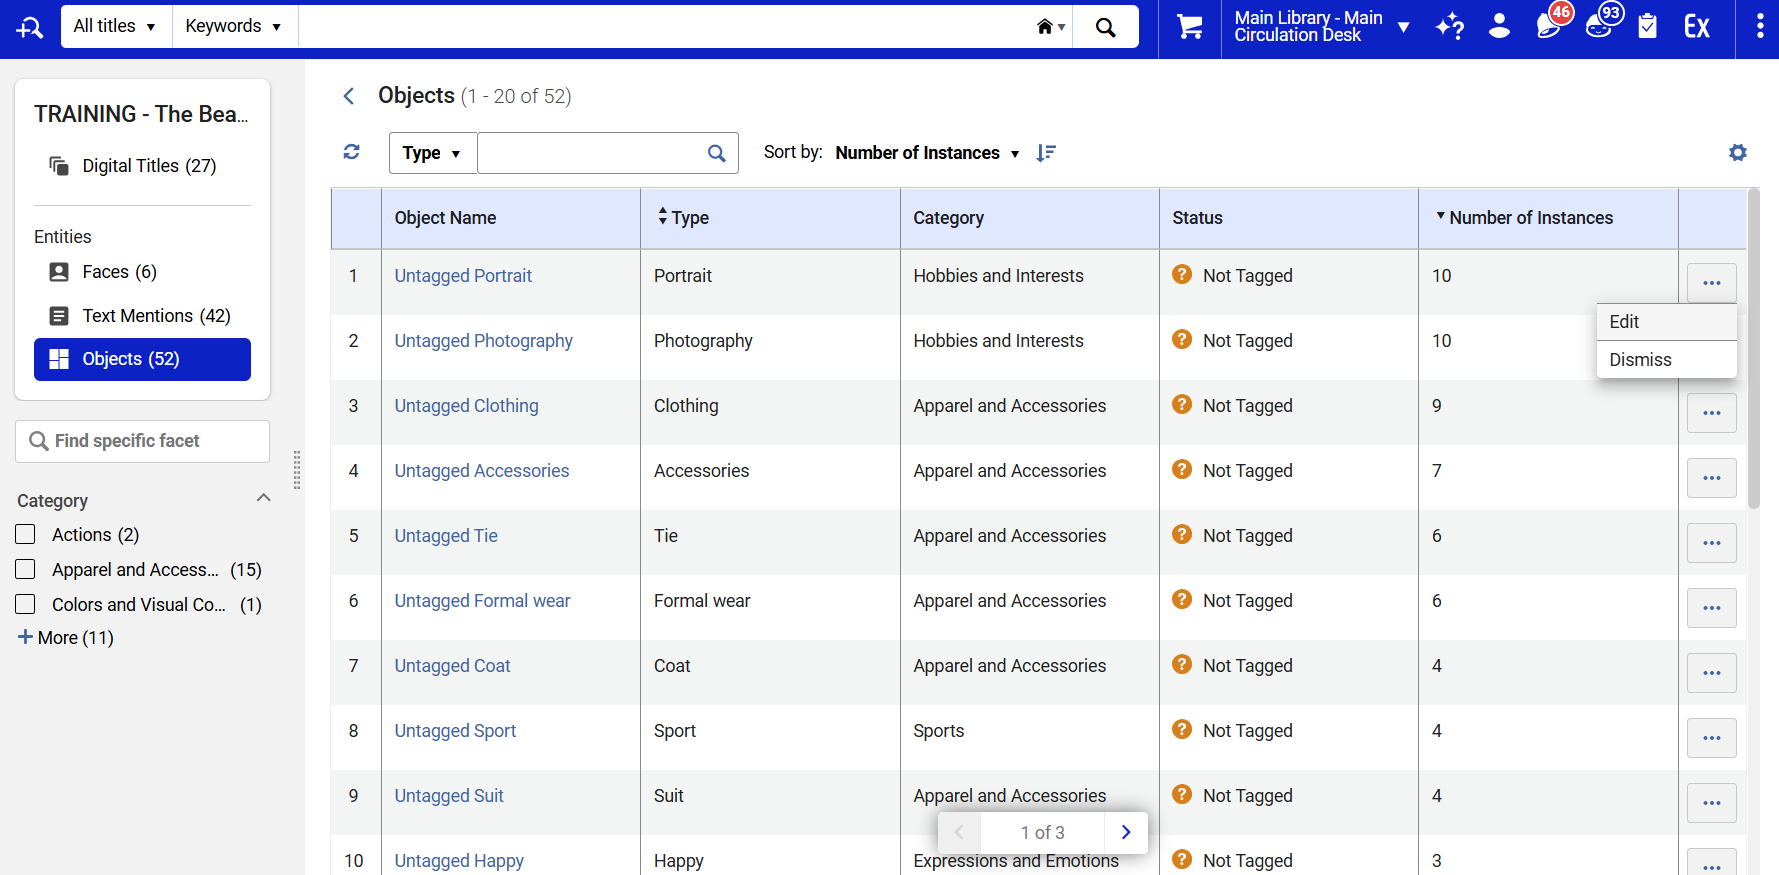
- Objects – to review the table of objects detected in the images.
- Within each section, you can select specific groups and review the groupings' accuracy to ensure that all group members are appropriately assigned before tagging.
You can use the Sort by filter to change how you preview the results.
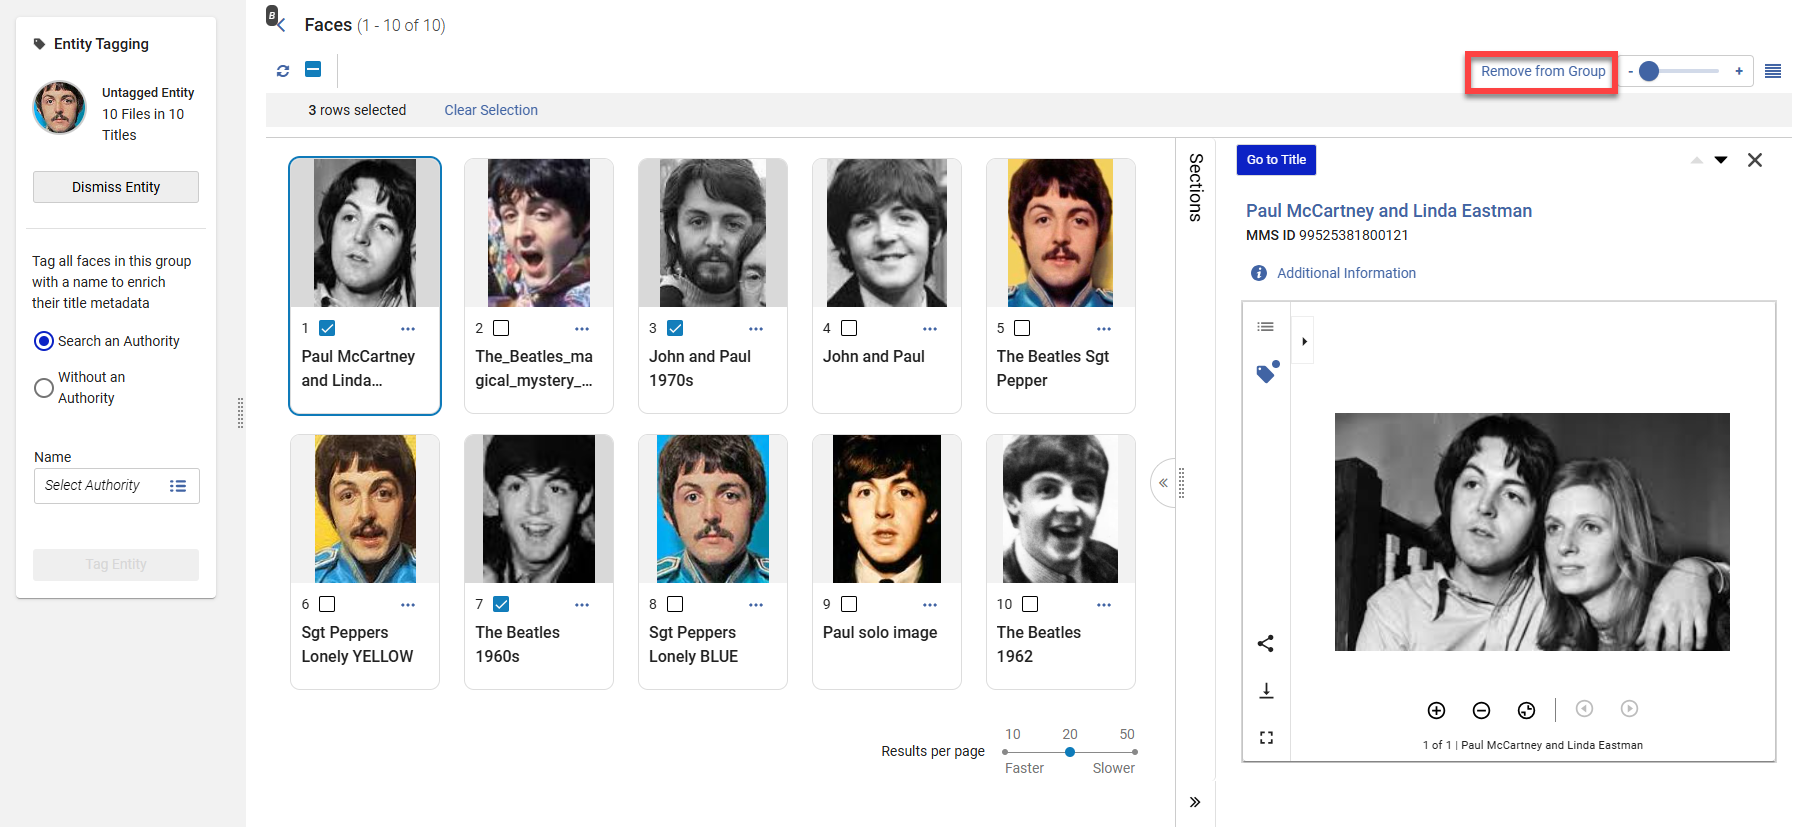
- For grouped faces and text mentions, if one or more entities in a group are inaccurately associated, select the relevant items and use the Remove from Group bulk functionality to ensure the group is accurate for the next tagging step.
- Object grouping is broader and is further elaborated in tagging with or without linking to authority.
- For grouped faces and text mentions, if one or more entities in a group are inaccurately associated, select the relevant items and use the Remove from Group bulk functionality to ensure the group is accurate for the next tagging step.
- If you do not want to tag a detected entity or entities, you can dismiss the group in one of the following ways:
- On the entity section level, select the More Actions button (ellipses) under the image and select the option to Dismiss Entity.
- Within the entity itself, select the Dismiss Entity function from the left-side panel. Dismissed entities are not removed from the collection, but they are not available for tagging in this collection or marked on individual titles. The grouped entities are marked as Dismissed and can be restored later if necessary.
You can multi-select different entity groups by selecting the checkboxes , and dismiss selected entity groups in bulk. - For objects, you can dismiss a group by selecting the ellipses at the end of the row in the object table and selecting the Dismiss Entity Group option.
Once you dismiss a group of objects, you can not find them again, unless you rerun the extraction process. Ensure you don’t need the object group before dismissing it. Objects are not counted in the 'Pending tagging' counter and may be left untagged.
Each Entity Group, whether faces, text mentions, or objects, will have a status depending on where it is in the extraction process. The status appears as an icon in the lower left corner of the Entity group image. The status types are marked with the following indicators:
-
Untagged: Question mark icon
-
Tagged: Green checkmark icon
-
Dismissed: Red X icon
-
In Progress: Green spinner icon



The actions you can perform on an Entity Group will also depend on the current status:
-
Untagged: Edit Entity Group, Dismiss Entity
-
Tagged: Edit Entity Group (triggers re-tagging and sets status to In Progress), Dismiss Entity (clears tagging and converts to recommendation)
-
Dismissed: View Recommendation, Restore Entity (restores recommendation and sets status to Untagged)
-
In Progress: All actions disabled until tagging completes
Step 4: Tag With or Without Linking to an Authority
Use authority linking whenever possible to ensure consistency and interoperability across cataloging systems, and to support linked data in Primo.
Faces
Once you are ready to tag the entities, select Edit Entity Group or select the item to begin. You can tag:
- With Authority Linking
- Without Authority Linking
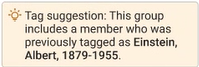
Tag suggestions based on AI or previous user tagging will appear along with banners denoting the source of the tag. An orange banner will appear for user tagging suggestions, while a purple one will appear for AI tagging suggestions.
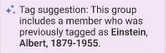
Tag with Authority Link
- Select the Search an Authority option in the Entity Tagging box.
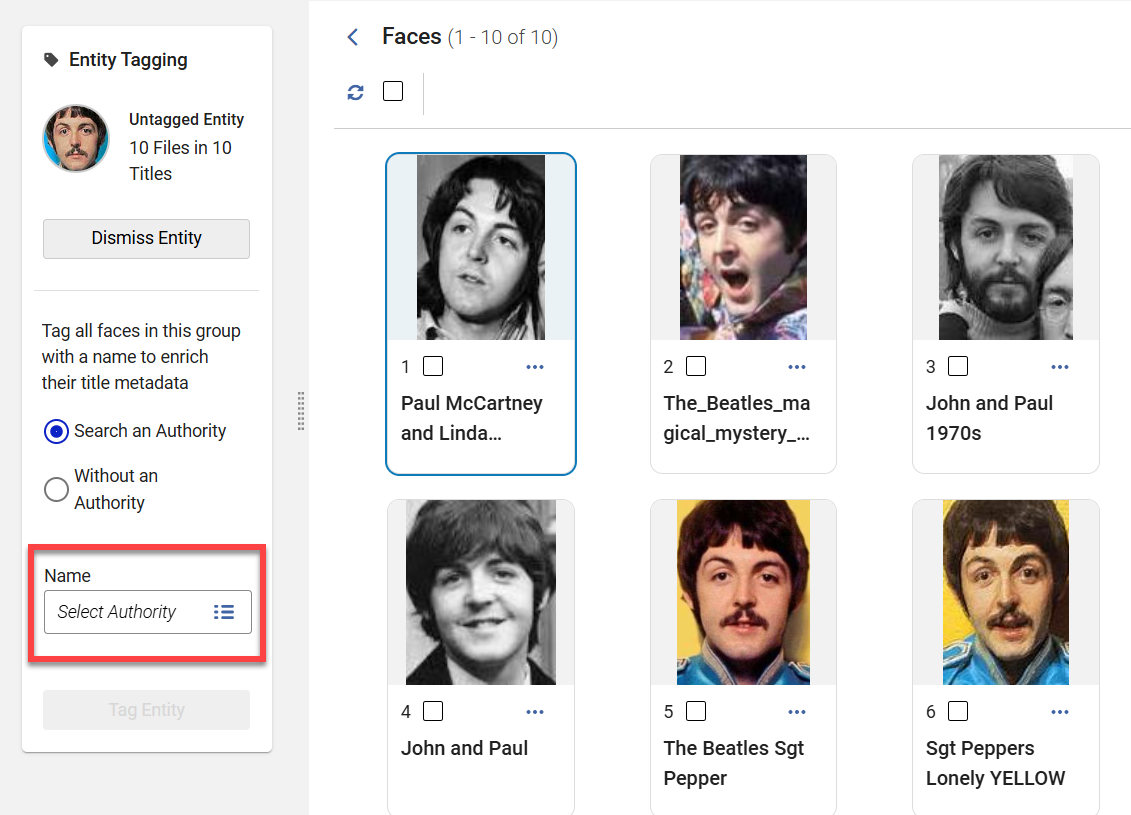
- Search the authority database and select the authority you wish to link to. Use filters and facets to narrow your search, and select individual records to view their metadata to ensure accuracy.
- The authority search results are pre-filtered based on the institution configuration setup for allowed Authority Volcabularies. If there are relevant suggested authorities prepopulated in the search, it is suggested to select them. This settign is available under the Customer Parameter authority_name.
- Select the relevant record.
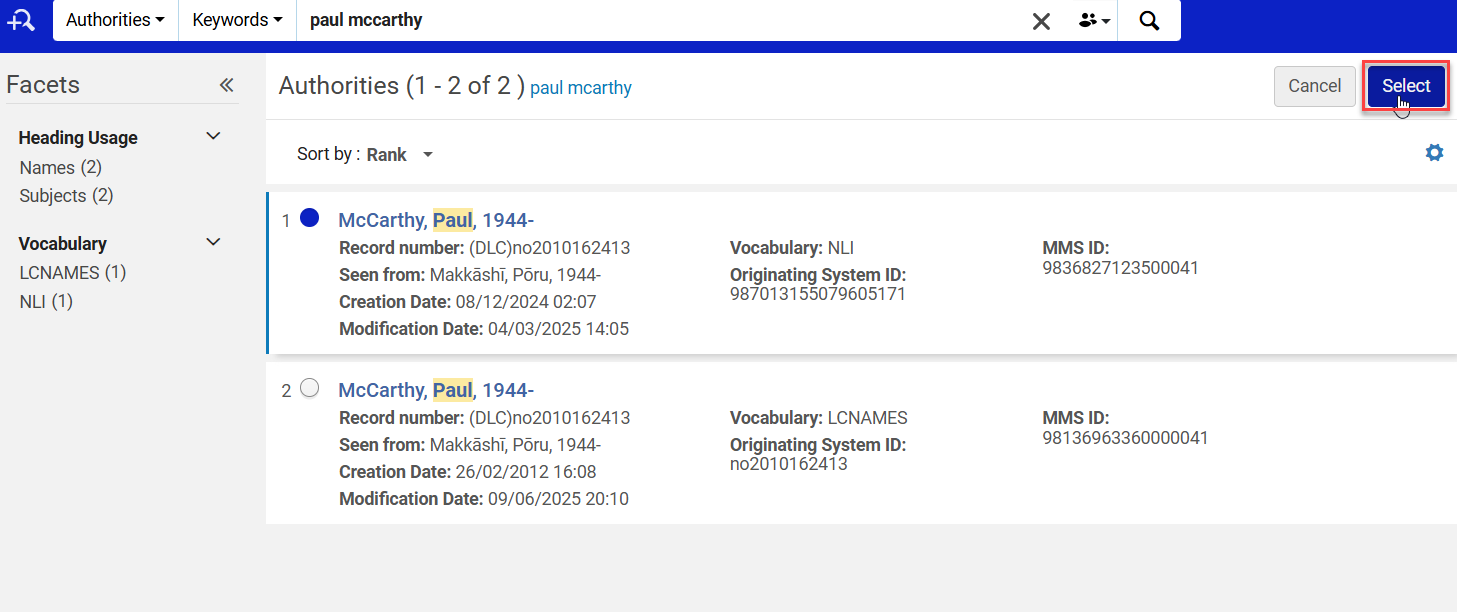
- Select the Tag Entity button on the left panel. This tags ALL titles associated with the extracted entities in the group.
Tag without Authority Link
- Select the Without an Authority option in the Entity Tagging box.
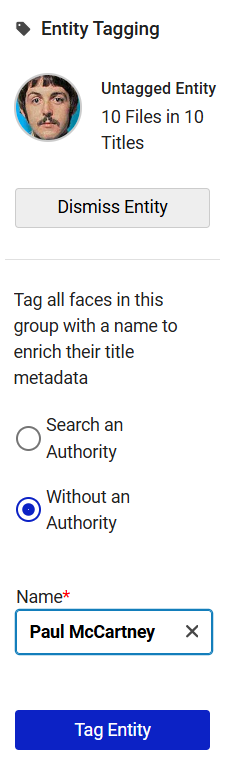
- When a name is available for the entity, an authority search is auto-populated. This happens due to previous tagging or AI suggestions. Otherwise, enter the name in the Name field, meeting your institutional cataloging requirements.
- Select the Tag Entity button. This tags ALL titles associated with the extracted entities in the group.
Use authority linking whenever possible to ensure consistency and interoperability across cataloging systems, and to support linked data in Primo.
Text Mentions
The Text Mentions table includes the following columns:
- Entity: identified name of the grouped entity.
- Tag Suggestion:
- Stars: AI-generated recommendation for an Authority record dentified as appropriate for this entity.
- Lightbulb: user-generated suggestion based on a previously tagged member of this group by a cataloger.
- Entity Type: distinguishes between people, locations and organizations.
- Status: untagged, tagged, dismissed, or in progress.
- Number of Titles: number of titles in which this entity was mentioned. Note that there may be multiple mentions of the entity within each title.
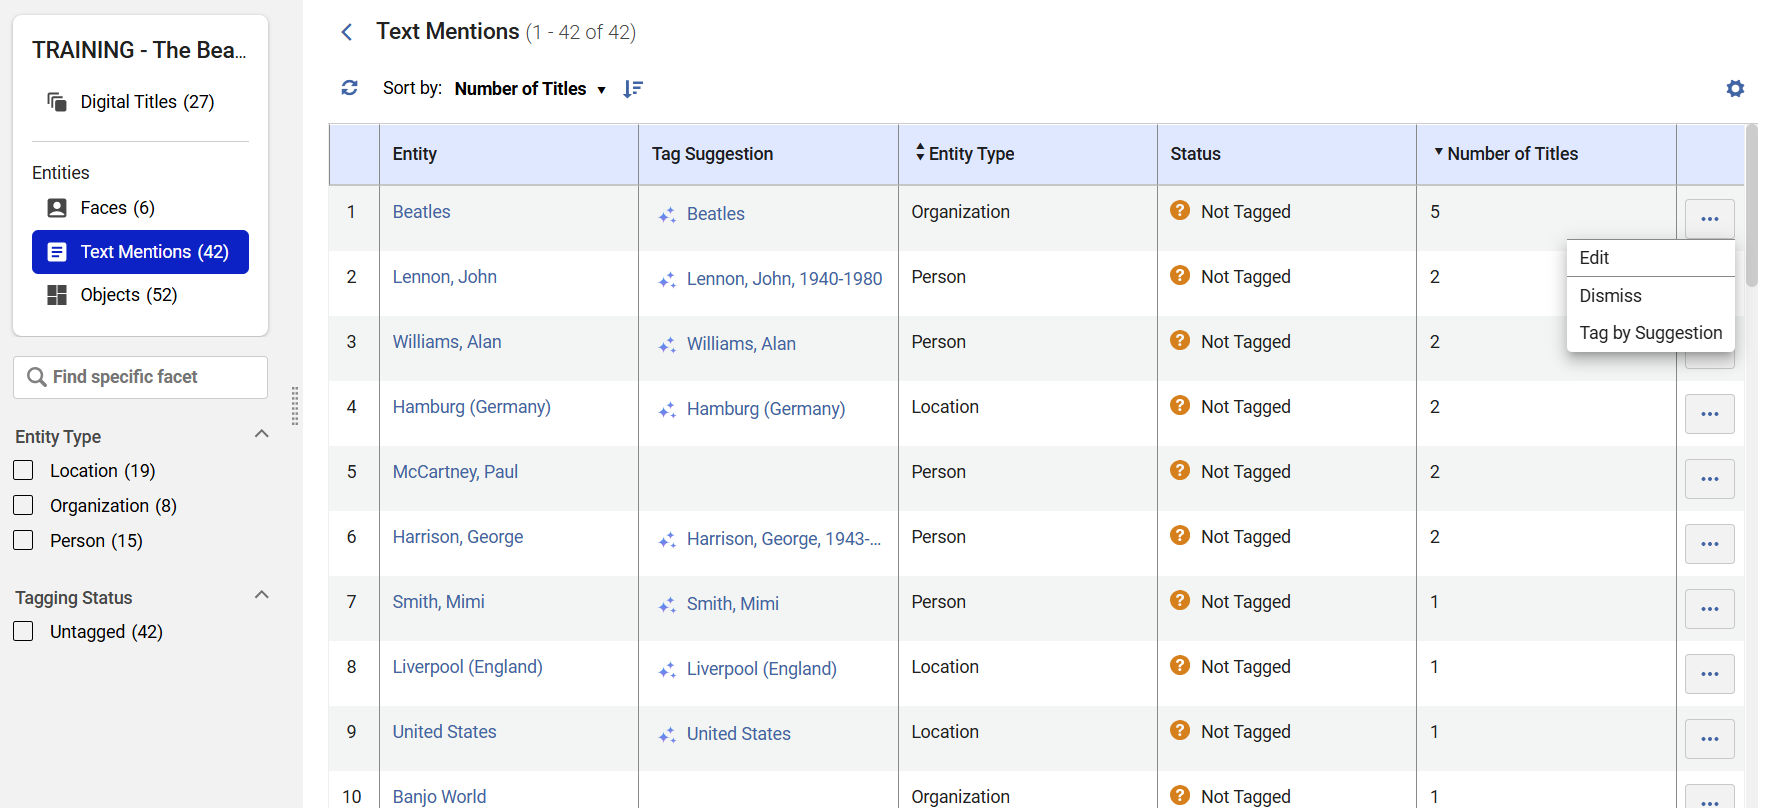
Once you are ready to tag the entities, select Edit or select the item to begin. You can tag:
- With Authority Linking
- Without Authority Linking
Tag With Authority Link
If an AI recommendation or user suggestion is already available, the Name field is pre-populated with the proposed Authority. You may review the record by selecting the View Authority Record to determine if this is the Authority to which you want to link the grouped entity.
- If no recommendations or suggestions are available, select the Search an Authority option in the Entity Tagging box.
- Search the authority database and select the authority you wish to link to. Use filters and facets to narrow your search, and select individual records to view their metadata to ensure accuracy.
- Select the relevant record.
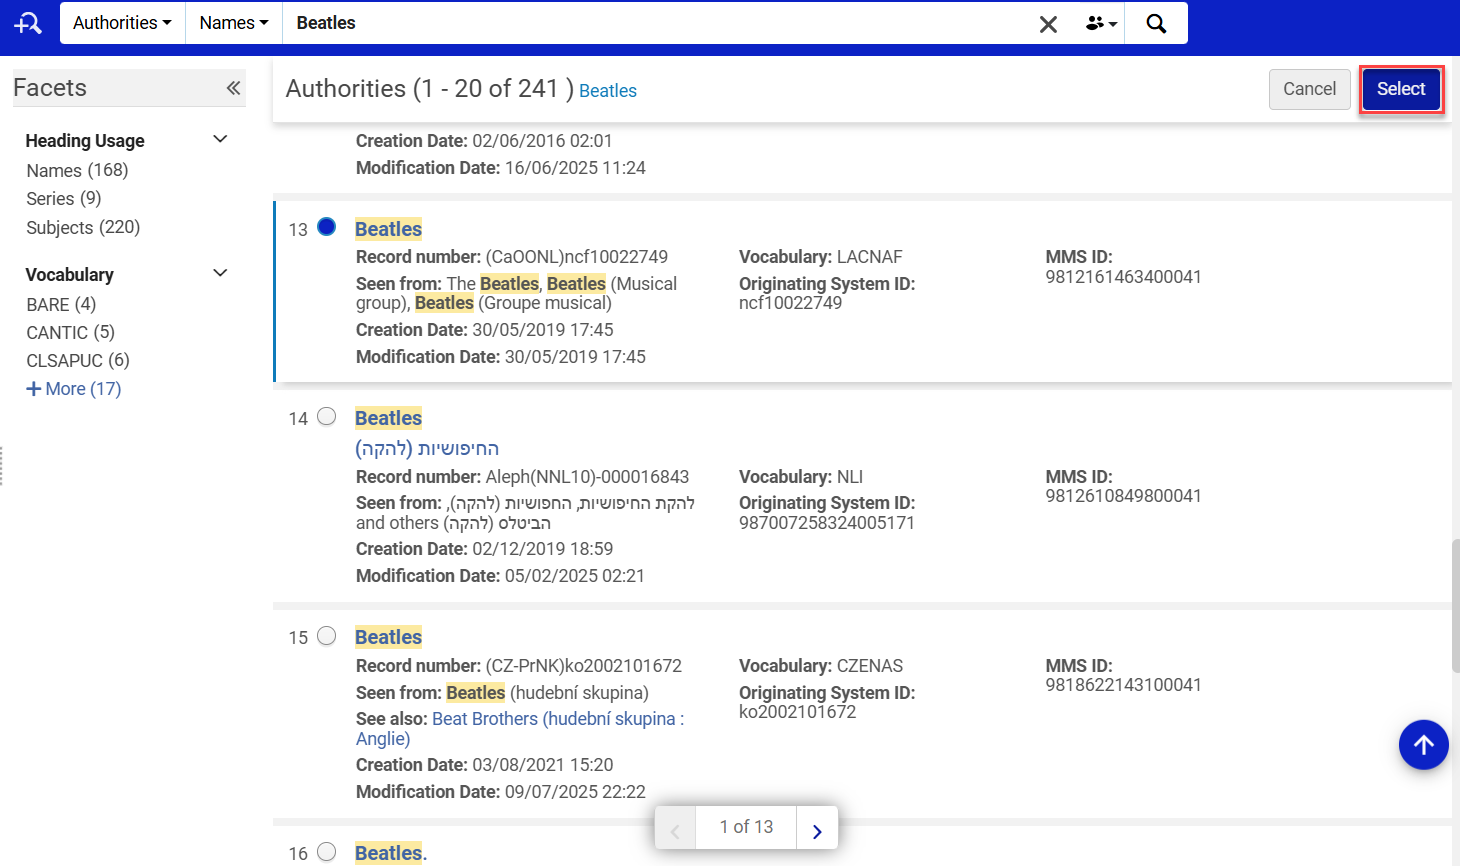
- Select the Tag Entity button on the left panel. This tags ALL titles associated with the extracted entities in the group.
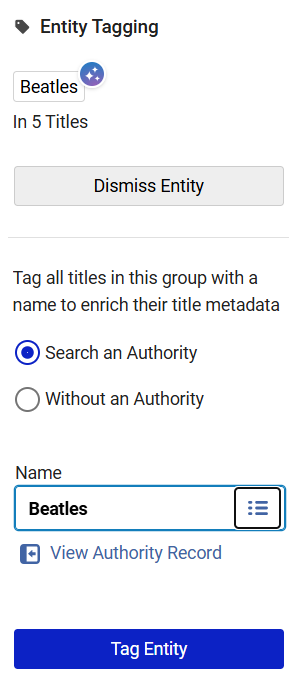
Tag Without Authority Link
- Select the Without an Authority option in the Entity Tagging box.
- Enter the name manually in the Name field below, meeting your institutional cataloging requirements.
- Select the Tag Entity button below. This tags ALL titles associated with the extracted entities in the group.
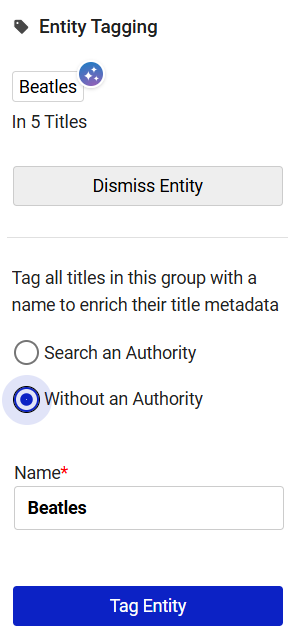
Objects
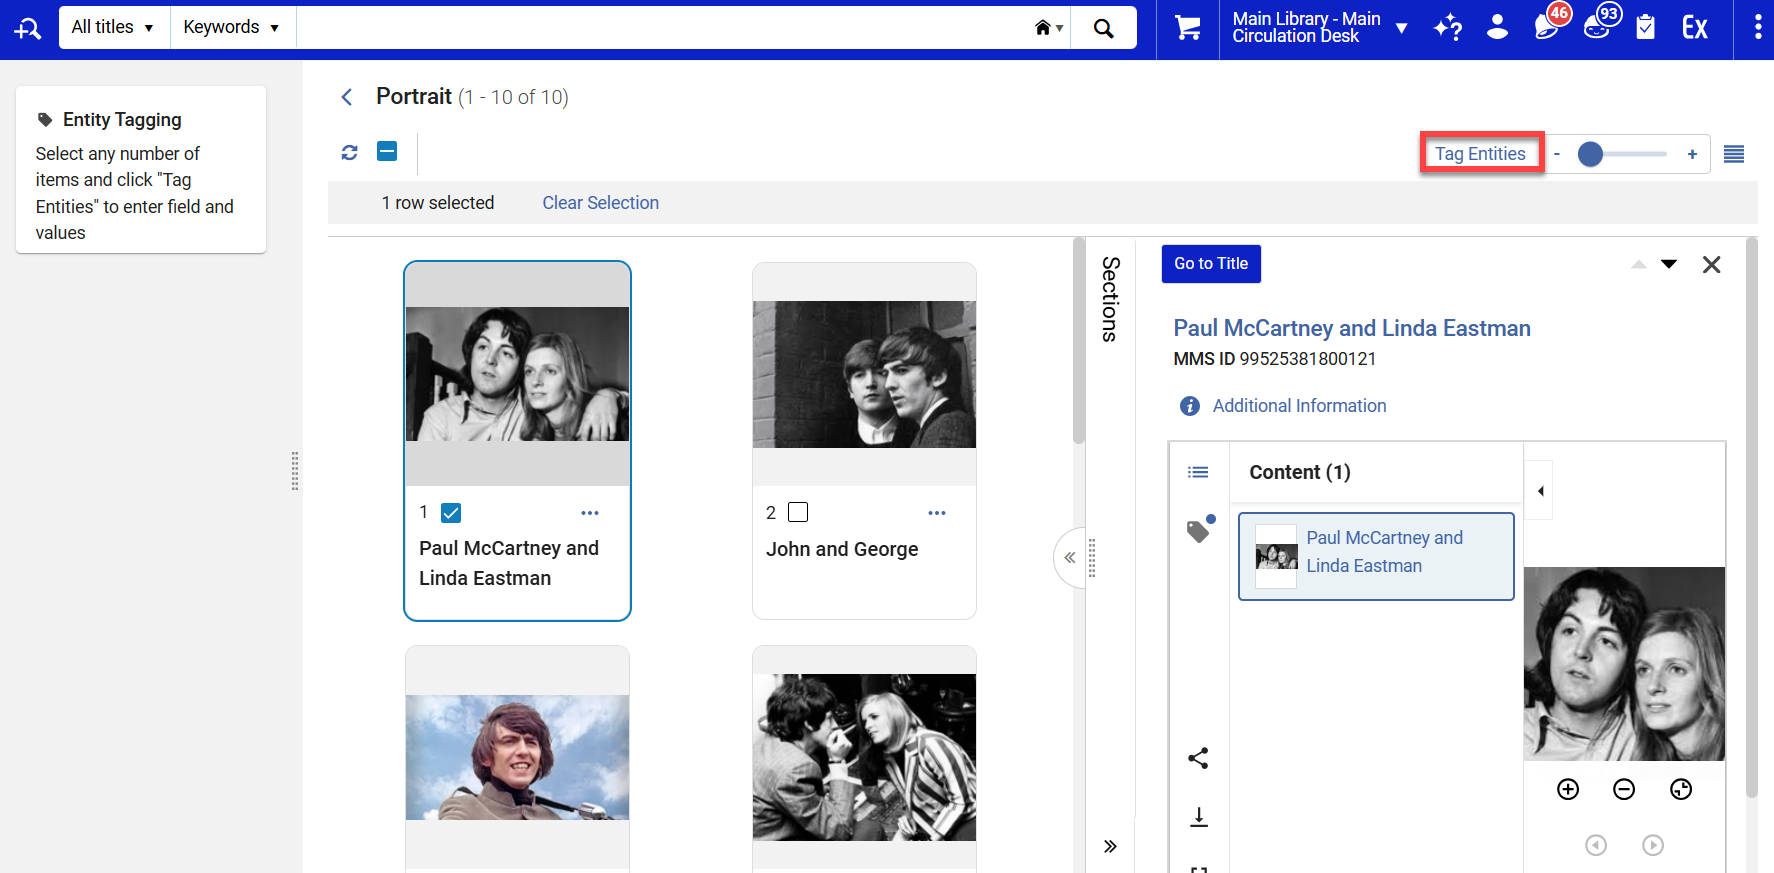
- To tag extracted objects, select the object's name in the Entity Group column in the object table or select the ellipses at the end of the table row and select the Edit Entity Group option. A new page opens. On the left side, you see all the appearances of the selected object type in the collection, and on the right side, you have the viewer.
- Choose the object or objects you wish to tag by selecting the checkbox under the title and selecting the Tag Entities button in the upper right side of the screen. Once tagged, the objects are removed from the Objects table and appear in the viewer within the Specto Title window.
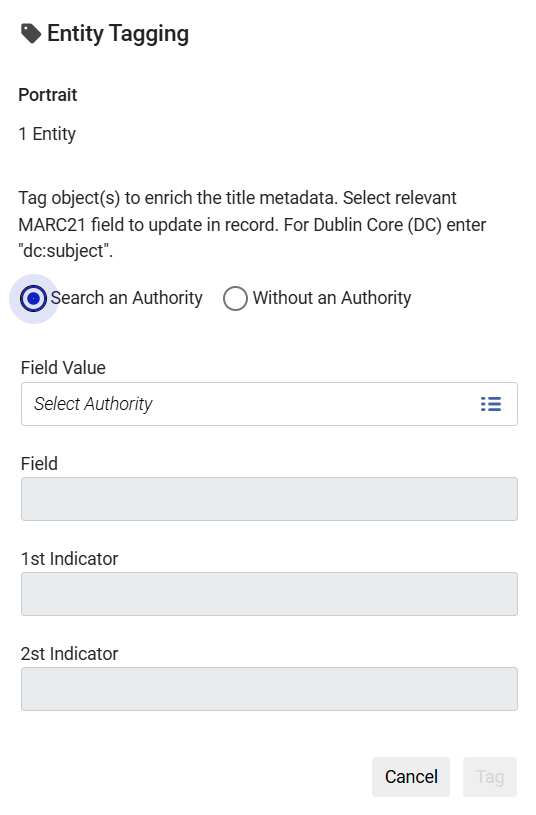
Tag with Authority Link
- Select the Search an Authority option in the Entity Group Tagging pop-up.
- Search the authority database and select the authority you wish to link to. Use filters and facets to narrow your search, and select individual records to view their metadata to ensure accuracy.
- Select the relevant record.
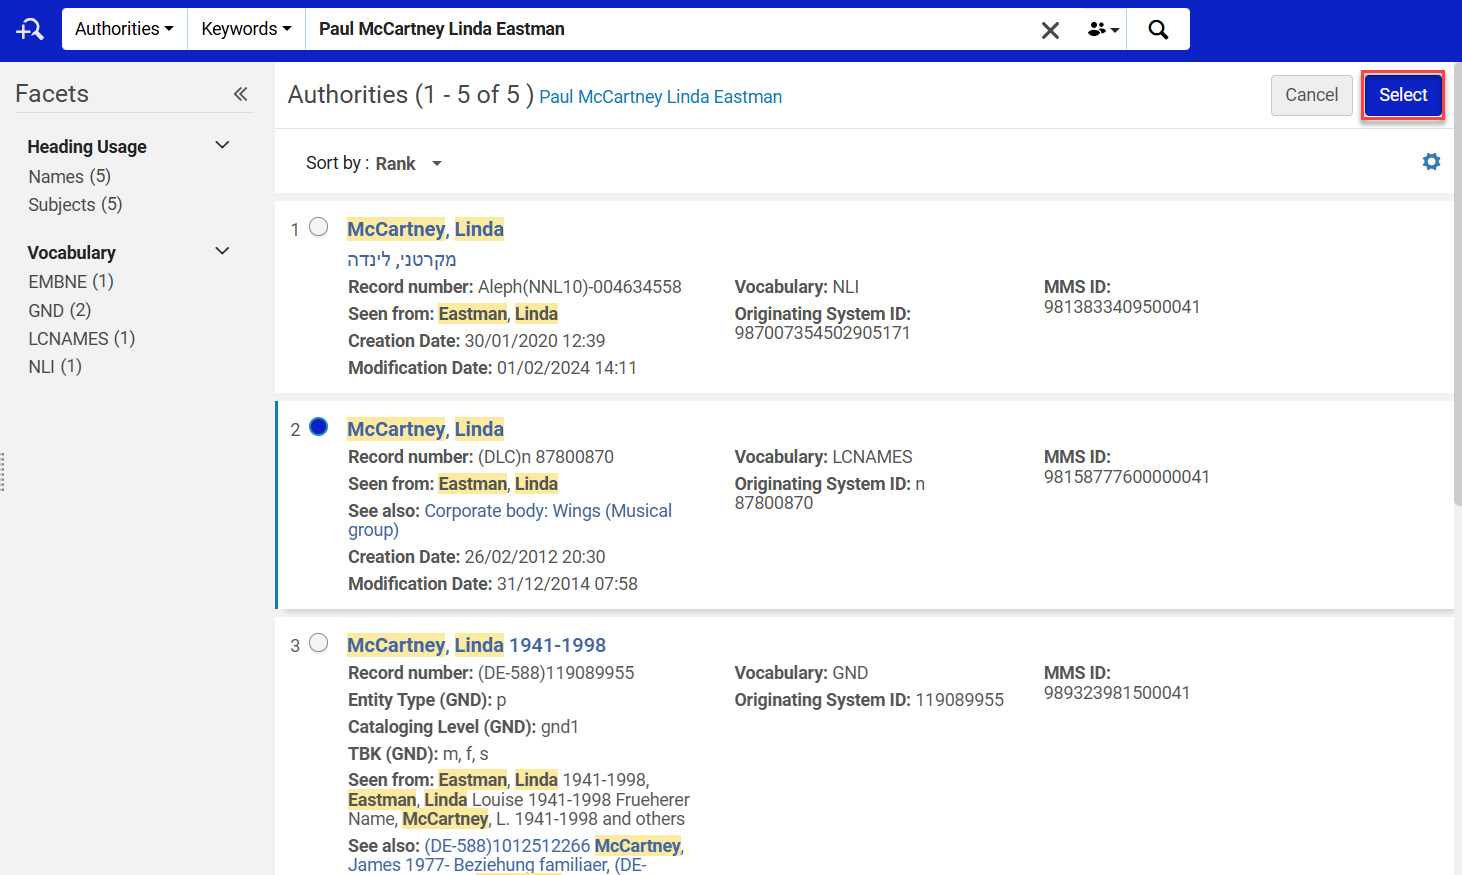
- Select the Tag Entity Group button on the left panel. This tags ALL selected entities in the group.
Tag without Authority Link
- Select the Without an Authority option in the Entity Group Tagging box.
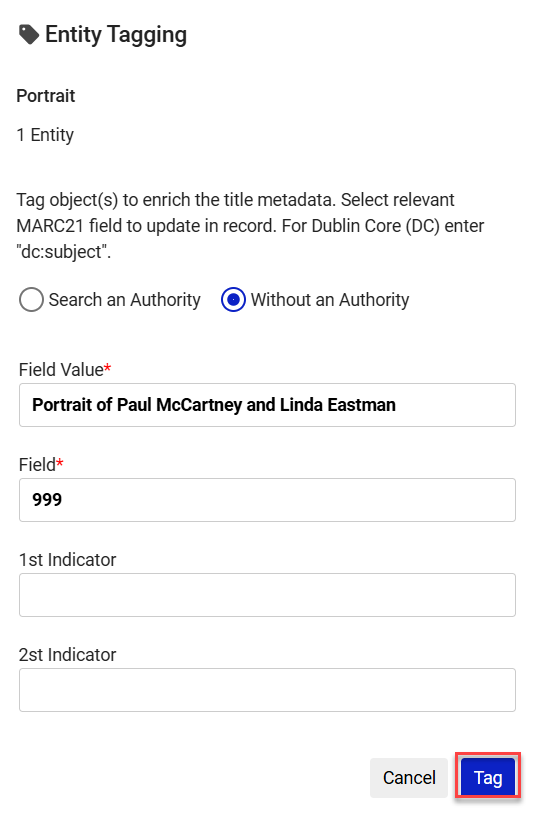
- Enter the metadata field number (a three-digit number) in the Field box, and enter the 1st and 2nd indicators according to your institutional cataloging requirements.
Ensure you don’t enter a number of metadata fields that are already predetermined for another purpose.
- Enter the subfield and name in the Field Value box below, meeting your institutional cataloging requirements. (You can enter only a name, but the system applies $$a subfield to the name.)
- Select the Tag Entity Group button below. This tags the selected titles in the group. The tag appears in the metadata under the field you entered with the indicators you chose.
