NEW Working with Items
- Physical Inventory Operator
- Physical Inventory Operator Extended (required for delete operations)
Users with these roles can work with physical resources only within the scope defined for the role in the User Details page, see Managing User Roles.
- Items for existing titles (add inventory to an existing holdings record) – Adding a Physical Item to an Existing Title
- New items (add inventory together with new holdings and bibliographic records) – Adding a New Book or Journal Article
The following summary indicates a quick reference (of tasks involved) to the sections discussed on this page.
- Resources > Add Physical Item - Libraries that have bibliographic and holdings records for a title need only to add a new item (new inventory), see Adding a Physical Item to an Existing Title.
- Via New Metadata Editor - When editing a holdings record, add inventory, see Adding a New Book or Journal Article.
In addition, see Navigating the New Metadata Editor Page for more information. - Working with Item Lists - The List of Items page lists physical items related to a physical title.
- Via a Repository Import Profile - Import items using an Excel or XML file that contains a list of items. See Managing Import Profiles.
- Import items via an API - For that, your institution would need to write an application that creates/updates the items with the API.
Adding a Physical Item to an Existing Title
There is no limitation on the number of physical item records that could be added to an existing title.
- From the Choose Holdings Type dialog box (Resources > Create Inventory > Add Physical Item), select the Existing option and select Choose. The Quick Cataloging page for existing resources appears.
- In the Resource Information section, find the title of your item.
- When you select your title, the Title field populates with your selection. The Library and Location fields populate based on the Title selection.
- Enter the barcode for the item and, optionally, add the following parameters:
- Use item template — Enables users to select a template to use in the Add Physical Item quick cataloging form, that automatically populates the item created by that form with the template's data. Use the magnifying glass drop-down menu or the find (arrow) icon to select from Recently Used, My Templates (Private), or Public templates. The template encompasses all the item's details except for Barcode, Inventory number, Pattern information, Process type, At (request department), Item call number prefix/suffix, and Temporary call number prefix.
Watch the Item Templates video (3:23 mins).
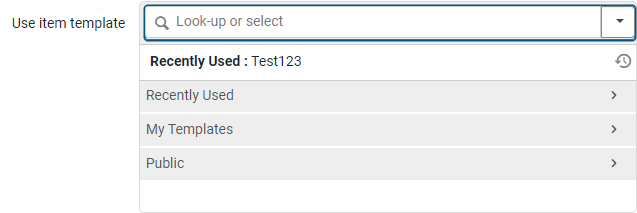 Use Item Template drop menu
 - Description — The text you enter appears in the list of holdings for the item (see Working with the List of Holdings).
- Material Type — Use the magnifying glass drop down menu or the find (arrow) icon to find and select a value for Material Type. The material type appears only in Primo’s Get It and Details tabs. For information on customizing the labels of the material types, refer to Configuring Physical Item Material Type Descriptions.
- Item Policy – Use the magnifying glass drop-down menu or the find (arrow) icon to find and select a value for Item policy.
- Public Note – Optional.
- Use item template — Enables users to select a template to use in the Add Physical Item quick cataloging form, that automatically populates the item created by that form with the template's data. Use the magnifying glass drop-down menu or the find (arrow) icon to select from Recently Used, My Templates (Private), or Public templates. The template encompasses all the item's details except for Barcode, Inventory number, Pattern information, Process type, At (request department), Item call number prefix/suffix, and Temporary call number prefix.
- Select Save. The item is added to the inventory. You are returned to the Alma home page.
For locations with RFID and an active RFID connection, you have the additional option to Write to RFID and Save. When the information has successfully been written to the RFID, the information is saved to the Alma database. For additional information, see RFID Support. If you only want to update information in the Alma database, select Save.
Adding a New Book or Journal Article
-
From the Choose Holdings Type dialog box (Resources > Create Inventory > Add Physical Item), select the New option.
-
Select the Citation Type (Book or Article) and select Choose. The Quick Cataloging form appears. The parameters for book and journal entries are different.
-
Enter values in the Resource Information fields for the book or article using the table below. Where noted, some parameters are relevant only for a book or an article. In addition, the order of the parameters is different for books and articles.
-
All brief bibliographic records created by the Quick Cataloging form have LDR and 008 fields determined by whether they are physical or electronic.
- All physical materials are cataloged as books.
- All electronic materials are cataloged as continuing resources.
-
Brief bibliographic records created by the Quick Cataloging form have the resource type as defined in 008 pos. 23 (form of item) in the default Book template. If a specific form of item is defined in this template, e.g.
o = online, the bibliographic record is created as Book-Electronic. - Template selection is based on the operator's IZ default template, regardless of the selected placement zone.
Resource Information Fields Field Description Title /
Article/Chapter Title
(Required)The title of the book, article, or chapter Journal Title (article) The title of the journal that contains the article Author The author of the book or article Author Initials The author’s initials Edition (book) Edition number of the book Volume The volume number of the book or the journal that contains the article Issue (article) The issue number of the journal that contains the article ISBN/ISSN The International Standard Book Number (ISBN) or International Standard Serial Number (ISSN) that identifies the book or article LCCN The Library of Congress Control Number System Control Number A central identifier number, such as Online Computer Library Center (OCLC) number Other Standard ID This value of this field can be set in the 024$$a field in the MD Editor. Barcode This field is used for resource sharing purposes. In the borrowing request creation, the item section does not exist. However, if the borrower knows the barcode at the lender's side (for instance, in networks or external brokers), it is put in this field and the "locate" is done based on this field.
Remote Record ID MMS ID Publisher The publisher of this edition of the book or journal Publication Date Date of the book or article’s publication DOI (article) Digital object identifier for the item PMID (article) PubMed database ID Place of publication The place in which the book or article was published Additional person name The name of an additional contact Source Data source of the item (MARC 21 field 786 or 590) Series title number Title number of the series in which the item is located Call number (book) The call number of the book. Indicates the library shelf on which the book is located Note A field for notes, as needed Part (book) Part number of the book Chapter number/Chapter The number of this chapter in the book or the journal that contains the article Pages The page number range in the journal that contains the article (i.e., pages 57-69). Pages do not necessarily need to be numeric. Start Page First page in the journal on which the article appears (or book on which the chapter appears) End Page Last page in the journal on which the article appears (or book on which the chapter appears) Chapter author (book) For a book chapter, the author of this chapter Chapter title (book) For a book chapter, the title of this chapter Editor (book) The editor of the book (typically used for books where chapters have different authors) Course Restricted Whether you want the item to be searchable in Primo only within a Courses search scope (once you set up the appropriate Primo search rules). This field appears only if the course_restricted_field parameter is set (see Configuring Other Settings).Suppress from discovery Whether to block the bibliographic record from publishing to Primo. Record Format The type of record to create. This field appears only if your system supports multiple record formats. Contact Ex Libris support to enable this feature. -
All brief bibliographic records created by the Quick Cataloging form have LDR and 008 fields determined by whether they are physical or electronic.
- In the Item Information section, enter and select the name of the library where you want the item to be located, or select the arrow icon to open a list of the libraries and select one. Once you select a library, the page refreshes and additional fields appear below the Library field, including one additional required field. Enter the values for the Item Information section as per the table below.
Item Information Fields Field Description Personal copy Indicates whether the physical item is owned by the instructor. If selected, the Personal copy of field replaces the Location field to enable you to specify the owner of the physical copy. For more details, see Contributing Instructor Resources to a Reading List.
Personal copy of If the Personal copy field is selected, specify the owner of the physical item, which is used for the item's location. To allow this item to be circulated, you must move it to a temporary location. Otherwise, it is suppressed from discovery. For more details, see Contributing Instructor Resources to a Reading List.
Items held at an instructor's location are not currently part of the library collection and are physically stored with the instructor.
Location The location within a library where the physical item is kept. Use the drop-down menu feature or select the arrow to open a list of available libraries and their locations. Barcode Enter the item's barcode. If you leave this parameter blank and you chose during your Alma implementation to implement barcode generation, a barcode will be automatically generated for the item when it is saved. If you have configured multiple barcode counter sequences, the default barcode counter sequence is used. See Configuring the Barcode Generation Method and Barcode Validation for more information.For locations with RFID and an active RFID connection as indicated by the connection icon, the barcode can be added for the Barcode parameter by selecting the RFID read icon (or Alt+A).For additional information, see RFID Support.Material Type The material type of the item. Use the drop-down menu or the arrow to open a list of possible types. The material type manifests itself only in Primo’s Get It/Details tabs. (For information on customizing the material type labels, see Configuring Physical Item Material Type Descriptions.) Item Policy The check-out policy for the item, as in term length and other restrictions. Use the drop-down menu or the arrow to open a list of available policies. Public Note A note that appears in Primo’s Get It/Details tab. - Select Save.
When the new item is created, it is created in place and a Pick from shelf request is created for it. After the item is scanned in at the relevant acquisition desk, the Acquisition Technical Services work order is created, to be used for complete cataloging at a later time. For an in-depth overview of work orders, see Physical Inventory - Defining and managing work orders in Alma.
-
For locations with RFID and an active RFID connection as indicated by the connection icon, you have the additional option to Write to RFID and Save. When you select Write to RFID and Save, the information is written to the RFID. When the information has successfully been written to the RFID, the information is saved to the Alma database. If you only want to update information in the Alma database, select Save. For additional information, see RFID Support.
Creating and Updating Items in Bulk
The below methods enable you to create new items and update existing items in bulk. Use any of these methods to create or update your items with the same characteristics.
- Use the "Change physical items" job. See Change physical items job.
- Via a Repository Import Profile, import items using an Excel or XML file that contains a list of items. See Managing Import Profiles.
- Import items via an API. For that, your institution would need to write an application that creates/updates the items with the API.
-
We recommend testing the process on a small number of records before attempting to import a large number of records.
-
To make sure that the bibliographic record is not harmed in the process, it is recommended that you find the bibliographic record, save as a set, and run the job Export Bibliographic Record. Then use this bibliographic record as part of the input file. Otherwise, if needed, you can restore an earlier version of the bibliographic record via the Metadata Editor.
Working with Item Lists
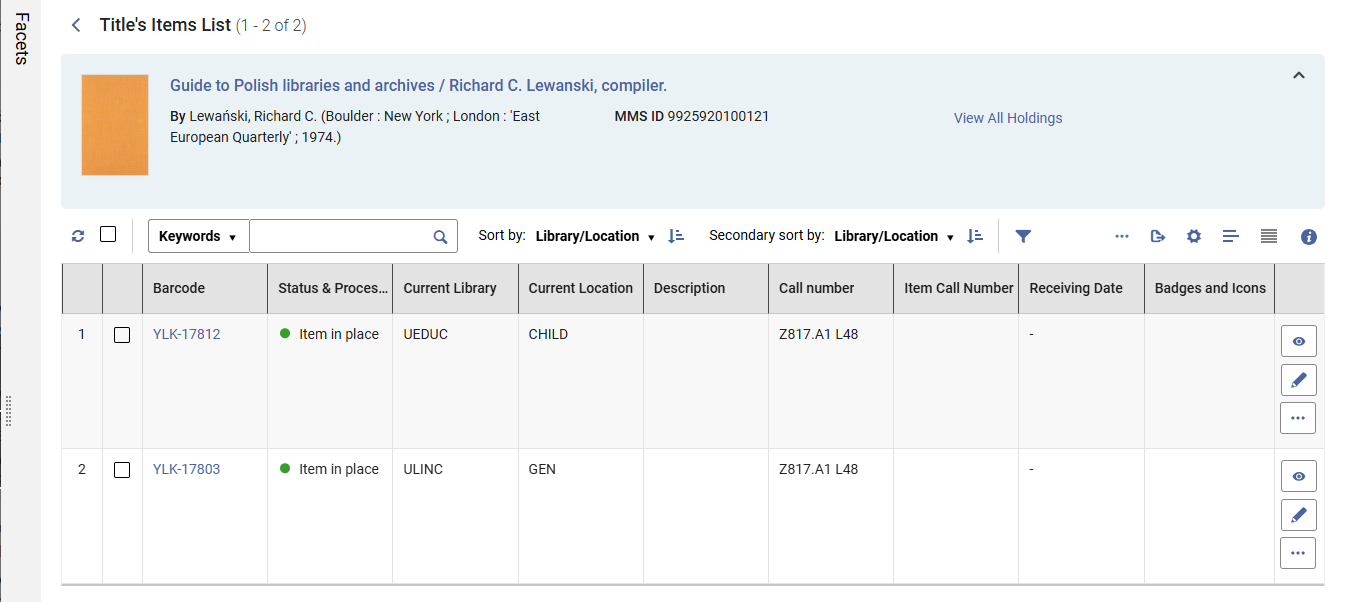
The Title's Items List includes the full list of physical items associated with a bibliographic record.
- View Title's Items List:
- In the Item section of the physical title
- In the item actions of the item editor, physical items search results or items list
- View Items in the Metadata Editor while editing a bibliographic record
- View Items:
- In the Holdings Search results
- In the Metadata Editor while editing a holdings record
- View Title's Items List in the item actions of the item editor, physical items search results or items list
The Title's/Holdings' Items List default view is the table view (for more information on available views see Views), which includes the following out-of-the-box columns:
- Barcode
- Status & Process Type
- Current Library
- Current Location
- Description
- Call number
- Item Call Number
- Receiving Date
- Badges and Icons
The customization of the Physical Items Search and the Items List are separate, as users may be performing different workflows in the context of a specific title’s/holdings’ items list and a general search.
- Select the Customize
 icon.
icon. - Select Table customization.
- Select/deselect/reorder the table columns as necessary.
Additional columns that can be added include:
- Title
- Type
- Creator / Imprint
- Due Back
- Item Call Number Type
- Call Number Type
- Temporary Call Number Type
- Year
- Volume
- Needed By
- At
- Until
- Due Date
- On Hold Expiration Date
- To Library
- Expected Arrival Time
- Creation Date
- Modification Date
- Receiving Number
- Receiving Operator
- Accession Number
- Inventory Number
- Inventory Price
- RFID Security Status
- Storage Location ID
- Item ID
- Holdings ID
- MMS ID
- Material Type
- Item Policy
- Temporary Item Policy
- Copy ID
- Condition
- Provenance
- Permanent Library
- Permanent Location
- Temporary Library
- Temporary Location
- Library Unit
- At Library
- Public Note
- Fulfilment Note
- Internal Note 1
- Internal Note 2
- Internal Note 3
- Statistics Note 1
- Statistics Note 2
- Statistics Note 3
- Edition
- Short Title
- Labels
- Item Material Type
- Current Library
- Current Location
- Process Type
- Item Policy
- Status
- Received
- Has Orders
- Permanent Library (Title's Items List only)
- Permanent Location (Title's Items List only)
- Year — The filtering options presented in the drop-down list are determined by the year content specified in the Chronology I parameter in the Physical Item Editor for the items listed.
- Volume — The filtering options presented in the drop-down list are determined by the volume content specified in the Enumeration A parameter in the Physical Item Editor for the items listed.
- Description — The filtering options presented in the drop-down list are determined by the description content specified in the Description parameter in the Physical Item Editor for the items listed. Items with an empty Description column are monographs. Items with text in the Description column are serials.
The Title's/Holdings' Items List includes all row actions available when performing a Physical Item search. For more information, see Performing Record Actions on the Repository Search Results Page.
Users with the required permissions can use the Edit icon to update item-level information for physical items (see Updating Item-Level Information).
Performing Bulk Actions in a Holdings' Items List
Several actions are available only while in the context of a holdings' items list:
- Add Item — adds a new physical item associated with the holdings record.
- Add Item from Template — adds one or more physical items associated with the holdings record using an item template (see Working with Item Templates).
- Open Predicted Items — opens the next predicated items associated with the holdings record.
- Withdraw (on selected items) — deletes the selected items.
- Bind Items (on selected items) — for more information, see Binding (Merging) Items.
Binding (Merging) Items
- For in-process items, if the original items are attached to open PO lines, Alma attempts to remove the PO line. If this is impossible, Alma removes the item from the PO line to enable the binding process.
- The work order processes for the items will be completed.
- Alma attempts to move item-level requests from the items to be bound to the new item. If the new item cannot fulfill the request, the request is canceled.
- On the List of Items page, select the check boxes for two or more items and select Bind Items. The Bind Items – Items List page appears.
- Select Next. The Bind Items – Generate Work Order page appears.
- Optionally, select a work order type and work order department from the relevant fields, and add notes in the Note field. If the original items are in the same work order type & department, Alma suggests the same work order for the bound item. The Operator can override this suggestion.
- Choose from the following options:
- Select Create and Edit to create the newly bound item. This opens the Physical Item Editor page, where you can edit the item’s details (see NEW Working with Items).
- Select Create to create the newly bound item. The item appears as a single item on the List of Items page.
Regarding Alma Analytics for Bound Items:
- Items that are bound into a new item are available for retrieval in Alma Analytics' “Physical Items” subject area.
- The items that get bound into a new item will have status “Deleted” in the “Lifecycle” field from the “Physical Item Details” folder.
- In the example below barcode “AU44538” with description “Vol. 1 Issue 1” and barcode “AU44539” with description “Vol. 1 Issue 2” were bound into a new item barcode “AU44541” with description “Vol. 1 Issue 1-2”.
- Therefore, barcodes “AU44538” and “AU44539” have Lifecycle “Deleted,” and barcode “AU44541” has Lifecycle “Active”.

Updating Item-Level Information
New items can be created using any of the following methods:
- While working with holdings records in the Metadata Editor using Add Item. See Navigating the MD Editor.
- By adding a physical item to an existing title (Resources > Create Inventory > Add Physical Item). See Adding a Physical Item to an Existing Title.
- Using the Add Item action in the Holdings search. See Performing Record Actions on the Repository Search Results Page.
- Using the Add Item action in the Holdings' Items List. See Working with Item Lists.
- Open the item you want to update in Edit Mode:
- Using the Edit icon in the Physical Items search, the Items List, or the Item View.
- Using the Edit Item action in the items section of the title or holdings record.
- Navigating to the Item Editor from other workflows, such as Manage Patron Services or Received Items List.
- Make the required updates to the item.
- Save your changes (see Saving Physical Item Changes).
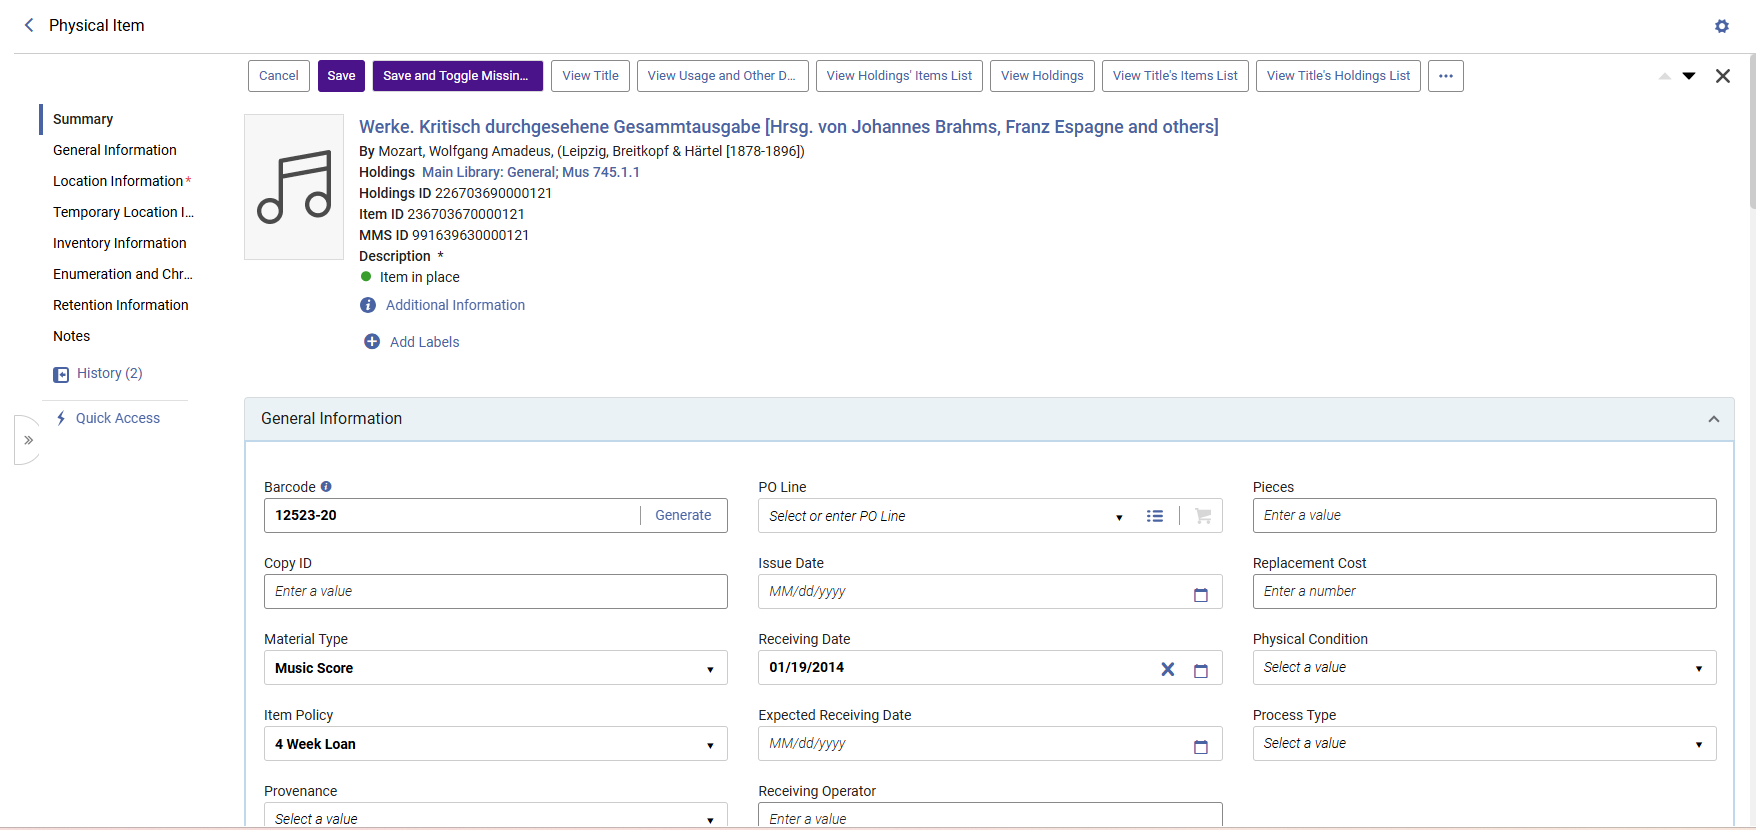
See the tables below for a description of the parameters on the Physical Item Editor, organized by the following sections.
- Physical Item Editor - Summary Information
- General Information
- Location Information
- Temporary Location Information
- Inventory Information
- Enumeration and Chronology Information
- Retention Information
- Physical Item Editor Page - Notes
The customization of the Physical Items Search and the Items List are separate, as users may be performing different workflows in the context of a specific title’s/holdings’ items list and a general search. The Sections customization set in the Physical Items Search is used as the default item editor and view settings, determining how the item appears when accessing the editor from other Alma pages (e.g. Receiving Workbench, Manage Patron Services).
- Select the Customize icon.
- Select Sections Customization.
- Select/deselect/reorder the sections as necessary.
| Field | Description |
|---|---|
| Resource Description | This identifies the item's title, author, and so forth. Select this link to open the title details. |
| Holdings | This identifies the holdings record location information. Select this link to open the holdings details. |
| Holdings ID | This displays the holdings record ID number. |
| Item ID | This displays the item ID number. |
| MMS ID | The MMS ID for the item's bibliographic record. |
|
Description
|
The item description. Items with an empty Description are considered monographs. Items that contain a Description are considered serials.
|
|
Status
|
This specifies the status of the item (such as item in place).
Options:
|
|
Additional Information
|
Includes:
|
|
Add Labels
|
The labels associated with the item. See Repository Search Labels.
Updating a single item’s labels is available in Edit mode.
|
| Parameter | Description |
|---|---|
| Barcode | This parameter identifies the item’s barcode.
If the barcode parameter is empty, add a barcode using one of the following methods:
While the cursor is in the Barcode field, pressing Enter on the keyboard saves the item. If populating the Barcode field using an external device (such as barcode scanner) - if the device adds Return, the item is saved. |
| Copy ID | The item’s copy ID, used to identify individual copies of the same title when multiple copies exist at the same location. |
| Material Type | The item’s physical form, such as a book or CD-ROM. Select from the predefined drop-down list. Note that the material type manifests itself only in Primo’s Get It/Details tabs. (For information on customizing the material type labels, see Configuring Physical Item Material Type Descriptions.) |
| Item Policy | The item’s override policy for loan rules. Defines the conditions under which a request for this item can be fulfilled. Select an item from the drop-down list (see Configuring Item Policies). |
| Provenance |
The provenance code indicates the item’s origin, as selected from options in the drop-down menu. To configure these options, see Configuring Provenance Codes. If joint use of inventory was configured for the institution, where one institution can order for another institution in a Consortia, this field indicates the purchasing institution (if this was set up). For details, see Joint User of Inventory in Consortia. |
| Is Magnetic | Options are Yes or No. Specifies whether or not the item contains digital properties that may be damaged by a self-check machine. If Yes is selected, the self-check machine does not attempt to demagnetize the item, which could damage the resource. The value would typically be Yes for items such as CD-ROMs and digital cassettes. |
|
Type a PO Line number, or use the quick pick list icon to open the Select PO Line page to locate a PO line for the item. Only PO lines for physical standalone items appear in the list.
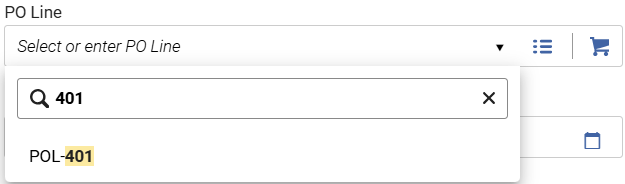
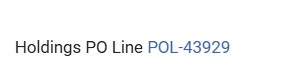
For serial items associated with a holdings' PO Line - the Holdings PO Line information will be displayed instead:
|
|
| Issue Date | The issue date generated from a prediction pattern. |
| Receiving Date | The date the material was actually received/activated for the first time. Select the calendar icon to populate the receiving date. |
| Expected Receiving Date | The date the item was expected to be received. Select the calendar icon to populate the expected receiving date. |
| Receiving Operator | The Operator who received the item |
| Pages | The item’s number of pages. |
| Pieces | The item’s number of pieces. |
| Replacement Cost | The charge administered to the patron if the item is lost. You can configure whether the PO line price is copied to the Replacement cost field in the item for physical one-time orders. You can also specify whether to add or subtract the amount from the PO line price copied to the item's Replacement cost field. For more information, see Configuring Other Settings. |
| Physical Condition | The physical condition of the item (see Configuring Physical Item Condition).
After a physical condition has been identified and saved with the item record, this information can be selected for publishing when publishing physical inventory and used as a criterion for advanced search. When running the Change physical items job, Physical Condition is available as a parameter for changing other fields. |
|
Process Type
|
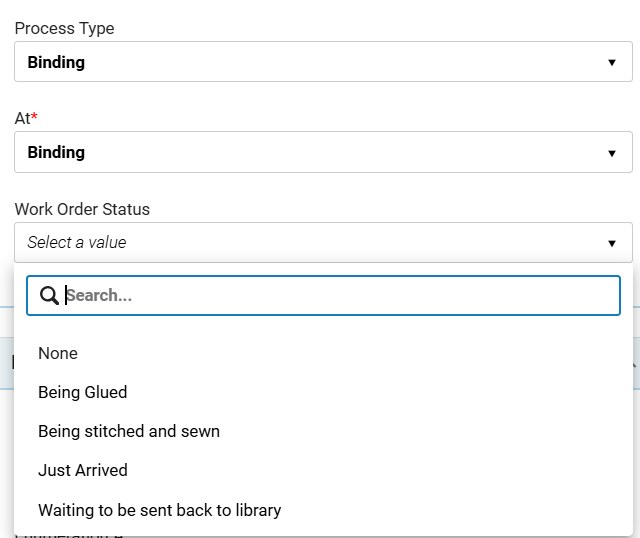
How the work order is currently being processed. When selecting a value in this field, the following additional fields are displayed:
After saving the item, the following information appears on the Repository Search page:
This information also appears on the Resource Request Monitoring page (see Managing Requests and Work Orders).
To remove an existing work order from an item, clear this field when accessing the Physical Item Editor page from the Edit link for an item. The Status of the item appears on the Repository Search page as "Item in place". Note that this workflow skips the next step calculation used when marking a work order as "Done", and therefore requests are not activated unless the item is scanned in.
|
| Parameter | Description | ||||||||
|---|---|---|---|---|---|---|---|---|---|
| Parameter | Description | ||||||||
|
Permanent Location
|
Select the permanent library and library location.
Changing an item's location in the item editor disconnects it from its holdings record. When a holdings record holds only a single item, moving this item to a different location may delete the current holdings record.
For more information, see Moving Items Between Holdings and Deleting Holdings Records. |
||||||||
|
Storage location ID
|
The ID number of the location where the item is stored.
If a closed list of values is needed for storage location IDs, the field can be configured as a closed list. Contact Ex Libris support to enable this option. See Configuring Storage Location ID.
|
||||||||
| Item Call Number Type | Select an alternative identification number type for the call number from the drop-down list. Some examples of options include:
You can use the Browse Shelf Listing action to search for existing call numbers in your system in the Metadata Editor. For information, see Browsing the Shelf Listing. |
||||||||
| Source (Subfield 2) | Enter the call number source corresponding to the $2 in the holdings record. This is relevant when the call number type is Source specified in subfield 2. See Browsing the Shelf Listing for more information. | ||||||||
|
Item Call Number
|
The call number for the specific item when it differs from the call number that may be present in the holdings record.
|
||||||||
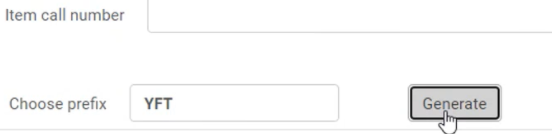
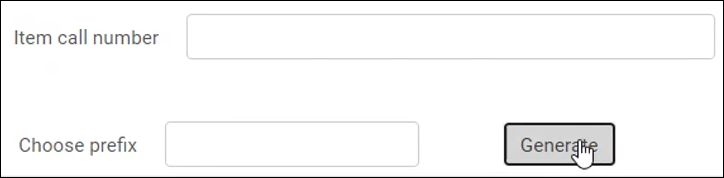
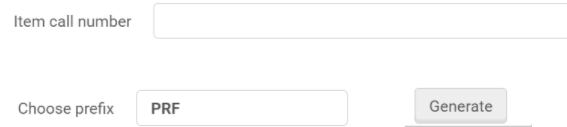
| Generate |
Generate an item call number using any of the following methods:
The number generated is determined by the matching sequence found in the Accession Numbers configuration (see Configuring Accession Numbers for more information). The number is generated after you select Save.
The Other Settings parameter item_call_numbers_generate_enable must be set to true for Generate to appear (see Configuring Other Settings (Resource Management) for more information).
For more information on generating an item call number, watch the Generate Alternative and Temporary Item-Level Call Numbers video (2:51 mins).
|
||||||||
| Calculate | Use Calculate to create an alternative item-level call number based on existing call numbers in the Alma repository.
Enter a full prefix for the Choose prefix parameter to help the system locate a matching prefix in the Alma repository in order to create a call number. The call number that is created is generated after you select Save. Your system may be configured to use both Calculate and Generate on the Physical Item Editor page or only one of these features.
Calculate needs to be configured by Ex Libris. Due to a technical issue, when using Calculate with both the Alternative and Temporary call numbers for the same prefix at the same time, an identical sequence is calculated and saved in both. When enabled for your institution, the use of Calculate can be restricted at the library-level so that only institution-level sequence configurations can be used. See Library for configuration information regarding the Disable Item Call Number Calculation option. |
| Parameter | Description | ||||||||
|---|---|---|---|---|---|---|---|---|---|
| Item is in Temporary Location (Yes/No) | Whether the item is located in a temporary location.
Setting this to No does not clear the item's temporary library and location values (see the next two fields). There are situations in which you might want to mark the item's temporary library and location before indicating that the item is actually in that location. For lending requests, before shipping, if the item was already in a temporary location, then, when returned, the item reverts to the previous temporary location. Note that this only applies to the temporary location and not to other temporary conditions, such as Temporary call number type, Due back date, etc. You can remove items' temporary location indications in bulk using the Change physical items job. |
||||||||
|
Select the temporary library and library location.
A temporary library must be specified for the Choose prefix, Generate, and Calculate features to appear for a temporary call number (if enabled).
|
|||||||||
| Temporary Item Policy | The item’s temporary override policy. Policies are configured and appear in the drop-down list. | ||||||||
| Due Back Date | The date the item is due to be returned from the temporary location. | ||||||||
| Temporary Call Number Type | The call number type used for the item at the temporary location. | ||||||||
| Temporary Source (Subfield 2) | Enter the call number source that is equivalent to the $2 in the holdings record. This is relevant when the call number type is Source specified in subfield 2. See Browsing the Shelf Listing for more information. | ||||||||
|
Temporary Call Number
|
The item’s call number when using the temporary call number type at the temporary location.
The Permanent Call Number is displayed for the temporary location in Alma and Primo when no temporary call number is assigned.
|
||||||||
| Choose Prefix | Enter a prefix and/or use it in combination with Generate and/or Calculate, as described below. | ||||||||
| Generate |
Generate an item call number using any of the following methods:
The generated number is determined by the matching sequence in the Accession Numbers configuration (see Configuring Accession Numbers for more information). The number is generated after you select Save.
The Other Settings parameter item_call_numbers_generate_enable must be set to true for Generate to appear (see Configuring Other Settings (Resource Management) for more information).
For more information on generating an item call number, watch the Generate Alternative and Temporary Item-Level Call Numbers video (2:51 mins).
|
||||||||
| Calculate | Use Calculate to create an alternative item-level call number based on existing call numbers in the Alma repository.
Enter a full prefix for the Choose prefix parameter to help the system locate a matching prefix in the Alma repository in order to create a call number. The call number that is created is generated after you select Save. Your system may be configured to use both Calculate and Generate on the Physical Item Editor page or only one of these features.
Calculate needs to be configured by Ex Libris. Due to a technical issue, when using Calculate with both the Alternative and Temporary call numbers for the same prefix at the same time, an identical sequence is calculated and saved in both. When enabled for your institution, the use of Calculate can be restricted at the library-level so that only institution-level sequence configurations can be used. See Library for configuration information regarding the Disable Item Call Number Calculation option. |
| Parameter | Description |
|---|---|
| Inventory Number | Enter/allocate an inventory number for this physical item, up to 20 characters.
You can enter a number manually. If inventory numbers are configured for your library (see Configuring Physical Item Sequences), select Allocate to enter the next number. If more than one numbering sequence is defined for the library, select the desired sequence from the Sequence List dialog box and select Select. If you want to, you can use the same number for multiple physical items. |
|
Inventory Date
|
Enter or select an inventory date.
If you select Allocate to set an inventory number, this field is populated with today's date. If required, select an alternate date.
|
|
Inventory Price
|
The price of the item. If you select Allocate to set an inventory number, the price is taken from the PO line, if one exists (using the currency of the PO line). You can change this to reflect the item's actual value to the library (for example, how much it would cost to replace).
The Inventory price is not what patrons are billed when the item is lost. For that purpose, see the Replacement Cost. For values less than 1, enter a leading 0. For example, 0.44, not .44.
The value is assumed to be in your institution's default currency. For more information, see Configuring Currency Subsets.
Users can validate the item inventory price by configuring a regular expression (regex) that specifies which characters are allowed when manually entering an inventory price in the item editor. When an item with an invalid value in the inventory price is edited and saved, the operator is alerted that the inventory price doesn't match the institution's configuration, so they can check and correct the data if needed.
The validation of the item inventory price is controlled by the customer parameter (CP): item_editor_inventory_price_regex that is accessed from the Resources mapping table (Configuration > Resources > General > Other Settings). For more information on the CP, see item_editor_inventory_price_regex. |
|
Receiving number |
Enter/allocate a receiving number for this physical item. Note that this parameter only appears when a Receiving Number sequence is configured (see Configuring Physical Item Sequences). You can enter a number manually or select Allocate if receiving sequence numbers are configured for your library. When you select Allocate, the next number in the sequence is added to this parameter. If more than one numbering sequence is defined for the library, select the desired sequence from the Sequence List dialog box and select Select. If you want to, you can use the same number for multiple physical items. |
|
Weeding number |
Enter/allocate a weeding number for this physical item. Note that this parameter only appears when a Weeding Number sequence is configured (see Configuring Physical Item Sequences). You can enter a number manually or select Allocate if weeding sequence numbers are configured for your library (see Configuring Physical Item Sequences). When you select Allocate, the next number in the sequence is added to this parameter. If more than one numbering sequence is defined for the library, select the desired sequence from the Sequence List dialog box and select Select. If you want to, you can use the same number for multiple physical items. |
|
Weeding date |
Enter or select a weeding date for this physical item. Note that this parameter only appears when a Weeding Number sequence is configured (see Configuring Physical Item Sequences). If you select Allocate to set a weeding number, this field is populated with today's date. If required, select an alternate date. |
| Clear Inventory Information | Use this option to clear all inventory parameters in this section. |
| Parameter | Description |
|---|---|
| Description | System or user-generated description based on entries in the Enumeration and Chronology fields. Select Generate to have Alma enter the description. To configure a description template, see Configuring Description Templates.
This field may be used to determine if the physical item is considered to be a monograph or a serial. If the field is defined (contains any characters), the item is considered a serial (or possibly a multi-volume monograph with volume numbers that appear). If the field is empty, the item is considered a monograph. Only the first 256 characters of the description appear in the Primo Get It tab (in a drop-down list). It is recommended that the description be shorter than this, so that it is properly visible in the Get It tab. |
| Enumeration A through H |
The multiple levels of enumeration. Enumeration A and B appear at the top of the section to make them easier to fill, as they are the most commonly used enumeration fields. |
| Chronology I through M |
The multiple levels of chronology. Chronology I and J appear at the top of the section to make them easier to fill, as they are the most commonly used chronology fields. |
| Break Indicator |
The code that indicates the reason for a break in the enumeration or chronology.
Possible valued:
The break indicator is used when generating summary holdings based on physical items. For more information see: How to use the Break Indicator in the physical item together with summary holdings.pptx |
| Pattern Information: | |
| Pattern Type | A list of unique 85X fields from the item's holdings record. For example, if the holdings record contains 853 and 854 fields, the list contains 3 853 and 4 854. |
| Linking Number | The list of subfields $8 from the currently selected 85X fields. For example, if Pattern Type is 3 853, and the holdings record contains two 853 fields with subfields $8 with values 1 and 2, the list contains 1 and 2. |
| Type of Unit | The type of unit. This is a read-only field populated on the fly by the FIRST subfield $o of the relevant Pattern Type and Linking Number. |
| Parameter | Description |
|---|---|
| Committed to Retain |
Select Yes/No to mark items as committed to retain and prevent withdrawing them. This is useful when several libraries pool their resources, and some of the library's items need to be retained even when internal usage is low. This is reflected in Alma Analytics, which helps libraries manage their collaborative collections. Upon selecting "Yes", the Committed to Retain icon ( This feature is also supported in import, export, and API workflows. |
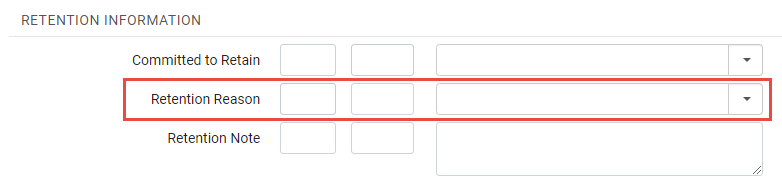
| Retention Reason | The reason the library has committed to retaining the item. The drop-down menu enables users to select and share Retention Reason values with all members.
Possible values are listed in the 'Retention Reason' table — for more information see Configuring Retention Reasons.
|
| Retention Note | A free-text note concerning the library's commitment to retaining the item. |
 ) is displayed for the physical item in the Item Editor.
| Note Type | Description | Max Length |
|---|---|---|
| Functional Notes: | ||
| Public Note | Note content that is displayed in the Primo Get It tab under the Holdings column. See Displaying Public Notes. | 4000 characters |
| Fulfillment Note | Note content that is displayed during the circulation process. For example, the content may include the statement Check for discs to prompt the circulation desk at item check-in. | 4000 characters |
| Internal Notes:
Internal notes can only be seen by staff members, not by patrons; however, they are exposed to staff members of other institution zones that share your network. |
||
| Internal Note 1 | Note content for internal use by Alma staff. | 4000 characters |
| Internal Note 2 | Note content for internal use by Alma staff. | 4000 characters |
| Internal Note 3 | Note content for internal use by Alma staff.
Specifically, this note may contain content about a shipped resource sharing lending item, as sent to Alma by the NCIP source system in the NCIP message's shipping note. The shipping note appears in the following format: ||Shipping Note||<text of shipping note>||Shipping Note|| The shipping note is used by NCIP implementers, such as OCLC Navigator, to update the library system with additional information about shipped resource sharing lending items, such as information about the resource itself, the requester, and the locations from where it is requested and is to be picked up. |
4000 characters |
| Statistics Notes:
Statistics note content may be free text, or selected from a customized drop-down list if configured by your institution. See Configuring Statistics Notes for information about configuring fixed drop-down lists of options for statistics notes. |
||
| Statistics Note 1 | Note content selected and saved is exposed in Analytics under New > Analysis > Physical Items. | 4000 characters |
| Statistics note 2 | Note content selected and saved is exposed in Analytics under New > Analysis > Physical Items. | 4000 characters |
| Statistics note 3 | Note content selected and saved is exposed in Analytics under New > Analysis > Physical Items. | 4000 characters |
Saving Physical Item Changes
- Save - saves your changes.
-
Save and Toggle Missing Status - saves your changes and also toggles the item’s missing status from "in place" to "missing" or from "missing" to "in place".
When you select Save and Toggle Missing Status, Alma saves any changes made to the item in the editor and then toggles the missing status, adding or removing a "missing" process type. If an item is in another process type, this option is disabled. If an operator adds a process type to an item in place and then selects Save and Toggle Missing Status, only the selected process type is saved, and the "missing" process type is not applied. - Save and Receive - saves your changes and also receives it.
When you select Save and Receive a dialogue window is displayed enabling you to fill in the receiving date and select whether to keep in department.The Keep in Department, Next Step and Received Date fields are populated with the same values as in the "Receive New Material". If these fields are modified in the pop-up, their values are saved as the user preferences.
Selecting Save and Receive, the item is saved with the Received Date, Receiving operator, and Process type and "At" when "Keep in Department" is selected. The PO line is progressed in the workflow (the same as if the receive was done from the "Receive New Material" page or from the PO line itself.
The department listed under "Currently At" directly impacts the ability to save and receive the item; an error occurs if the user is not in the correct department. Furthermore, the values shown in the "Next step" field within the dialogue window correspond to the "Currently At" department.
The Save and Receive button is enabled under the following conditions:
- Users possessing Receiving Operator/Receiving Manager roles for the owning library of the Purchase Order (PO) line, and/or users with Receiving Operator/Receiving Manager roles for a library designated as "acquire for" the owning library of the PO line.
When the "Receiving date" field is unfilled, and the "PO line" field is populated.
Viewing Item History
Use the History link in the sections menu to view item changes in a sliding panel, or the View Fulfillment History action to navigate directly to the Fulfillment Activities.
The Operator column appears only for managers and administrators. See Roles and Registration Configuration.
| Report type: | |
|
Item changes
|
Changes made to the item are visible on the Physical Item Editor History tab. This report identifies the name of the operator who made the change, the date the change was made, the field that was changed, and the before and after values.
When an item moves to a different library/location, causing it to be linked to a different holdings record, the change is represented as a change in the "Holdings PID" field - meaning that the item was linked to holdings record A and is now linked to holdings record B. All the fields that are defined at the holdings level impact the item, but they do no appear specifically in the item history.
|
| Holdings changes |
Changes to the library (852 $$b), location (852 $$c), call number type (852 first indicator), call number (852 h, i, j, k, l, m), and accession number. This report identifies the operator name that made the change, the date the change was made, the field that was changed, and the before and after values.
Changes to the last item under the holding do not appear in this tab; they appear only under the Item Editor View Holdings list. The reason is that in this case, the existing holding is changed, rather than creating a new holding. |
| Fulfillment activities | Loan/return activity. This report identifies the date the change was made, the action type completed (loan/return), the name of the operator/desk name that made the change, the borrower name, and the borrower ID. In-house loan/usage information displays on the page.
The borrower name and ID are displayed only for the following roles: Circulation Desk Operator, Circulation Desk Manager, Circulation Desk Operator - Limited, Requests Operator, Fulfillment Services Operator, Fulfillment Services Manager, Resource Sharing Partners Manager, Fulfillment Administrator, User Administrator, and General System Administrator. To disable this privilege for any of the above roles or enable the privilege for other roles, contact Ex Libris Support. |
Configuring Storage Location ID
- Contact Support to enable this feature.
- This capability is available for up to 100,000 storage IDs.
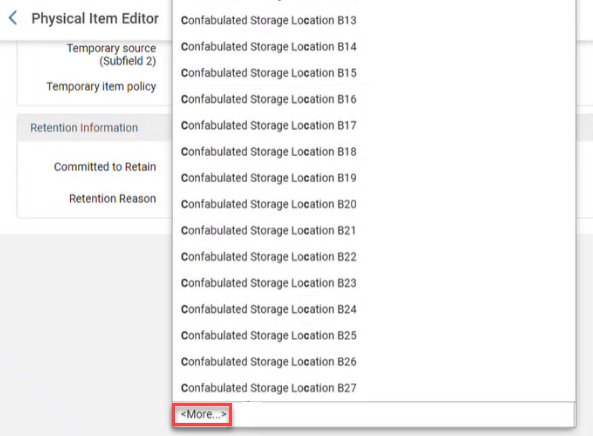
- The <More...> indicator is for informational purposes only and will be updated in a later release when the Item page moves to the NG layout.
 More indicator
Configuring Retention Reasons
When an item is Committed to Retain, users can select a retention reason (see the image below). The retention reason is an additional detail to help users understand why the item is marked for retention. Alma incorporates out-of-the-box values for Retention Reason, but they are customizable. Users can modify current values, delete values, and add new ones.
See also: Bibliographic Record Retention for information to prevent the deletion of a bibliographic record.
- In Alma, select Configuration Menu > Resources > Collection Retention > Item Retention Reason. The Retention Reason screen is displayed.
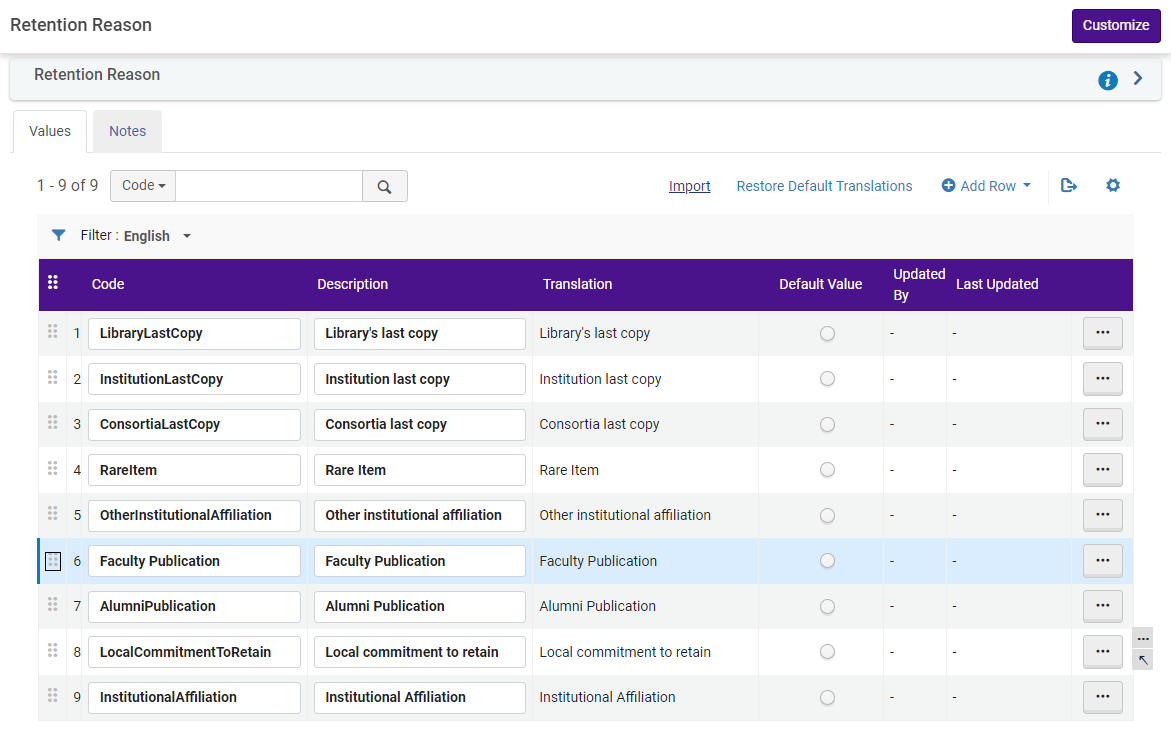 Retention Reason
 - To alter a current value, do the following:
- In the Code column, select any value and enter a desired value, for example, HistoricalItem.
- In the Description column, repeat the value in the Code column (Historical Item) or enter any custom description (Item of Historical Value).
The Translation column is automatically populated when the value is saved.
- If you want the value to be the default Retention Reason value when assigning an item for Committed to Retain, select the radio button in the Default Value column for the value.
- Select Customize. The screen reverts to the Configuration dashboard. Select Resources > Collection Retention > Item Retention Reason to view the updates.
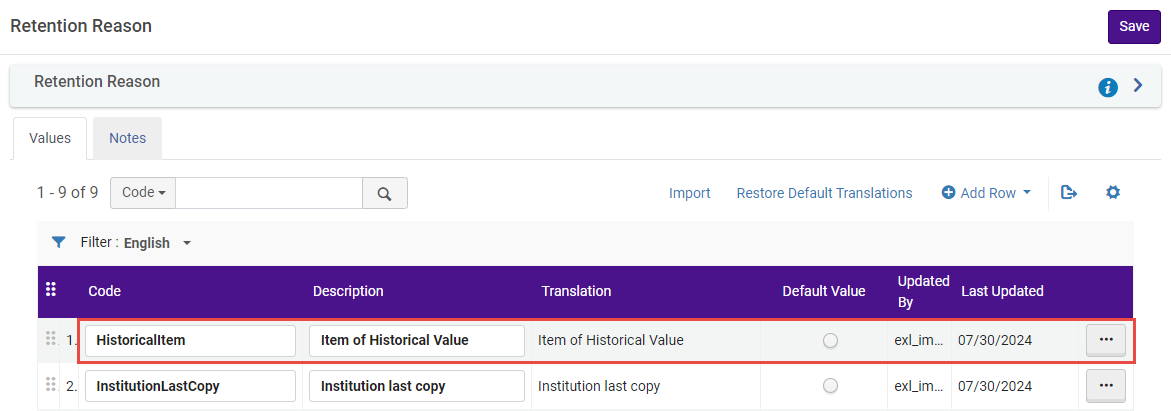 Customized Retention Reason
- In Alma, select Configuration Menu > Resources > Collection Retention > Item Retention Reason. The Retention Reason screen is displayed.
- In the list of values, select the desired value to delete. Select the More actions... button and select Delete. The value is deleted.
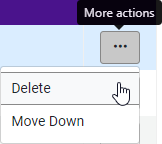 Delete Retention Reason value
- In Alma, select Configuration Menu > Resources > Collection Retention > Item Retention Reason. The Retention Reason screen is displayed.
- Select Add Row.
- In the drop menu, enter a Code value, Description, and select if the value is to be a default value (Yes/No).
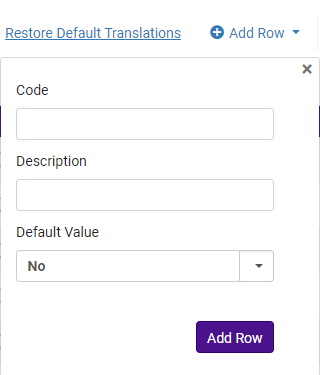 Add Row Drop Menu Options
 - Select the Add Row button. The value is added to the Retention Reason list.
Relinking Items to Another Bibliographic Record
To relink items to another bib record, you must have one of the following roles:
- Repository Manager
- Physical Inventory Operator
Users with these roles can work only within the scope defined for the role in the User Details page, see Managing User Roles.
Note that you may also select the Change Location row action for an item on the Title's Item list to submit a move request. For more information, see Creating a Request.
- If there is a request at the title level, it is canceled.
- If there is a request at the item level, it moves with the item.
- Select the Relink to Another Bibliographic Record action for a Physical Item. The Relink Items to Another Bibliographic Record dialog box opens.
- Search for the bibliographic record to which you want to link the item in the Bibliographic Record drop down or pick list.
- Search for the holdings record of the title to which you want to link the item in the Holdings drop down or pick list.
If the title you selected has no holdings, or you want to create a new holdings record to link the item to, you can create a holdings record from the Holdings pick list, using the Add New Holdings action.
- Select Relink.
If the item that you are moving is the last item linked to its previous holdings record, Alma prompts you with the options below for handling the previous holdings record. Make a selection and select Go. You are returned to the Title's Item List page.
- Keep holdings and bibliographic records
- Delete holdings; delete bibliographic records that have no other holdings
- Suppress holdings from publishing; suppress bibliographic records that have no other holdings from publishing
- Delete holdings; suppress bibliographic records that have no other holdings from publishing
- Suppress holdings from publishing; keep bibliographic record
- Delete holdings; keep bibliographic record
Working with Item Templates
To work with item templates, you need the roles and privileges to add new physical items.
It is possible to save an existing physical item as a template and use it to pre-populate fields such as notes, item policy, material type, temporary location, and so forth when manually creating new physical items.
The template includes all item information except:
- Barcode
- Inventory number
- Pattern information
- Process type & At (request department)
- Item call number prefix/suffix
- Temporary call number prefix
- The item’s permanent library and location, inherited from the item’s holdings record.
Using Item Templates to Create Items
When creating an item from a template, the item is pre-populated with the template’s data.
Once an operator selects a template to work with, Alma remembers the selection for the user in all manual item creation workflows. Selecting a template again is only required when changing the type of items being created.
Add Item from Template
The Add Item from Template option enables users to select a template for the Add Physical Item quick cataloging form, which automatically populates the item created by that form with the template's data. Once the option is selected, use the magnifying glass drop-down menu or the find (arrow) icon to select from Recently Used, My Templates (Private), or Public templates. The template includes all item details except Barcode, Inventory number, Pattern information, Process type, At (request department), Item call number prefix/suffix, and Temporary call number prefix.
Adding a new item from a template is available in a holdings' items list and when editing a holdings record in the Metadata Editor.
- From the Holdings Record, select Add Item from Template.
- Select the template you want to use from the drop-down to create your new item. The new item opens as a draft, and the operator can make any needed changes before saving.
The content indicators on the tabs only appear after the item is saved (and not in draft mode).
- Enter the item details and select Save.
Using Item Templates to Create Multiple Items
When creating items using a template, you can add multiple items to a holdings record.
- It is possible to add up to 99 items in one action.
- When using a barcode sequence, the system checks the current sequence when creating each item (to ensure barcode uniqueness). Barcodes may therefore not be sequential if other items were created at the institution using the same sequence while the process is running.
Users can add multiple items to a holdings record using Add Item from template and specifying the desired quantity. This initiates a process that generates multiple items within the holdings record, pre-filled based on the selected item template.
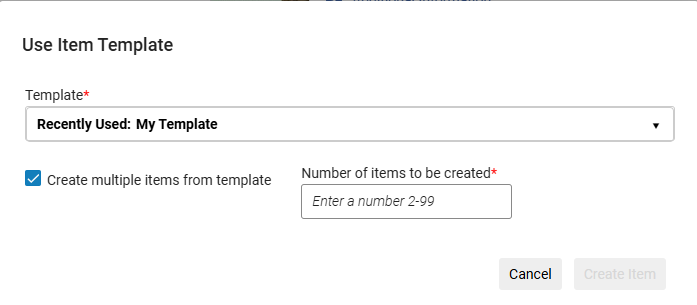
It is also possible to create multiple items in Alma without using templates, with import profiles or the Item Creator by Excel CloudApp.
Creating and Updating Item Templates
- To create an item template, open the item editor, make sure only the fields you want populated in the template are filled in the item, and select Save as Template.
- Creating a template can be done from an existing item or from an item draft. To create a new template based on an existing template, use Add Item from Template to create a pre-populated item draft, make the changes and select Save as Template.
Save as Template fields:
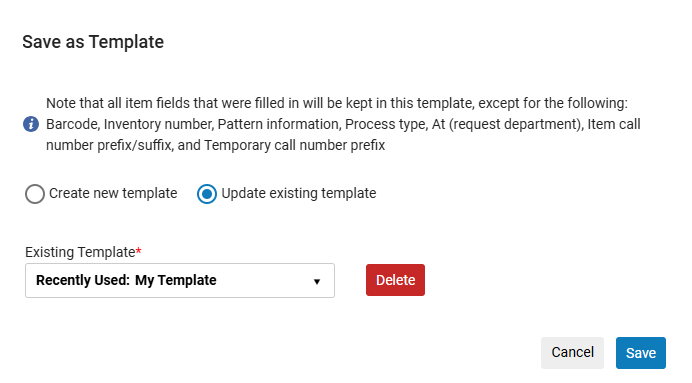
Template name Select a unique, clear name for your template. If you use the name of a template that already exists, that template is updated with the contents of your current item. Create new template Enter a Template name and select Public template if relevant. Update existing template Select an existing template to update. See Edit an Existing Template. Public template Leave unchecked to create a private template only you can see and use. Select Yes to have the template available to all physical inventory operators in the library. Any user who can create items can use and update a public template. - Select Save to save your template.
Edit an Existing Template
- In a holdings record, select Add Item from Template and select the template you wish to edit.
- In the item editor, make the changes you want, and make sure only the fields you want populated in the template are filled in (except for permanent library and location, which are inherited from the holdings record and aren’t part of the template workflow).
- Select Save as Template.
- In the Existing template drop-down, select the template you want to update, and select Save.
Any change to an existing template updates the template with the current data in the item editor. If you wish to override a template with data from an existing item, it can be done by opening it in the item editor, selecting Save as Template and selecting the template you want to override.
Delete a Template
- Edit a physical item and select Save as Template.
- Select Update existing template.
- From the Existing Template drop down list, select the template you want to delete, and select Delete.