
Primo Configuration Wizards
To configure the Front End and pipes, the Back Office provides the following main wizards:
-
The Initial Configuration Wizard(on-premise customers only)
-
The Primo Configuration Wizard(on-premise customers only)
The Initial Configuration Wizard
When configuring the Primo system for the first time in an on-premise installation, the home page of the Back Office displays a link to the Initial Configuration Wizard. This wizard steps you through the initial configuration of your system.
Prior to the initial configuration, you should fill out the tables provided in the Customer Profile for Primo document to plan and gather the configuration data for your system.

The initial configuration consists of the following steps:
Once you have completed the initial configuration in the Back Office, the Ongoing Configuration Wizard link appears and the Initial Configuration Wizard link disappears since it is no longer necessary in the Back Office.
Prerequisites
The first step in performing initial configuration is to ensure that all prerequisite requirements are met. It is important that all necessary decisions about the system are made in advance so that the configuration only consists of entering information into the correct fields. Viewing the checklist helps determine whether you are ready to begin the configuration of your system.
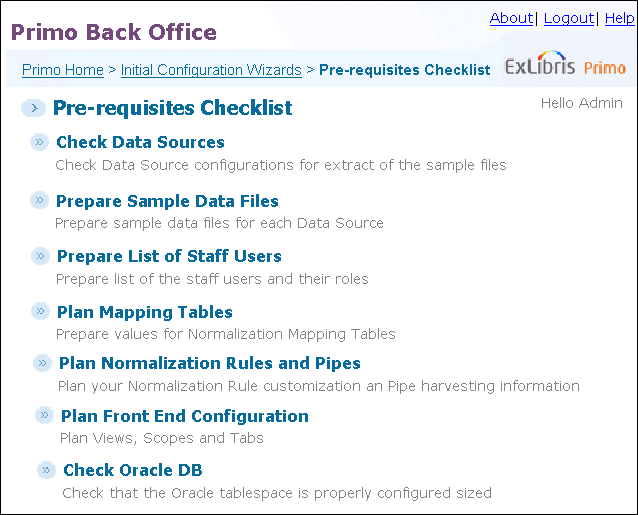
Before you start configuring your system, select each of the items on the pre-requisites checklist and ensure that you have completed each procedure:
-
Check Data Sources– Check that all necessary information can be extracted from your data sources.
-
Prepare Sample Data Files– Follow the instructions provided to prepare sample data files.
-
Prepare List of Staff Users– Follow the instructions provided to ensure you have a list of the system's staff users and their roles.
-
Plan Normalization Rules and Pipes– Follow the instructions provided to ensure your Normalization rules and pipes are planned correctly.
-
Plan Mapping Tables– Verify that the standard mappings exist. The first mapping is between the Primo institution code and the value from the source data, and the second mapping is between the Primo library code and the value from the source data.
-
Plan Front End Configuration– Follow the instructions provided to ensure that your views, tabs, and scopes are defined properly.
-
Check Oracle DB– Follow the instructions provided to ensure the space in the database is properly sized to fit the amount of data that you plan to upload.
Switch Primo On
After completing the initial configuration and testing the configuration settings using sample data, you can use the Switch Primo On page to complete the final steps of the initial configuration.
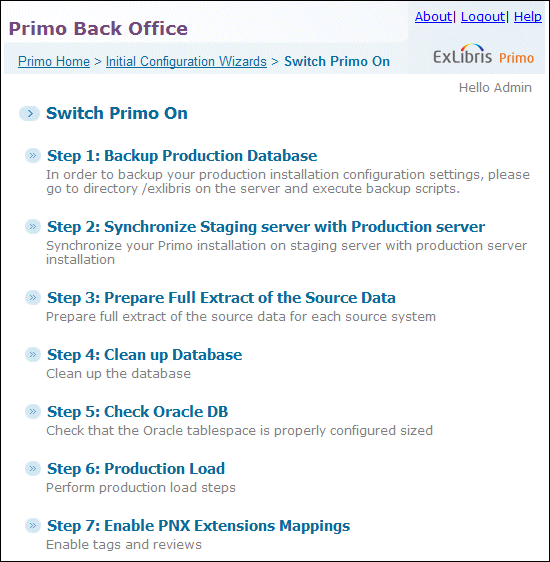
The Switch Primo On page contains the following steps:
-
Backup Production Database– The page that opens contains instructions on creating a backup of the production.
-
Synchronize Staging server with Production server– This runs a script that copies the setup from the production server to the Staging server.
-
Prepare Full Extract of the Source Data– The page that opens contains instructions for full data extract from the source systems.
-
Clean up Database– This runs a script that cleans the database before the data load.
-
Check Oracle DB– The page that opens contains instructions on checking the space in the database to verify there is enough available space for the resources that are about to be loaded.
-
Production Load– The production load process contains the following steps:
-
Execute and Monitor Pipes– The Monitoring Pipe page opens (see Pipe Monitoring - Pipes List)
Click Execute to start running the pipe.Data is uploaded into the database. For further instruction on monitoring pipes, see Monitoring Pipe Status. -
PNX Viewer– The PNX Viewer page opens (see PNX Viewer Page).
Use the PNX Viewer to view the PNX records that were created. You can compare the PNX records to the source records to ensure that the PNX records were converted accurately and your normalization rules are defined correctly. For further instructions on using the PNX Viewer, see Accessing the PNX Viewer. -
Indexing and Swapping– The Search Engine Monitoring page opens (see Search Engine Monitoring Page).
Click Full Index to index the PNX records to ready the records for searching. For more information on monitoring the search engine, see Monitoring Search Engine Status. -
Schedule Tasks– the Schedule Tasks page opens (see Schedule List Page), enabling you to determine the frequency of the pipe run.
-
-
Enable PNX Extensions Mappings– the PNX_EXTENSIONS_MAPPINGS mapping table opens for editing. To enable tag and popularity searching, click the Enabled check box next to the PNX extension entries.
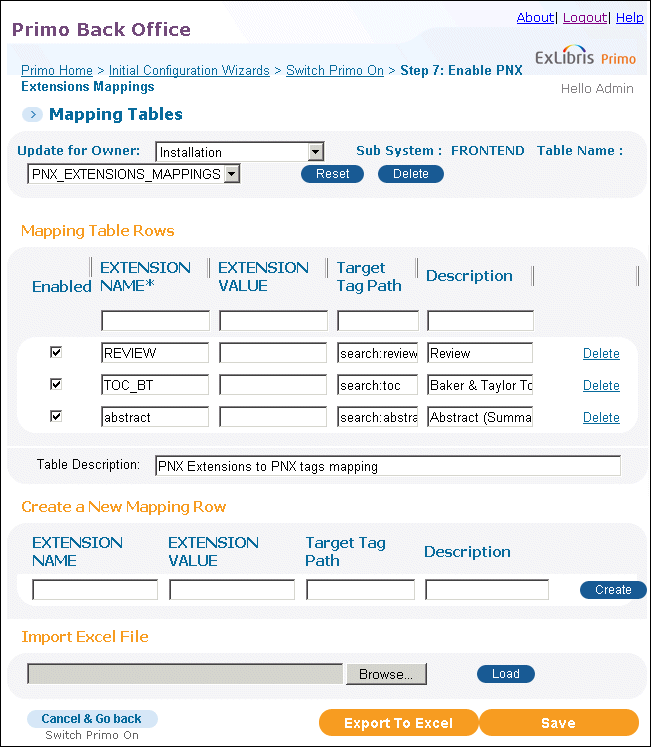 Enable PNX Extensions Mappings
The Ongoing Configuration Wizard
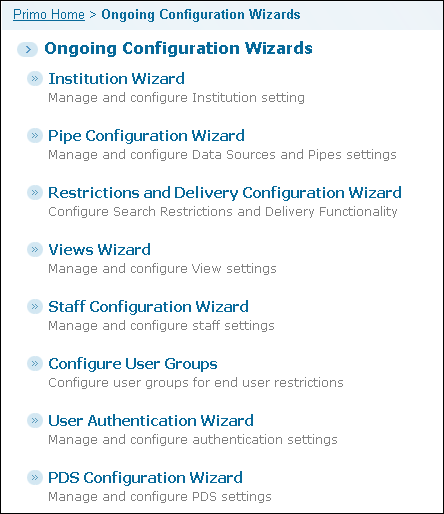
The Ongoing Configuration Wizards page allows you to update and maintain your system. For instructions on how to perform the configurations on the main page of the Ongoing Configuration wizard, refer to the following sections in this guide:
The Advanced Configuration Wizard
The Advanced Configuration page allows you to set general and search engine parameters and update configuration tables.
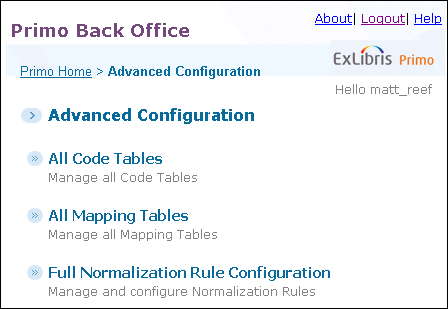
For instructions on how to perform the configurations on the main page of the Ongoing Configuration wizard, refer to the following sections in this guide:
-
General Configuration Wizard(on-premise customers only)
-
Tags and Reviews(on-premise customers only)
-
Search Engine Configurations(on-premise customers only)
The Primo Configuration Wizard
During the initial configuration, on-premise customers enter information in the Back Office based on configuration decisions that were entered in the Customer Profile for Primo document. As the Initial Configuration wizards prompt you for information regarding your system's settings, use the links provided and reference your Customer Profile for Primo document for your system's specific information. All of the system configuration decisions should be made before you begin the configuration itself to ensure that the initial configuration goes smoothly.
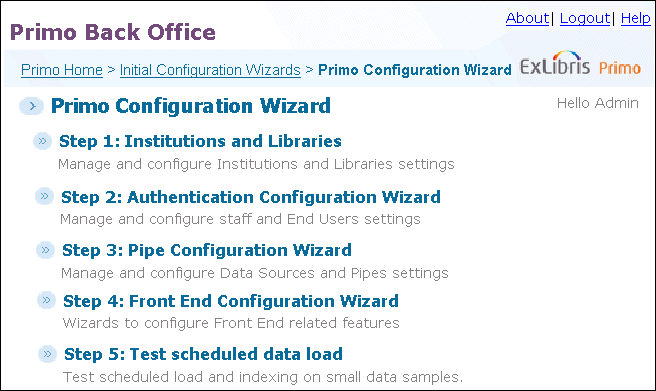
For instructions on how to perform the steps on the main page of the Primo Configuration Wizard, refer to the following sections in this guide:
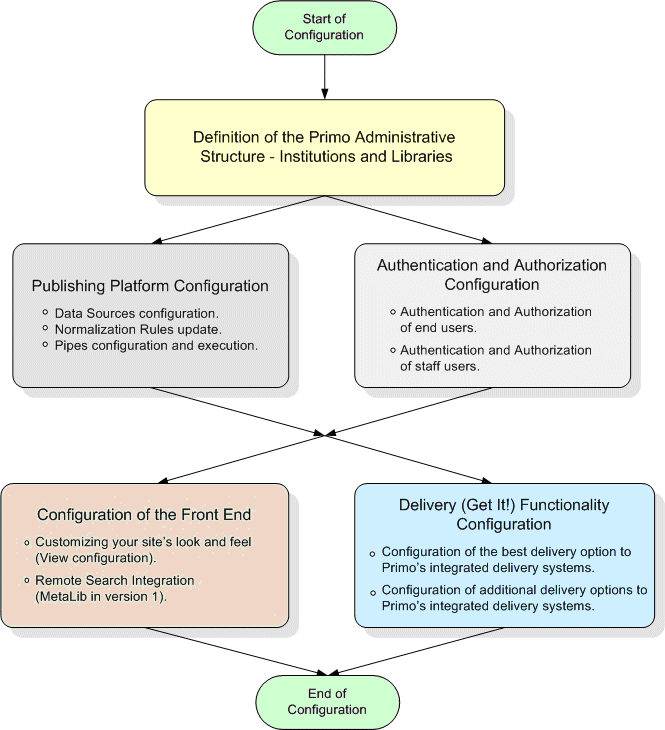
Although you must work according to these steps, there are some steps that may be performed simultaneously, as described in the following figure.
Authentication Configuration Wizard
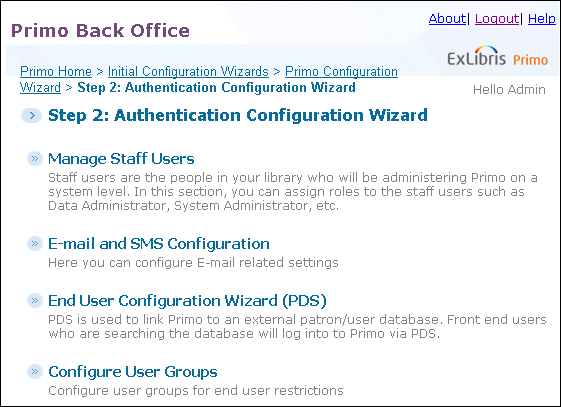
The Authentication Configuration Wizard page (see Authentication Configuration Wizard Page) enables on-premise customers to define the system’s authentication settings for the staff users, end users, and user groups.
For instructions on how to perform the steps on the main page of the Authentication Configuration Wizard, refer to the following sections in this guide:
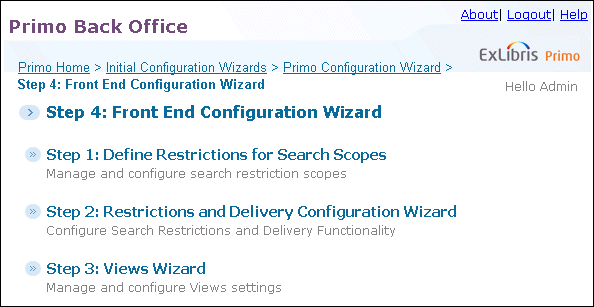
Front End Configuration Wizard
After searching and discovering the resource using the Front End, Primo indicates the availability of the resource in the source system. Then Primo interacts with the source system to provide more information about the resource or deliver the resource.
For instructions on how to perform the steps on the main page of the Front End Configuration Wizard, refer to the following sections in this guide:
Test Scheduled Data Load
The last step of initial configuration is to test the load using the Test Schedule Data Load page. Testing the load ensures that the system and all of its new settings function properly.
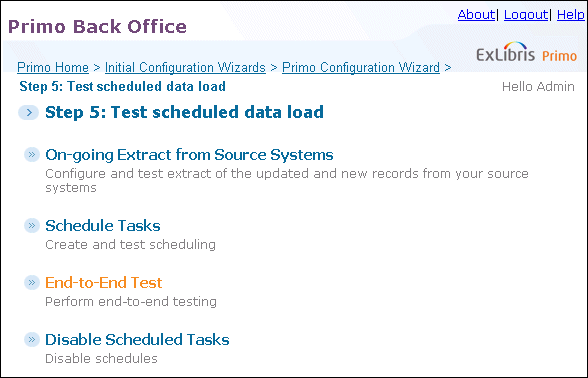
From this page, you can perform the following steps to test your scheduled data load.
-
On-going Extract from Source Systems– the On-going Extract from the Source Systems page opens, providing you with instructions on how to extract data from different delivery systems.
-
Schedule Tasks– the Schedule Tasks page opens, enabling you to determine the frequency of the pipe run.
-
End-to-End Test– the End-to-End Test page opens, providing you with instructions on how to perform end-to-end testing. End-to-end testing consists of updating records in the source system (or updating the availability statuses), extracting records from the database, running the pipe, and retrieving the data via the Front End and verifying that the information has been updated.
-
Disable Scheduled Tasks– the Schedule Tasks List page opens, enabling you to disable the scheduled task used for testing and to schedule a real full data load.
Page tags: article:topicProd:Primocontype:documGetting StartedBack Office Guideproduct:primocontent:Documentationlang:english
