
Configuring Distributed Access to Electronic Resources
Overview and configuration instructions for sets of libraries, campuses, or institutions that have access to certain portfolios or electronic collections used to configure access rights in a discovery system.
- Repository Administrator
- General System Administrator
The Network Zone can distribute access to electronic resources for the institutions of a collaborative network implementing a Network Zone. See Configuring Distributed Access to Electronic Resources When Working with a Network Zone.
However, distributing proxy access through the Network Zone is not supported for Network Zone member distribution. This option is only available for multicampus institutions. Proxies must be managed in the Institution Zone rather than the Network Zone.
Managing Inventory Management Groups

- Ensure that your libraries and campuses are defined, and the IP addresses of each library and campus is set correctly. See Adding/Editing IP Definitions for a Library.
- On the Inventory 'Available For' Management Groups page, select Add Group. The Add Group dialog box appears.
- Enter a name for the group, optionally enter a description, and select Add and Close. The group appears on the Inventory 'Available For' Management Groups page.Punctuation is not to be used in the group description.
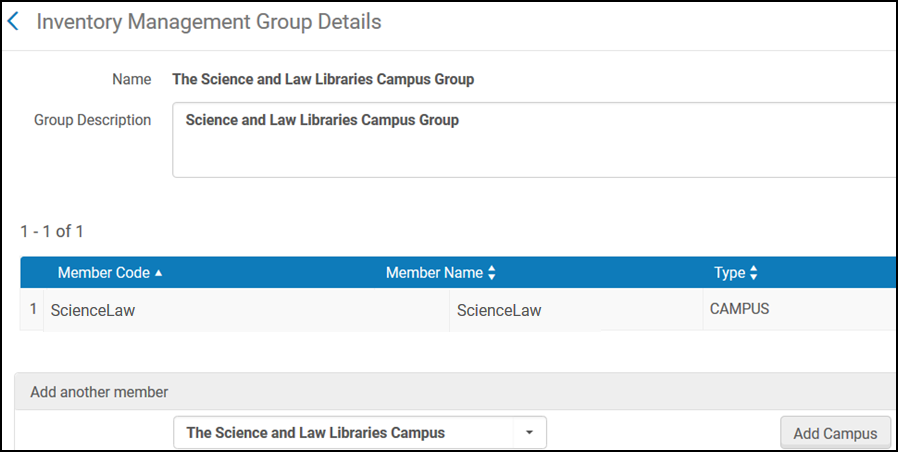
- Select Edit from the group's actions list. The Inventory Management Group Details page appears.
- Select the library and/or campus to add to the group and select Add Library or Add Campus, respectively. The library or campus is added to the group.
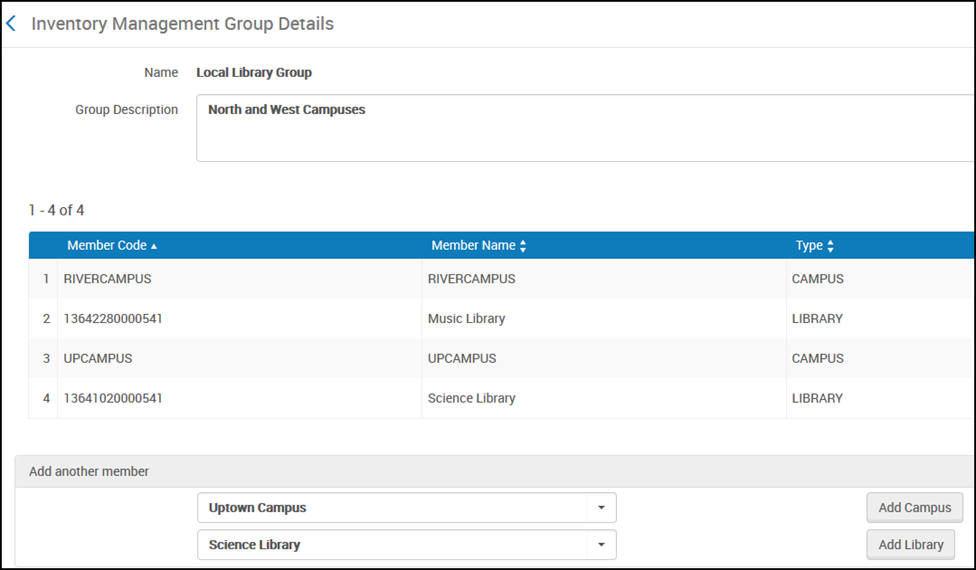
Inventory Management Group Details Page - When you are finished, select Save.The group is now configured. You can delete the group on the Inventory 'Available For' Management Groups page.
-
After configuring the group, locate the portfolios, services, or electronic collections that you want to make available only for the group and configure them. For more information, see Associating a Resource with the Inventory Management Group.
Inherited Group Settings
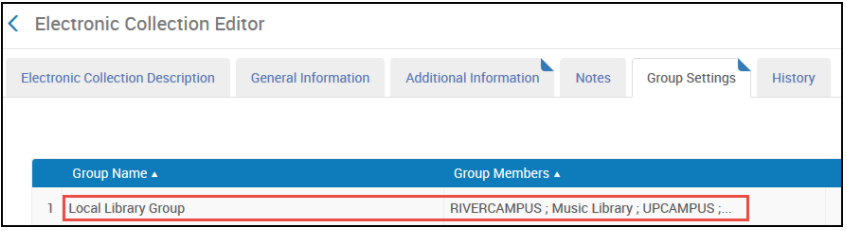
Group settings and inventory management restrictions can be defined at three hierarchical levels:Collection, Service, and Portfolio. The lowest level's settings take precedence over higher-level settings, meaning that portfolio-level settings override service-level settings, and service-level settings override collection-level settings.
By default, if no separate restrictions are applied at a lower level, portfolios inherit inventory management group restrictions from services, and services inherit them from collections. These restrictions are displayed at the top of the Group Settings tab within each service or collection. For example, a service that does not have its own group settings will inherit restrictions from its parent collection.
To apply a Group Settings Proxy for portfolios, the Group Setting, along with the Proxy, must be defined within the Group Settings tab of the electronic service.

For instance, consider the following scenario:
- A collection is available to Group A.
- Its service is available to Group B.
- If no group settings are explicitly defined for portfolios, then all resources in that collection will be available to Group B, since service-level settings override collection-level settings.
- However, if a specific portfolio under this service has group settings defined for Group C, then that particular portfolio will be available only to Group C, while the rest of the portfolios remain available to Group B.
This hierarchy ensures flexibility in managing access restrictions, allowing institutions to tailor availability at different levels while maintaining clear inheritance rules.
Availability of the electronic collection's descriptive record in Discovery is determined by the collection-level group settings.
Inventory Management Group Workflow Example
The following sections that describe working with inventory management group settings use the following example information:
- There is a campus called The Science and Law Libraries Campus:
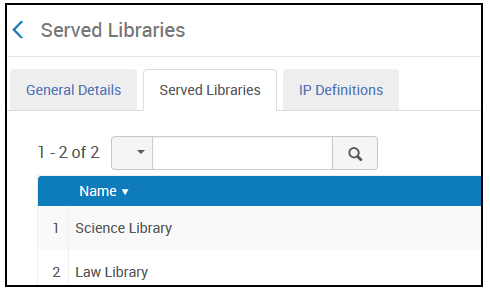
- This campus includes the Science Library and the Law Library:
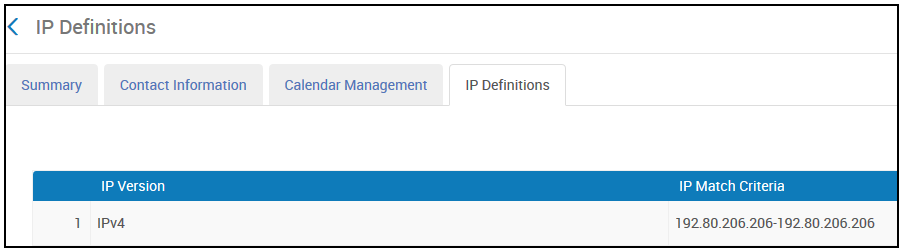
- There is another library called the Graduate Library:
Adding the Group
- On the Inventory Network Groups page (Configuration Menu > Resources > General > Inventory Network Groups), select Add Group. The Add Group dialog box opens.
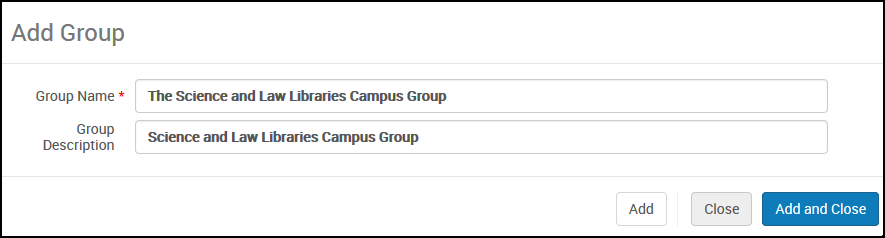
- Add the group The Science and Law Libraries Campus Group and select Add and Close.
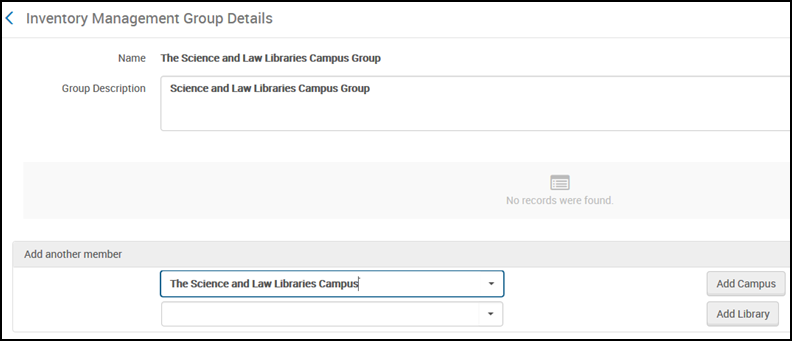
- Select Edit from the group row actions to add campuses and libraries to this group. For each campus, select the campus and select Add Campus. For each library, select the library and select Add Library.
- Select Save.
Associating a Resource with the Inventory Management Group
- Open the Law & policy portfolio in the Electronic Portfolio Editor and select the Group Settings tab.
- Select Add Settings for Group. The Available For Information dialog box appears.
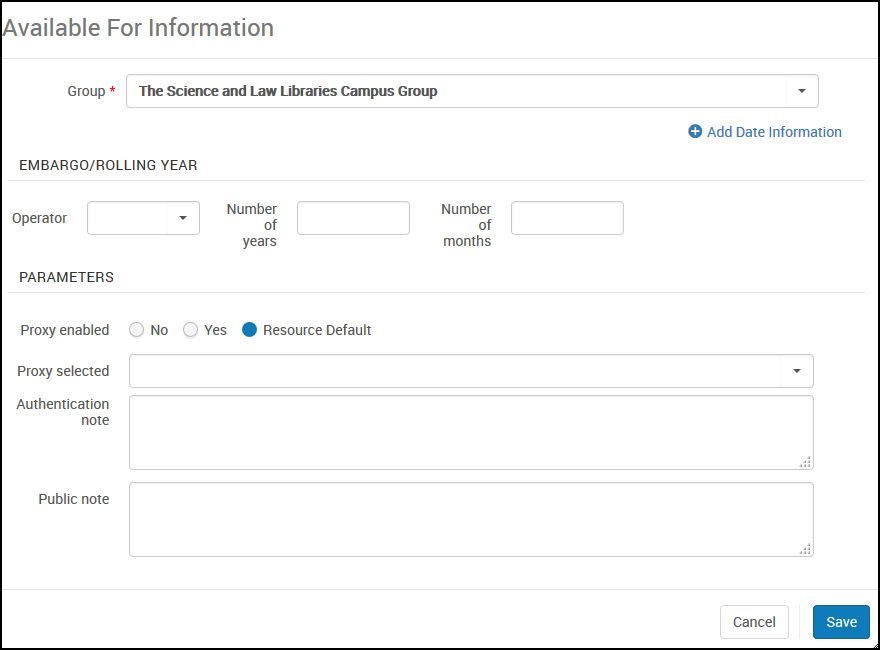
The Available For Information Dialog Box - Select the group The Science and Law Libraries Campus Group.
- If you want to narrow down the embargo/rolling year information for this group, you can do that in the Embargo/Rolling Year section. If not, the embargo/rolling year information for the group will be inherited from the higher-level resource, as defined in the Coverage tab for the resource.
- To specify separate proxy settings for this group setting, select one of the following in the Proxy enabled parameter:
- No- select to remove any resource default, and not to use a proxy.
- Yes- select to remove any resource default and select a different proxy from the list of proxies pre-defined for your institution in the Proxy Selected parameter.
- Resource Default- Use the proxy selected for the resource, as defined in the Linking tab for the resource.
The Network Zone can distribute access to electronic resources for the institutions of a collaborative network implementing a Network Zone. It is also possible to Network Zone to allocate electronic resources to specific libraries or campuses within a member Institution Zone See Configuring Distributed Access to Electronic Resources When Working with a Network Zone.
However, distributing proxy access through the Network Zone is not supported for Network Zone member distribution. This option is only available for multicampus institutions. Proxies must be managed in the Institution Zone rather than the Network Zone. Electronic resources from the network zone might use the institution's default proxy – in campus level, library level or institution level. - In the Authentication Note or Public Note parameters, you can specify a note specifically for this group setting.
- Select Save.After saving the group settings, you must also save the portfolio or service; otherwise, the group settings will not be applied.
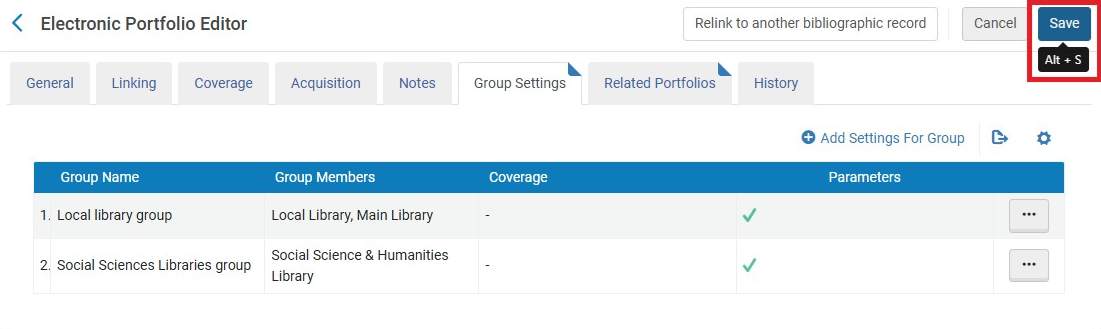 Group Settings - Saved
When Law & policy appears in a search, the results indicate that this resource is only available for a specific group.
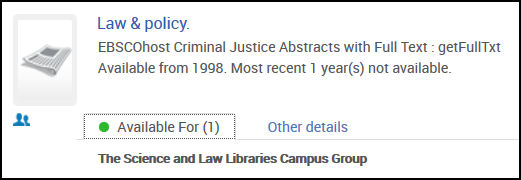
Understanding the Effects of the Inventory Management Group
A guest is someone trying to access a resource while not logged in to the system. A logged-in user can be explicitly associated with a campus in the user's definition; if the user is not associated with a specific campus, the user's IP range is checked, as for a guest.
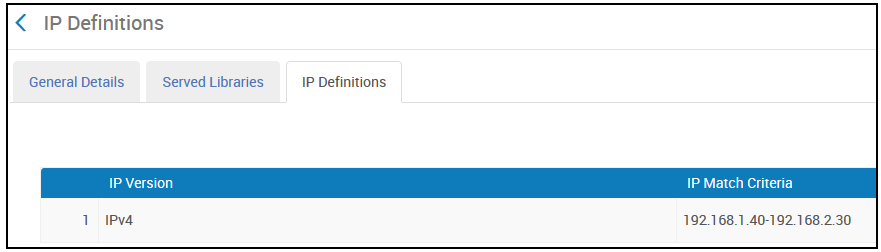
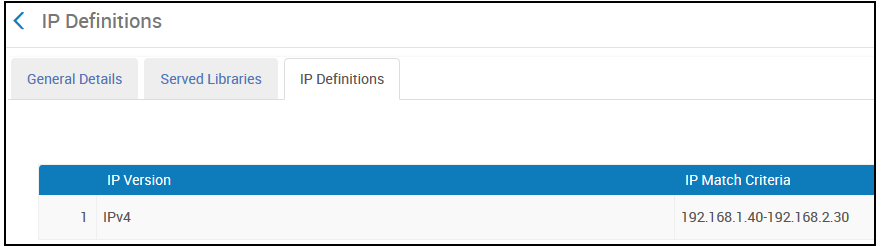
Since the management group "The Science and Law Libraries Campus Group" was added to the resource "Law & Policy," and this group includes the IP range 192.168.1.40 to 192.168.2.30, any guest with an IP address within this range can access the "Law & Policy" resource.
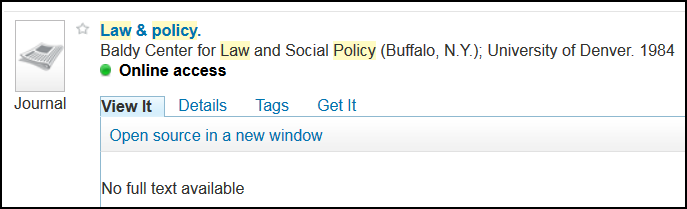
See below for an illustration of the guest's search results for Law & policy. The guest has access to the Law & policy resource.
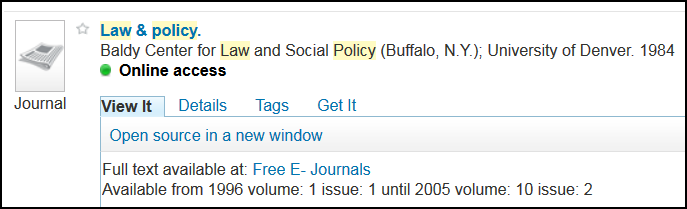
If the IP of the guest is not within the IP range defined for the campus, the guest is denied access to the electronic resource.
Associating an Electronic Collection with an Inventory Management Group
You can associate an inventory management group with an entire collection. The restriction of the collection applies to all the resources associated with the collection (unless other restrictions are defined separately for the services/portfolios).
Changes to the collection-level inventory management groups trigger a background indexing process for the collection, so depending on the collection's size, changes might take some time to be reflected in the search.
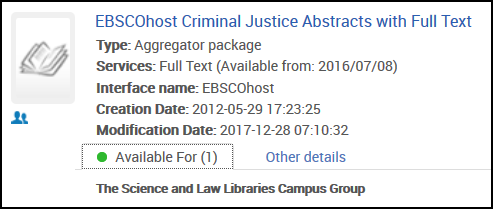
In the following example, the inventory management group The Science and Law Libraries Campus Group is associated with all the resources that are part of the EBSCOhost Criminal Justice Abstracts with Full Text electronic collection.

The repository search results show that The Science and Law Libraries Campus Group inventory management group applies at the electronic collection level and to all the resources in the electronic collection.

Limiting Access by Library
In the following example, an inventory management group is associated with the Graduate Library, not a campus. The only member of The Graduate Library Group(a management group) is the Graduate Library.
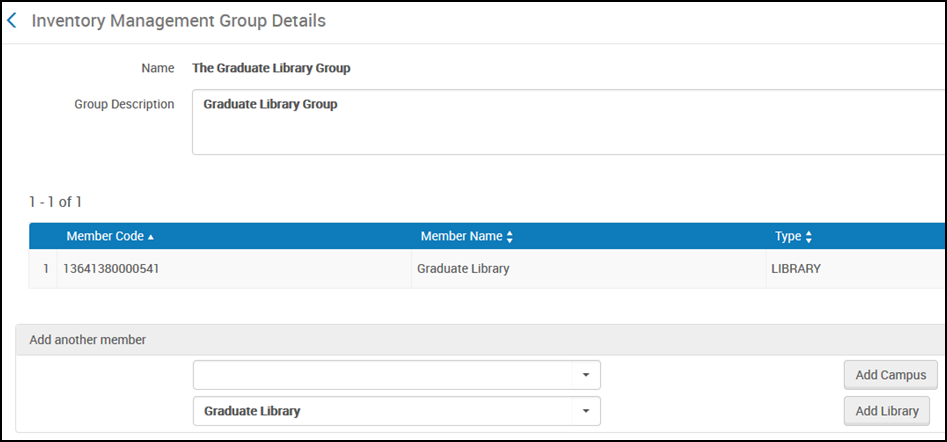
The Graduate Library has an IP address range of 192.80.206.1-192.80.206.206. When the inventory management group The Graduate Library Group is applied to a resource, only users coming from IPs within this range can access it.
In the example below,Law & policy is now also associated with the management group The Graduate Library Group.
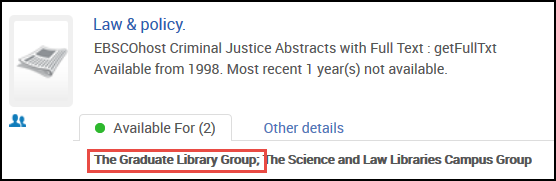
Similar to the example in Understanding the Effects of the Inventory Management Group above, if the IP of the guest is within the IP range defined for the Graduate Library, the guest is allowed access to the electronic resource Law & policy. If the IP of the guest is not within the IP range defined for the library, the guest is denied access to Law & policy.
Access Restrictions for Users Explicitly Associated with a Campus
A user can be explicitly associated with a campus. In this case, the user's explicit association is used to determine whether the user is at the campus and able to access resources restricted to the campus.
When using inventory management groups restricted to a campus:
- A guest (not logged in) can only view the resource if accessing it from an IP within the range (demonstrated above).
- If a user is logged in and is not associated with a campus, the user is able to view the resource only coming from an IP within the range (demonstrated above).
- If a user is logged in and not within the IP range, the user is able to view the resource if the user is explicitly associated with a campus that is part of the inventory management group associated with the resource.
- If a user is logged in and is not coming from an IP in the range and is not associated with a campus that is part of the inventory management group, the user is not able to see the resource.
In the following example, there is a resource that is associated with an inventory management group that includes a campus with an IP range of 192.168.1.40-192.168.2.30. The logged in patron tries to access the resource from an IP address that is not within this range.
The patron Dean Andrews comes from a different IP range and is not associated with a campus. As a result, he will have no access to the resource.

However, if the patron Dean Andrews comes from a different IP range and is associated with a campus (that is part of an inventory management group associated with the electronic resource), he has access to the resource even though he is not in the IP range.

Adding Access to Resources by Adding a Campus to an OpenURL
When a resource is restricted by campus, you can add a campus parameter to the OpenURL to enable access to the resource. When the resource is accessed with this parameter, Alma considers the request to come from within the campus named by the parameter.
In the following example, the electronic resource Law & policy is associated with the group The Science and Law Libraries Campus Group which includes the campus The Science and Law Libraries Campus.
The user is coming from outside the IP range, is a guest, and has no associated campus, but the user can specify a campus in the OpenURL. To illustrate how using the OpenURL method works, the following three examples highlight both successful and unsuccessful access to resources in Alma.
The OpenURL syntax uses the following components:
- The Alma URL begins with https://uni.alma.exlibrisgroup.com
- The Alma institution code is:EXLDEV1_INST
- The campus code for this example is ScienceLaw
Example 1:http://uni.alma.exlibrisgroup.com/view/uresolver/EXLDEV1_TEST/openurl-ScienceLaw?rft.mms_id=994387020000121
This OpenURL has the correct syntax that uses the correct campus code and provides access to the resources for the user.

Example 2:http://uni.alma.exlibrisgroup.com/view/uresolver/EXLDEV1_TEST/openurl-Law?rft.mms_id=994387020000121
Access is not provided with this OpenURL, because the wrong campus code is used.

Example 3:http://uni.alma.exlibrisgroup.com/view/uresolver/EXLDEV1_TEST/openurl?rft.mms_id=994387020000121
Access is not provided with this OpenURL. There is no campus code, and Alma correctly responds with No full text available.

Working with Primo/CDI in a Multicampus Environment
When configuring an environment in which campuses and libraries are given distributed access to electronic resources, you must configure Primo and CDI to support the availability of these resources per campus/library. Refer to the following documents to configure Primo and the CDI for a multicampus environment:
- Publishing Inventory Management Group Information to Primo
- CDI Overview
- Publishing to CDI
- Alma Multicampus Setup in Primo or Multicampus Setup in Primo VE
- Publishing to Central Discovery Index in a Multicampus or Available For Environment
- Single Activation with the Fully Flexible Setting - Consortia
- Single Activation with the EasyActive Setting - Consortia
For Primo users who work with Leganto in multicampus environments, resource availability is only displayed when a list is associated with a course.
Page tags: article:topicConfiguring Resource Managementproduct:almacontent:Documentationavailable forlang:englishinventory management groupmulticampusPrimo Central publishing
