
Configuring Courses
Configure rules for course reading lists and citations.
This page describes how to configure courses including course terms, citation matching criteria, reading list statuses, etc. For links to all the main fulfillment documentation pages see Fulfillment.
For additional configuration tasks related to course reserves, see:
- Configuring Digitization and Copyright Rules
- Configuring the Citation Default Copyright Status
- Translating Notifications
Configuring Processing Departments
- General System Administrator
- Fulfillment Administrator
Processing departments are the internal/staff units that are responsible for managing course reading lists and citations. This field is mandatory when creating a course (see Adding a Course), but it is (currently) for informational purposes only.
Each Alma institution or library can include many processing departments. Each processing department that you define at the institution level is available to the libraries within the institution.
You configure processing departments from the Department List page (Configuration Menu > Fulfillment > Courses > Processing Departments).
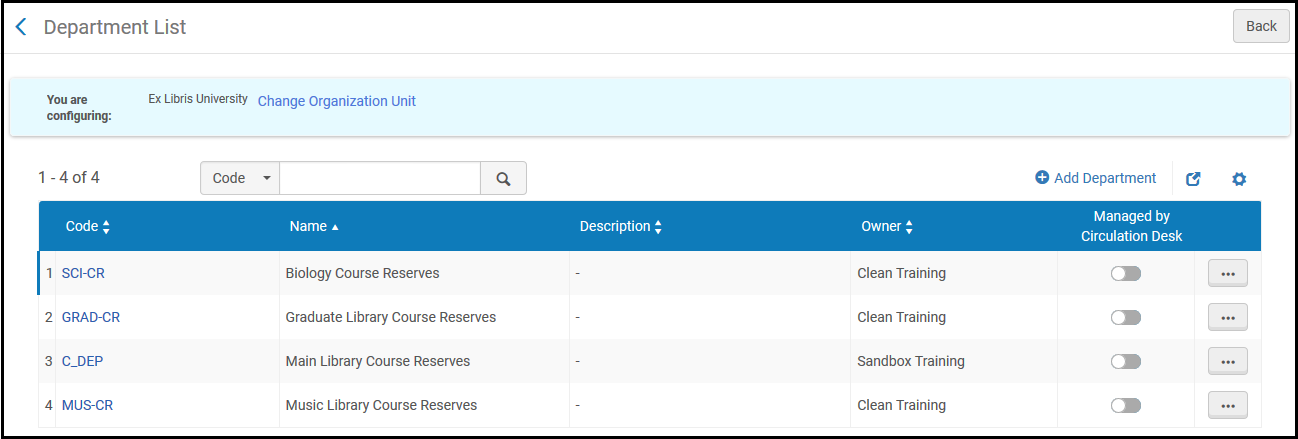
This page is the same as that used for configuring digitization departments. For instructions on adding, editing, and deleting processing departments, see Configuring Digitization Departments.
Configuring Academic Departments
- General System Administrator
- Fulfillment Administrator
Alma lets you define academic departments with which you can associate courses (see Adding a Course). For example, you can create an academic department for Exact Sciences. You can then associate a particular course (for example,Introduction to Chemistry) with this academic department. Note that you can define academic departments at the institution level only.
Academic departments may be either enabled or disabled. By default, all new academic departments are enabled. The defined academic departments appear in all Academic department drop-down lists in Alma, in the same order in which they are listed on the Code Table page on which you define them. Only enabled academic departments appear in the Academic department drop-down lists.
You configure academic departments from the Course Faculties code table (Configuration Menu > Fulfillment > Courses > Academic Departments). For more information about code tables, see Code Tables.
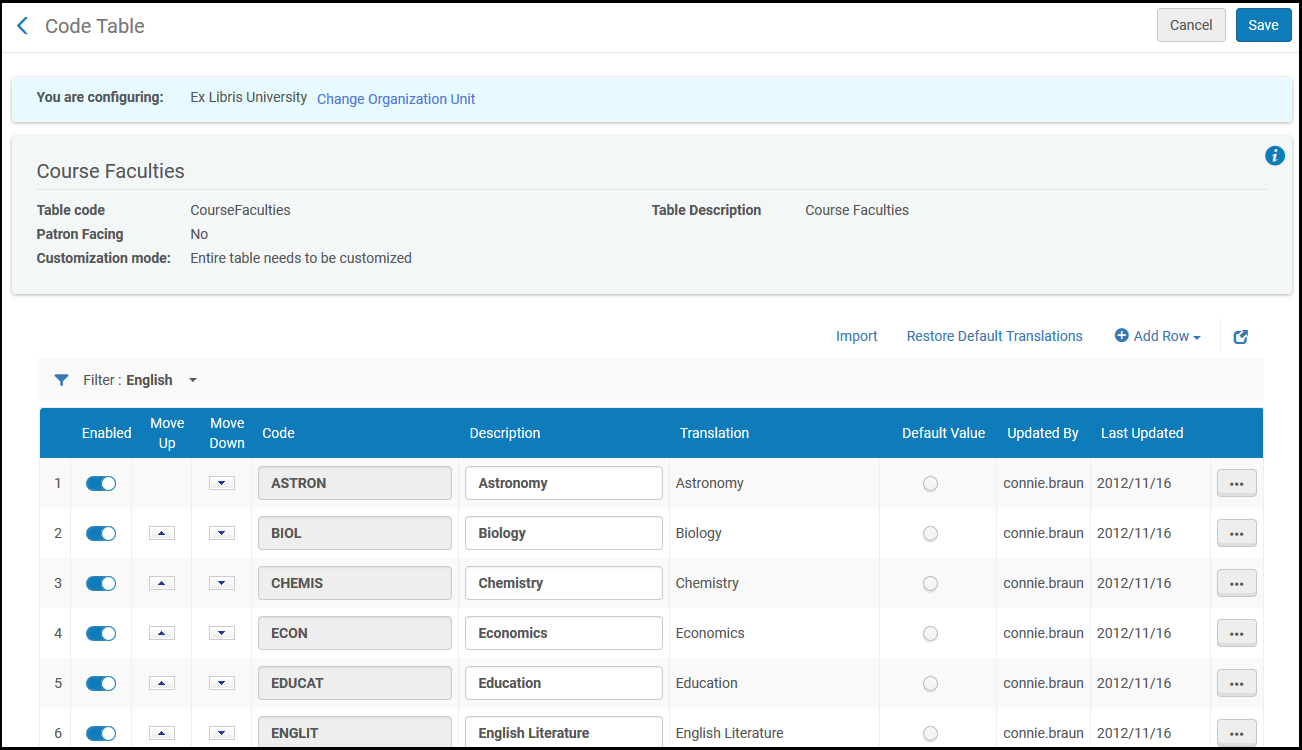
Most of the details are system-generated and cannot be edited.
You can add, enable or disable departments, or select one as the default selected department in the drop-down list.
You can import academic departments information using the Import tab in the Course Faculties code table, as follows:
- Export the file using Export > Excel(see Export to Excel).
- Make your changes and save the file. Note that there should be no duplicate lines in the Excel file.
- Select Import on the relevant page.
- In the File field, select Browse to locate the file on your computer.
- Select the file you wish to upload, then select Open.
- When the document is loaded, select Upload File.
Configuring Additional Reading List Citation Statuses
- General System Administrator
- Fulfillment Administrator
While managing reading list citations, you can assign a status to the citation (see Managing Citations). Alma comes with a number of predefined citation statuses (see Reading List and Citation Statuses in the Leganto Administration Guide). You can configure additional citation statuses. Note that you cannot remove Alma's predefined statuses.
You define additional citation statuses on the Additional Reading List Citation Statuses code table (Configuration Menu > Fulfillment > Courses > Additional Reading List Citation Statuses). For more information about code tables, see Code Tables.
See also Configuring Reading List Statuses.
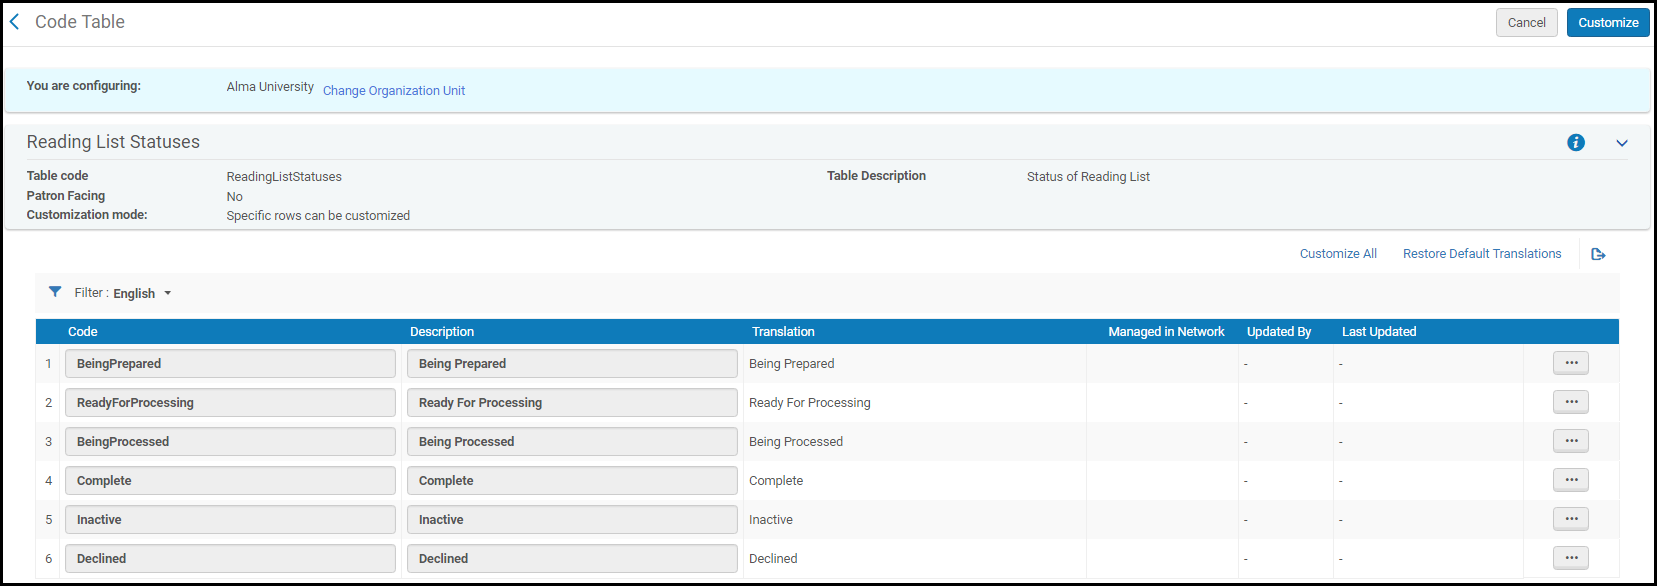
You can add, edit, and delete additional citation statuses on this page. You cannot edit or delete any system-defined statuses (which do not appear on this table). You can select a status as the default selected status in the drop-down list.
Configuring Automatic Purchasing Requests from Citations
You can configure rules to automatically create purchase requests for citations based on criteria associated with the citation, reading list, and/or course. These rules are run whenever a citation is saved (note that citation status is one of the criteria that can be checked). For more information on purchase requests, see Purchase Requests.
The rules are created on the Purchase Workflow Rules List page (Configuration > Fulfillment > Courses > Citation Processing Rules). For more information about rules tables, see Rules Tables.

Rules are checked from top to bottom and only the first matching rule applies. If no rules match, a purchase request is not created. You can enable and disable rules, change their order, edit, duplicate, or delete them. For more information about working with rules, in general, see Configuring Digitization and Copyright Rules.
The parameter MARC_incomplete_field_indicator(Configuration > Leganto > General > Settings) enables you to flag MARC records that are created from a citation, for example, when submitting a purchase request, to easily enable you to find the record and review it later. When the MARC_incomplete_field_indicator parameter is configured, the field indicated in the parameter is recorded on the MARC record. The parameter format is <MARC field number>.<subfield>.<text>. For example, if you want MARC records created from a citation to contain a 591 subfield a with the value INCOMPLETE, set the parameter to 591.a.INCOMPLETE.
The MARC_incomplete_field_indicator parameter value is added to bibliographic records created from both manual and automated purchase requests.
The new purchase request is "created by" the user that added or edited the citation.
A purchase request is not created if:
- A purchase request already exists for the citation's resource
- The reading list is not associated with a course
- No rules match the criteria
- On the Purchase Workflow Rules List page, select Add Rule. The Purchase Workflow Setup page appears.
Purchase Workflow Rule Editor Page - Enter a name (mandatory) and description for the rule.
- Enter the criteria for the rule and select Add Parameter(repeat as required; all criteria must match for the rule to trigger). Criteria are composed of the following elements:
- Name- Select one of:
- Academic Department - Whether the course has one or none of the selected academic departments
- Available in Electronic - Whether the citation's resource is already available electronically
- Citation Status - Whether the citation's status matches one or none of the selected statusesA citation's status can only trigger a rule when the citation is created; the rule will not trigger if the citation's status is edited manually.
- Citation Tag - Whether the citation's tag matches one or none of the selected types. To use these options, tags must be defined.
- Citation Type - Whether the citation's material type matches one or none of the selected types
- In Repository - Whether the citation's resource is already in Alma's repository
- Item to Student Ratio - Whether the percentage of requested items / the number of participants is higher, lower, equal to, or not equal to a certain value. The value must be between 0 and 1. For example,0.1 means 1 copy per 10 students.
- Number of Students - Whether the number of students is higher, lower, equal to, or not equal to a certain value
- Reading List Status - Whether the reading list's status matches one or none of the selected statuses
- Total Copies - Whether the total copies requested is higher, lower, equal to, or not equal to a certain value
- Operator- Select the relevant comparison operator, depending on the criteria selected for Name.
- Value- Select one or more values, or enter a value, for the criteria, depending on the criteria selected for Name.
- Name- Select one of:
- After entering one or more criteria, select in Request Format whether the requested purchase should be physical or electronic.
- When you are done, select Save.
Adding Citation Tags
Use the DSC system tags to create rules to auto-generate a purchase request:
- Digitisation Approved
- Digitisation Rejected
- Digitisation Removed
- Digitisation Sent
- Digitisation In Progress
Configuring Course Terms
- General System Administrator
- Fulfillment Administrator
Course terms appear in the Terms list field when adding a new course on the Manage Course Information page. For more information, see Managing Courses.
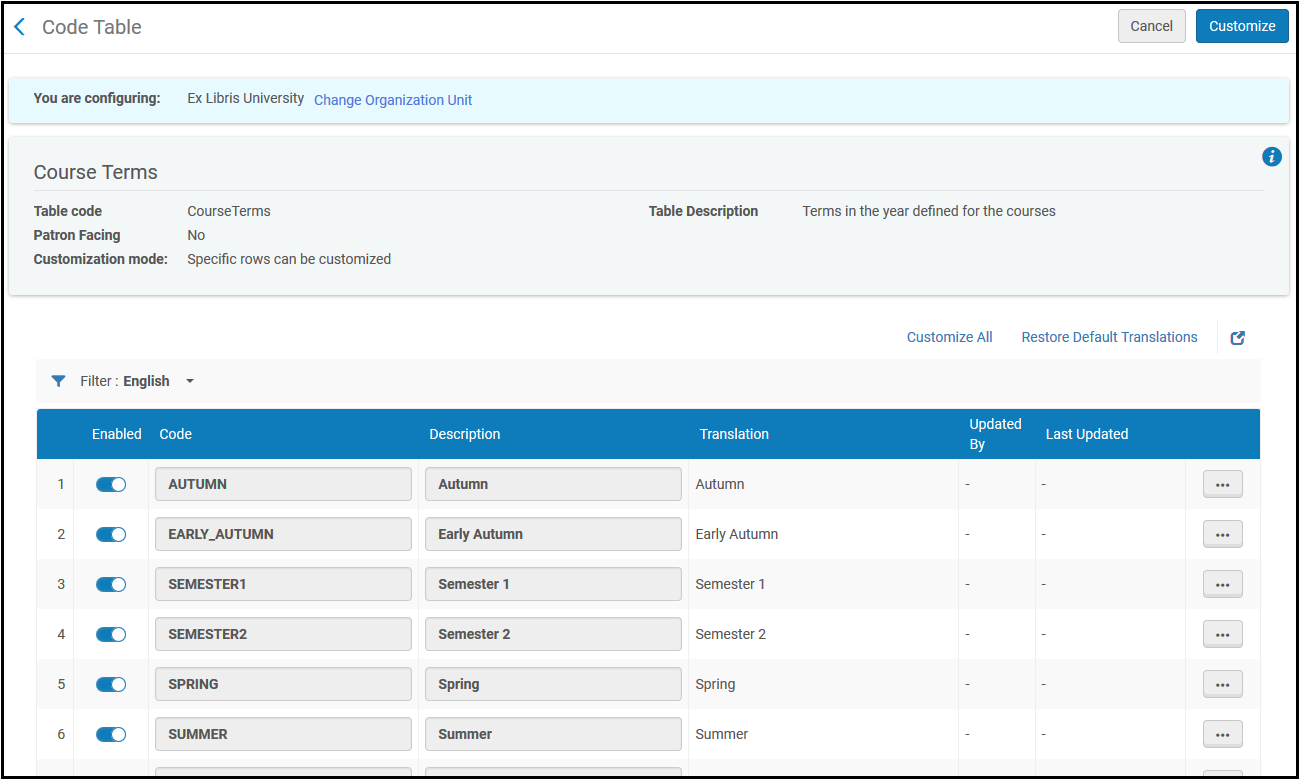
You manage course terms on the Course Terms code table page (Configuration Menu > Fulfillment > Courses > Course Terms). It is not possible to add or delete course terms; however, you can customize the course term descriptions and enable/disable the terms. For more information about code tables, see Code Tables.
Configuring Citation Attribute Types
- General System Administrator
- Fulfillment Administrator
When working with citations, you can add attributes to the citations (see Attaching Citation Attributes to Citations). Each attribute has a name and a type.
You can configure additional attribute types that you will then be able to map to attributes on the Citation Attributes Types Code Table page (Configuration Menu > Fulfillment > Courses > Citation Attributes Types). For more information about code tables, see Code Tables.
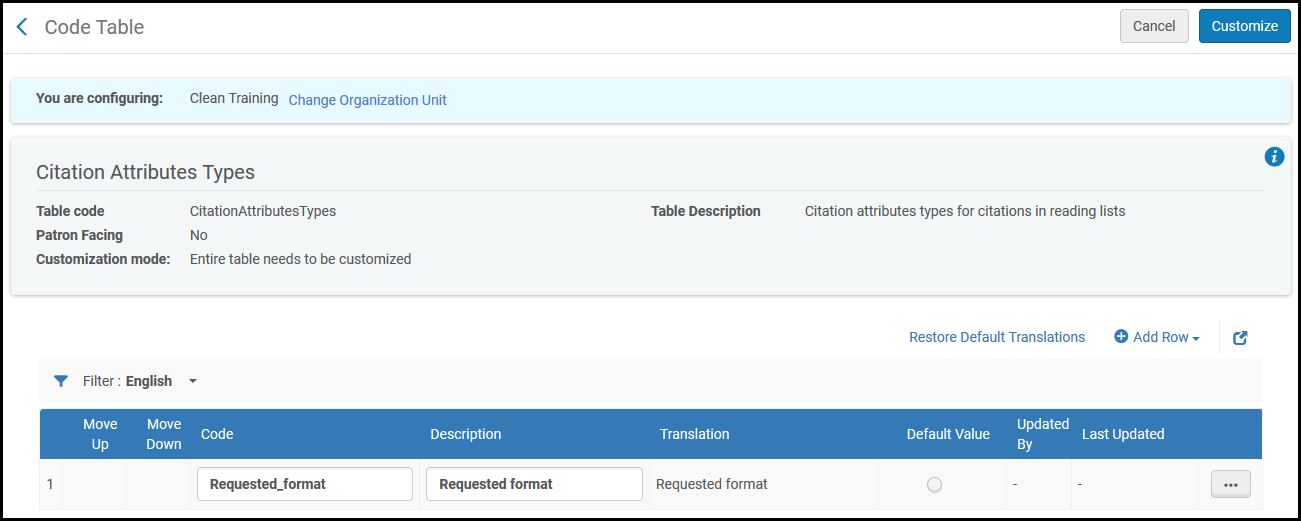
Alma comes configured out-of-the-box with the citation attribute type Requested_format. Up to five citation attributes can be added per citation attribute type.
(See also Configuring Citation Attributes and Mapping Citation Attributes to Citation Attributes Types.)
Configuring Citation Attributes
- General System Administrator
- Fulfillment Administrator
When working with citations, you can add attributes to the citations (see Attaching Citation Attributes to Citations). Each attribute has a name and a type.
You can configure additional attributes for citations on the Citation Attributes Code Table page (Configuration Menu > Fulfillment > Courses > Citation Attributes). For more information about code tables, see Code Tables. Alma comes configured out-of-the-box with the citation attributes Book, Audio, CD, and DVD.
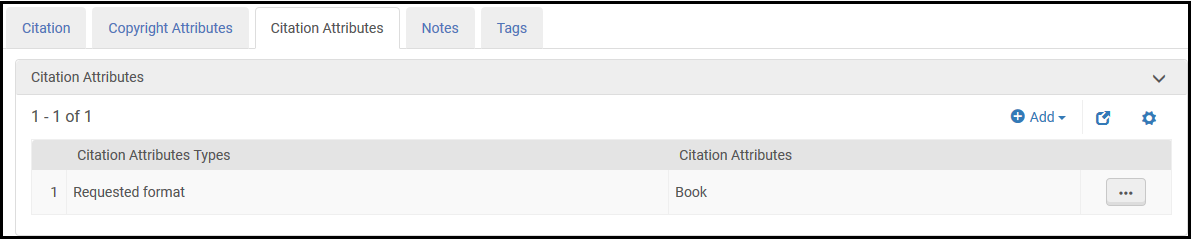
Up to five citation attributes can be added per citation attribute type.
(See also Configuring Citation Attribute Types and Mapping Citation Attributes to Citation Attributes Types.)
Mapping Citation Attributes to Citation Attributes Types
- General System Administrator
- Fulfillment Administrator
When working with citations, you can add attributes to the citations (see Attaching Citation Attributes to Citations). Each attribute has a name and a type.
Before you use citation attributes, you must map citation attributes to citation attribute types on the Citations Attributes To Citations Attributes Types mapping table (Configuration Menu > Fulfillment > Courses > Citation Attributes to Citation Attributes Types). For more information about working with mapping tables, see Mapping Tables.
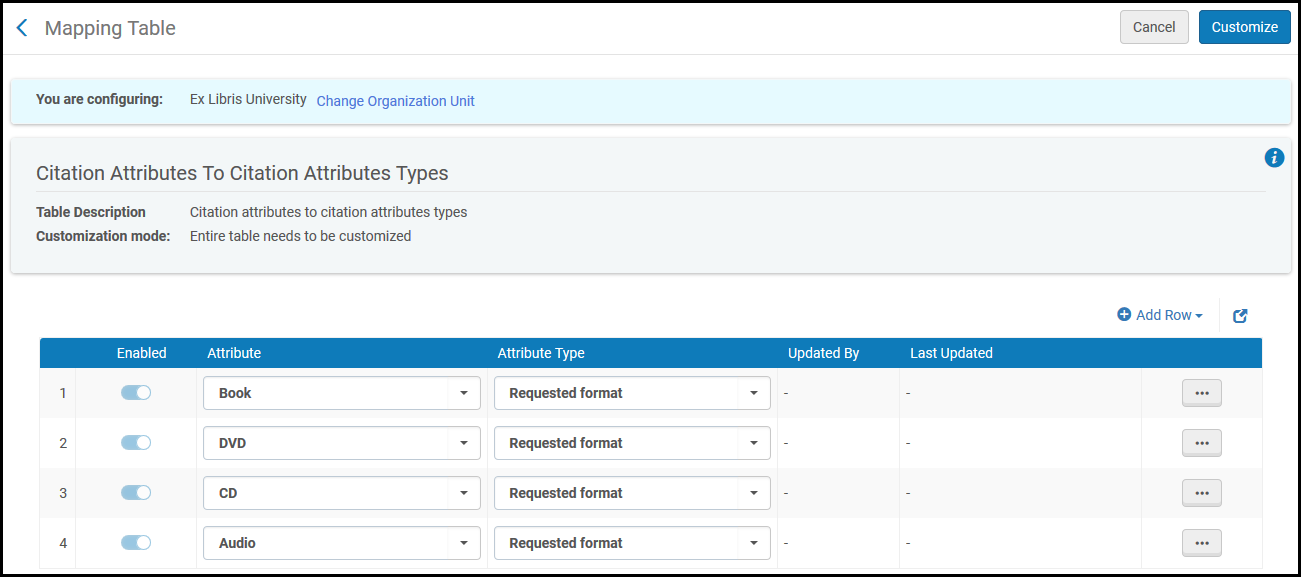
Alma comes configured out-of-the-box with the Book,Audio,CD, and DVD attributes mapped to the Requested_format attribute type.
You can add additional attribute types and attributes, and map them to each other, as needed. Up to five citation attributes can be added per citation attribute type.
(See also Configuring Citation Attribute Types and Configuring Citation Attributes.)
- On the Citations Attributes To Citations Attributes Types mapping table page, select Add Row.
- In the Attribute field, select a citation attribute.
- In the Attribute type field, select a citation attribute type to which you want to assign to the selected attribute.
- Select Add Row. The mapped values appear in the Mapping Table Rows table. The attribute is mapped to the indicated attribute type.
- When you are done, select Customize.
Configuring Citation Matching Criteria
You can configure the fields that Alma uses to match newly-entered non-repository citations to Alma inventory. For books (with ISBNs), Alma tries to match to the local Alma bibliographic record. For articles (with ISSNs), Alma tries to match using the OpenURL link resolver (with DOI). Alma tries to match all enabled fields (AND). See Managing a Citation's Attachment to an Inventory Item.
You configure the fields on the Match by Fields code table (Configuration Menu > Fulfillment > Courses > Locate Citation by Fields). For more information about code tables, see Code Tables.
You can set the priority enabled fields by using the drag icon and dragging and dropping to order the fields.
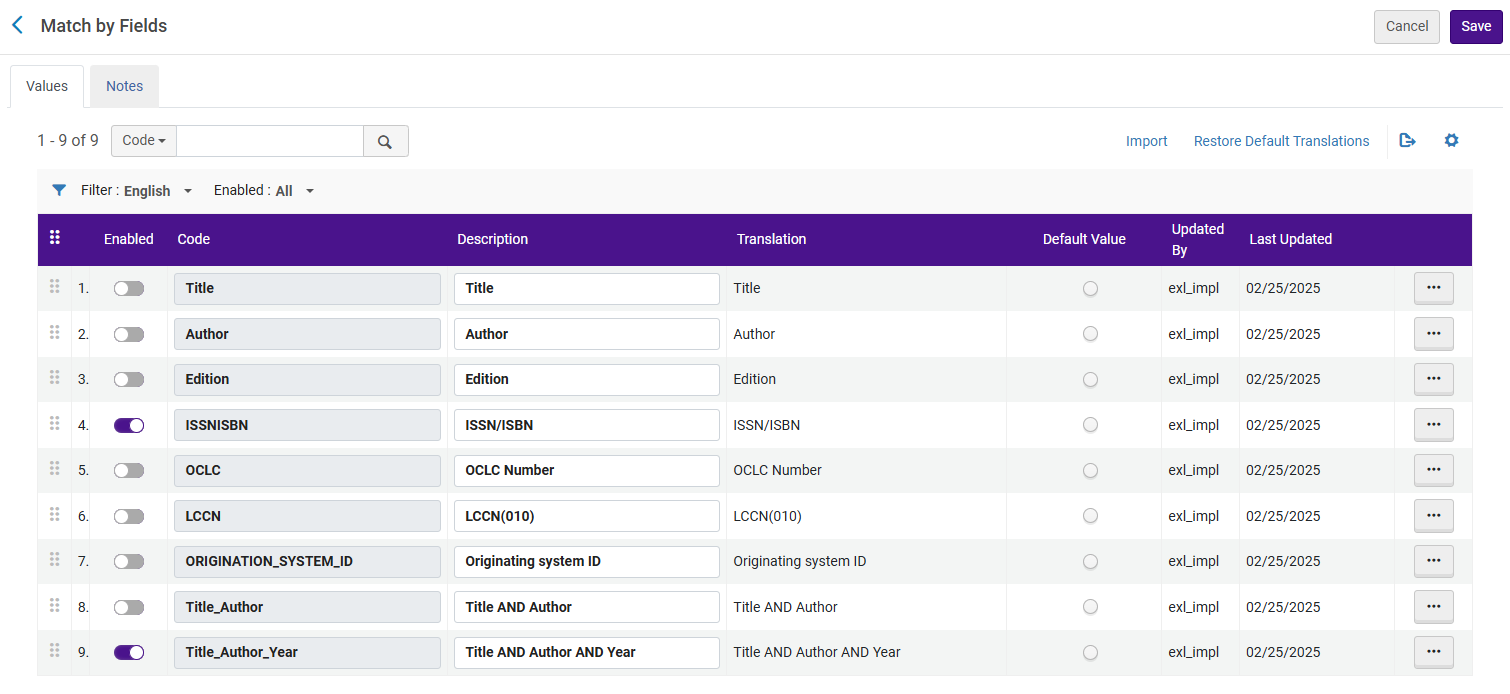
Select the gray or yellow checkmarks in the rows. Select Customize when you are done. The display order and default value features on this page are not enabled.
Originating system ID is the ID that the record had in the previous system before the record was migrated to Alma. The field appears if it was added during the migration process (for more information, contact Ex Libris customer support) and can be added manually when editing a citation (see Adding Citations to a Reading List)..
Configuring Citation and Section Tags
In addition to attributes, citations and reading list sections can use an expanded tagging system.
- Librarians can configure any amount of tags for both citations and sections in Alma.
- Public citation and section tags appear to patrons in Leganto. Instructors and librarians can view Instructor-Library tags in Leganto and Alma. Only librarians can view Library-Internal tags in Leganto and Alma. Instructors can view Library-External tags in Leganto and Alma, but they cannot add or remove them.A fourth type of tag,Internal, is created by Ex Libris and cannot be managed by customers. These tags are typically added to a section or citation as a result of a Leganto or Alma feature and used to indicate some kind of process status for that feature. They are visible to instructors in Leganto and to librarians in Leganto and Alma. Customers cannot add, edit, manage, or remove these tags.
- Librarians can view and remove citation tags to/from citations in Alma. The tags assigned to citations appear in each citation section on the Edit Reading List page (see Managing Citations).
- Tag descriptions must be at least three characters long.
- Tags that are not mapped to a specific tag type can be added to citations using the Questions feature but cannot be added manually (see Adding citation tags).
- Defining tags is a two-step process:
- Define the tag in the Tags table.
- Configure the tags as citation/section and as public/instructor-library/library-internal/library-external on the Tag Mapping table.
- To define public tags, open the Tags code table (Configuration Menu > Fulfillment > Courses > Tags). For more information about code tables, see Code Tables.
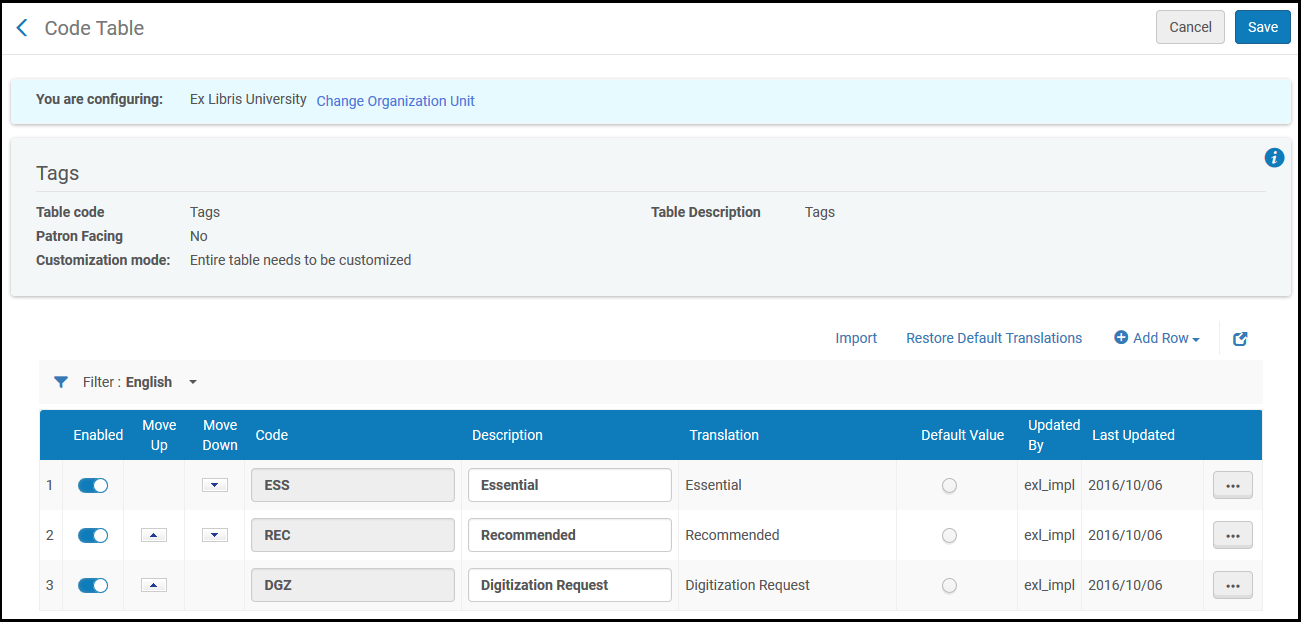 Public Tags Page
Make any required changes. Note that the Default Value field currently has no effect. When you are done, select Customize to save your changes.
- Open the Tags to Tag Mapping table (Configuration Menu > Fulfillment > Courses > Tag Mapping). For more information about working with mapping tables, see Mapping Tables.
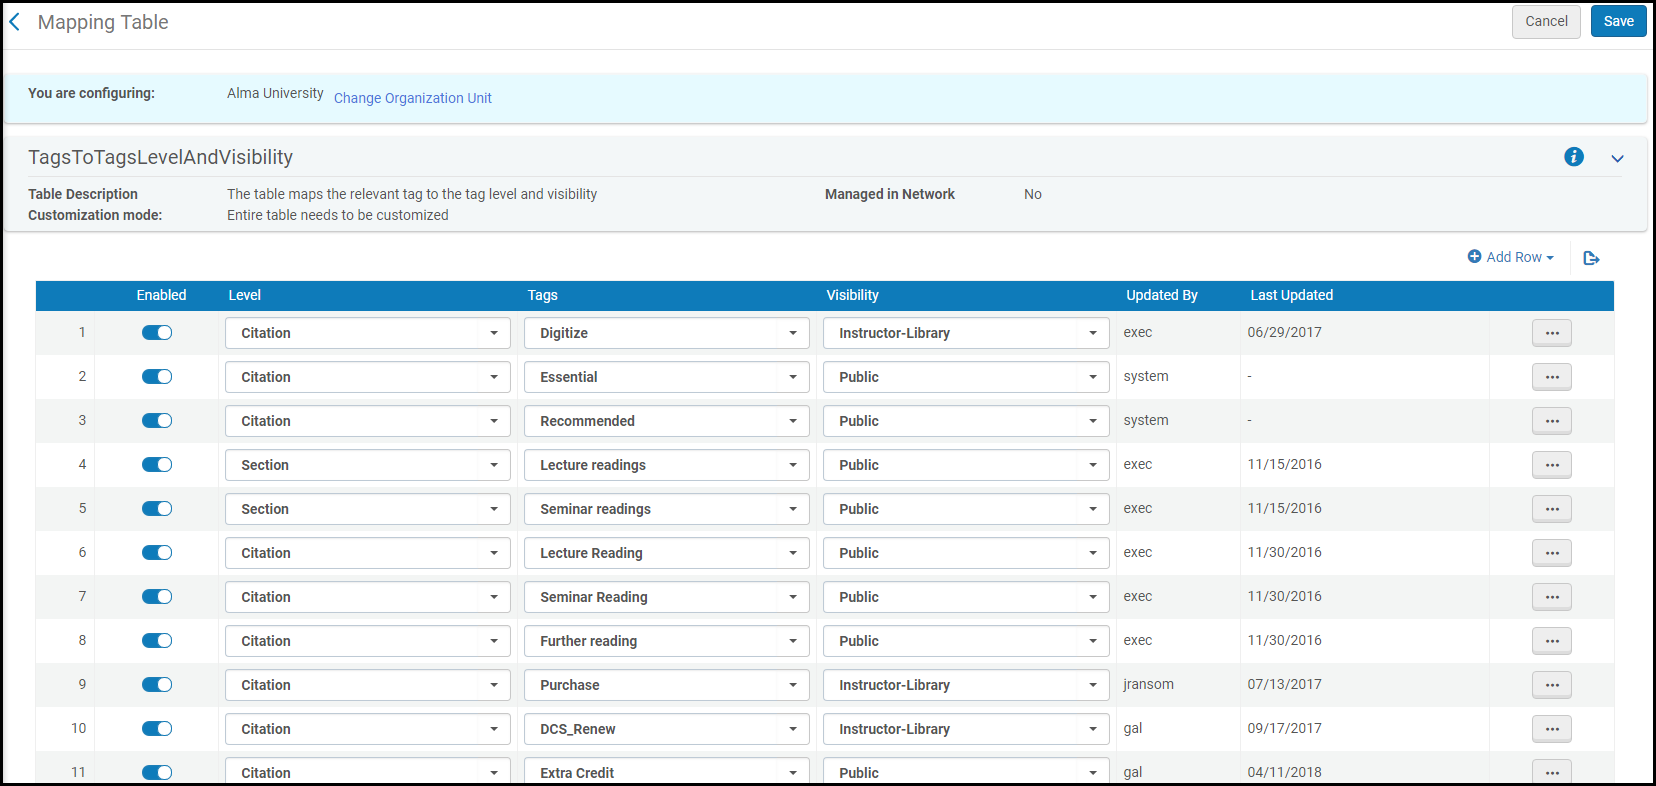 Tags to Tags Level and Visibility Page
Make any required changes. When you are done, select Save to save your changes.
- Changing this table does not affect any existing tags already attached to citations.
- (Leganto only) The order that tags appear in the drop-down list in Leganto is determined by the Leganto customer parameter tag_sorting(Configuration Menu > Leganto > General > Settings). The options are:
- group(default) – Sort in the following orders: all public tags, followed by (librarians only) all library-internal tags, followed by all library-instructor tags. Within each group, the order is determined by the order in the Tags code table.
- table – Sort only by the order in the Tags code table.
Configuring Reading List Subjects
You can view the out-of-the-box subjects available for reading lists on the Reading List Subject Tags code table (Configuration Menu > Fulfillment > Courses > List Subjects). You can add new subjects on the Additional Reading List Subject Tags code table (Configuration Menu > Fulfillment > Courses > Additional List Subjects). For more information about code tables, see Code Tables.
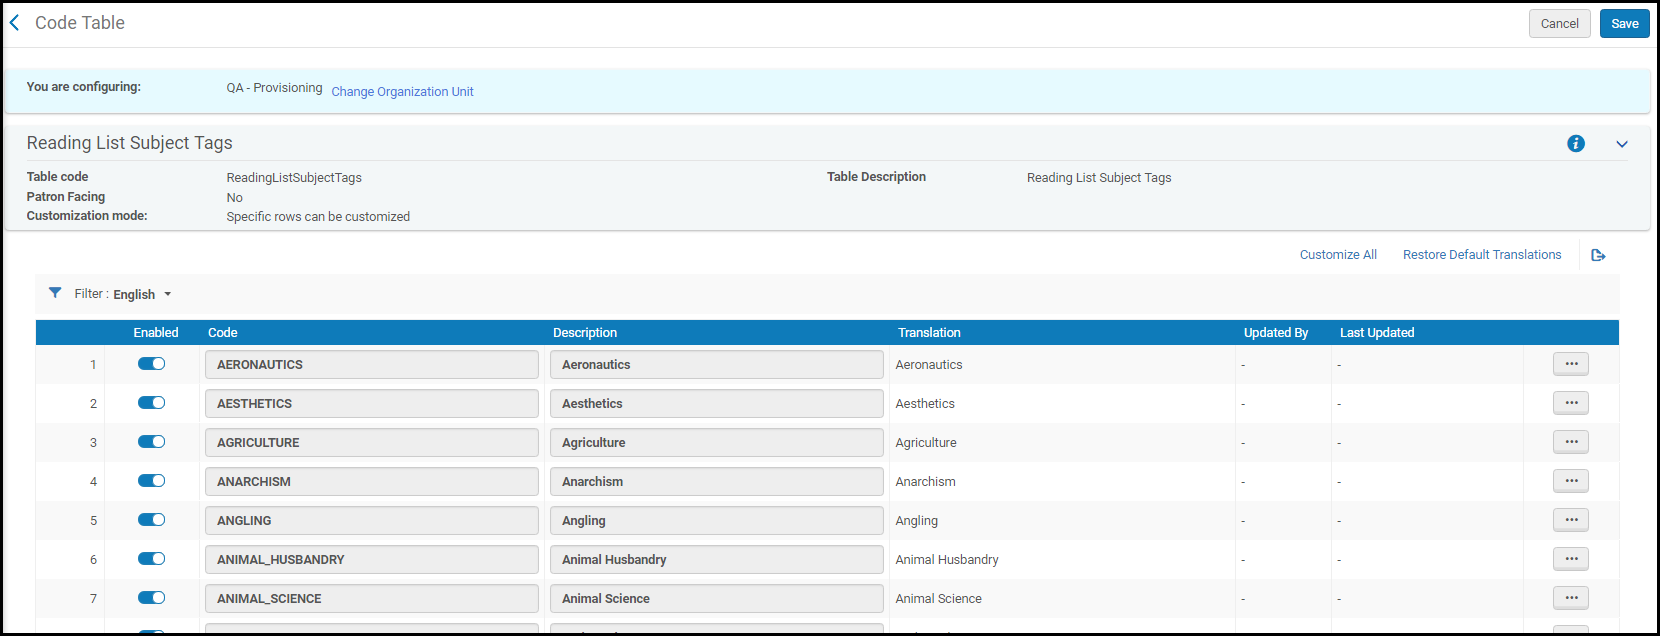
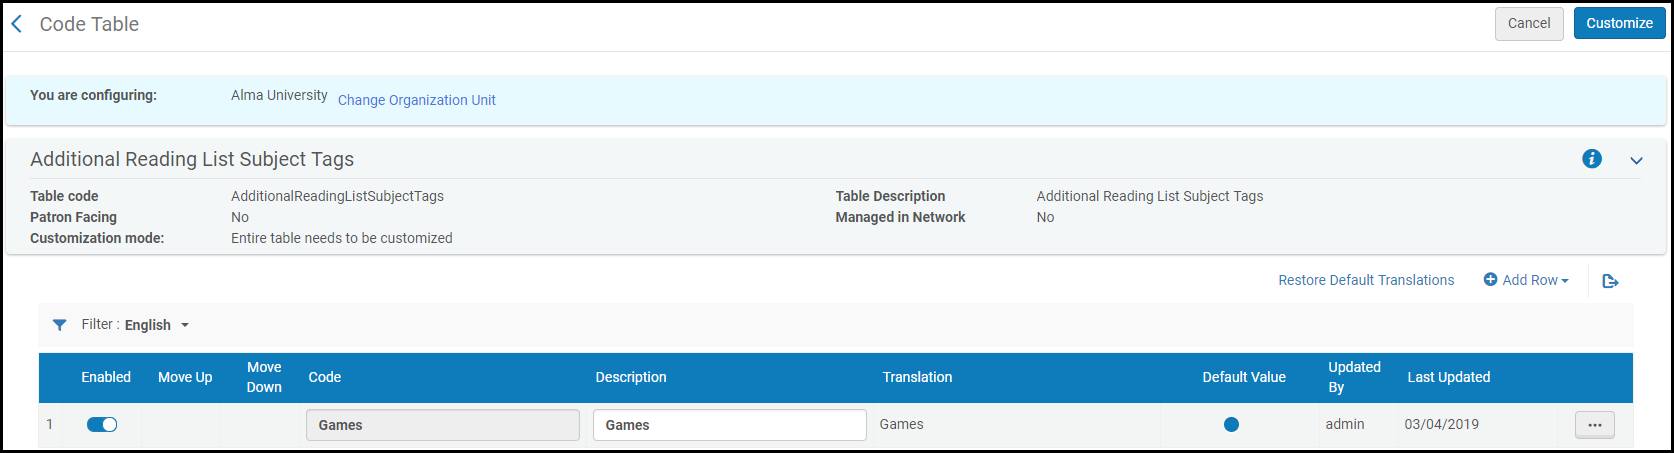
On the Reading List Subject Tags code table, you can enable, disable, or change the names of the subjects. The available subjects are as follows:
| Aeronautics | Aesthetics | Agriculture | Anarchism | Angling |
| Animal Husbandry | Animal Science | Anthropology | Aquaculture | Arboriculture |
| Archaeology | Architecture | Archives | Art | Astronautics |
| Astronomy | Atlas | Bahaism | Bible | Bibliography |
| Biography | Biology | Books | Botanic | Botany |
| Bridges | Buddhism | Building Construction | Canon Law | Cartography |
| Chemical Technology | Chemistry | Christianity | Civil Engineering | Classical Studies |
| Colonization | Commerce | Communication | Communism | Community |
| Criminology | Decorative Art | Demography | Dentistry | Dermatology |
| Design | Diplomatics | Doctrinal Theology | Drawing | Eclectic Medicine |
| Economic History | Economic Theory | Education | Education Theory | Electrical Engineering |
| Electronics | Emigration | Engineering | Environmental Science | Environmental Technology |
| Epigraphy | Ethics | Family | Finance | Fisheries |
| Folklore | Forestry | Genealogy | Geography | Geology |
| Gynecology and Obstetrics | Heraldry | Highway Engineering | History | History of Civilization |
| History of Education | Homeopathy | Horticulture | Human Anatomy | Human Ecology |
| Hunting | Hydraulic Engineering | Illustration | Industry | Information Resources |
| Inscriptions | International Law | International Migration | International Relations | Islam |
| Judaism | Labor | Law | Leisure | Libraries |
| Linguistic | Literature | Literature on Music | Local Government | Logic |
| Manners and Customs | Map | Marriage | Mathematical Geography | Mathematics |
| Medicine | Metallurgy | Microbiology | Mining Engineering | Modern Languages |
| Motor Vehicles | Municipal Government | Music | Mythology | Natural History |
| Nuclear Engineering | Numismatics | Nursing | Ocean Engineering | Oceanography |
| Ophthalmology | Otorhinolaryngology | Painting | Paleography | Pathology |
| Pediatrics | Pharmacology | Philology | Philosophy | Physical Geography |
| Physics | Physiology | Plant Breeding | Plant Propagation | Political Science |
| Political Theory | Practical Theology | Print Media | Psychology | Public Welfare |
| Race | Rationalism | Recreation | Religions | Religious Law |
| Sanitary Engineering | Science | Sculpture | Seals | Silviculture |
| Social Class | Social History | Socialism | Social Pathology | Social Problem |
| Social Reform | Social Science | Society | Sociology | Statistics |
| Surgery | Technical Chronology | Technology | Theosophy | Therapeutics |
| Transportation | Visual Art | Women and Sexuality | Writing | Zoology |
On the Additional Reading List Subject Tags code table, you can add, delete, enable, disable, or change the names of new subjects.
- Alma does not check if the codes you enter on the Additional Reading List Subject Tags code table are unique, both within the table and with the codes in the Reading List Subject Tags code table. If you enter a duplicate code, the results may be unexpected.
- If you remove a subject from the Additional Reading List Subject Tags code table that was assigned to a reading list, the subject remains assigned to the reading list until you remove it from the reading list.
Configuring Citation Material Types
You can view the secondary material types available for citations on the Reading List Citation Secondary Types code table (Configuration Menu > Fulfillment > Courses > Citation Material Type). For more information about code tables, see Code Tables.
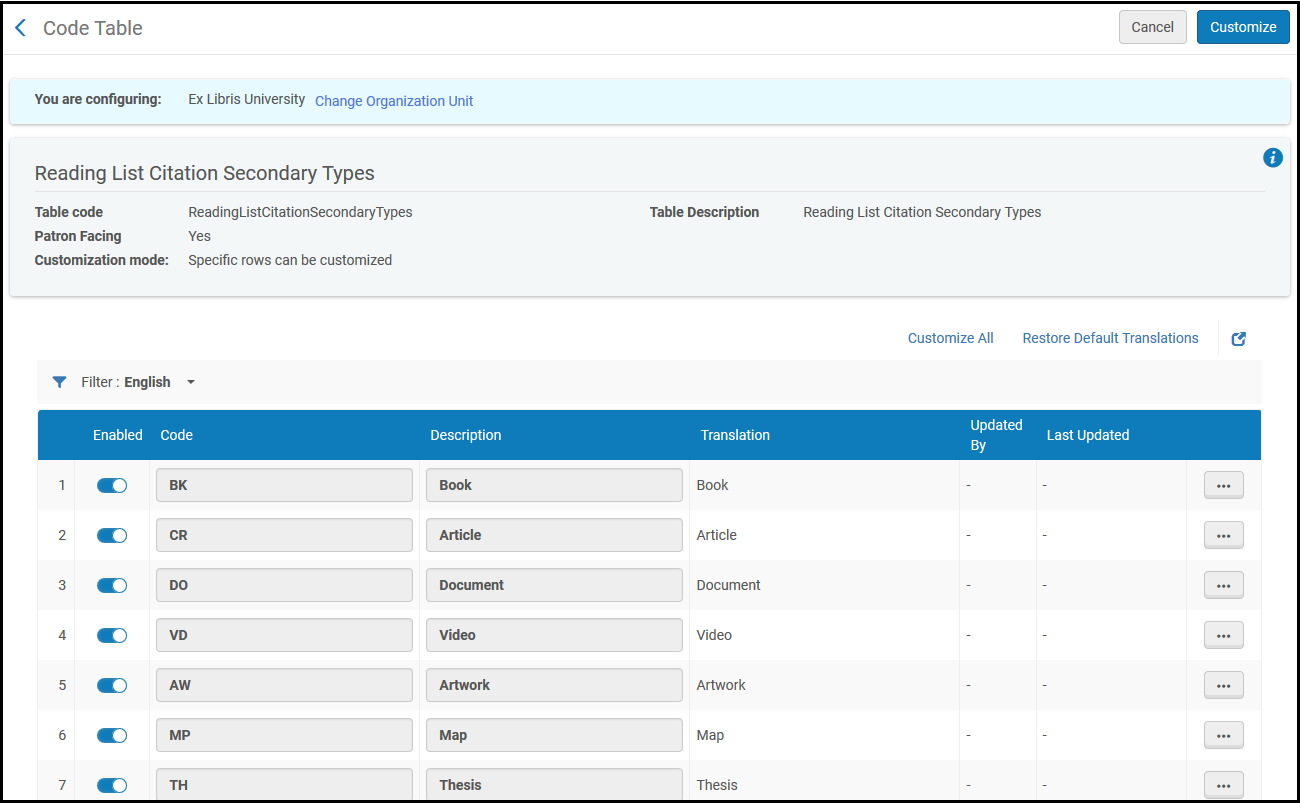
The types are:
| Abstract | Anthology | Archive | Article | Artwork | Audio Recording |
| Blog | Book | Book Chapter | Book Extract | Case | Case Study |
| CD | Computer Program | Conference | Conference Paper | Database | Dissertation |
| Document | DVD | E-book | Electronic Article | Eoffprint | Government Document |
| Grant | Image | Interview | Journal | Legal Document | Legislation |
| Letter | LibGuides | Manuscripts | Map | Music | Newspaper |
| Newspaper Article | Note * | Other | Pamphlet | Patent | Poem |
| Presentation | Reference Entry | Research Dataset | Review | Score | Series |
| Standards | Statistical Data Set | Technical Report | Text Resource | Thesis | Transcript |
| Video | Website | Working Paper |
* Citations of type Note(citations whose material type is set to Note) are added by instructors in Leganto. They are used to provide information to the students who are viewing the reading list, and do not need to be fulfilled by the library staff. You can only edit or delete them in Alma.
Configuring Reading List Statuses
- General System Administrator
- Fulfillment Administrator
While managing a reading list, you can assign a status to the reading list (see Managing Reading Lists). Alma comes with a number of predefined reading list statuses (see Reading List and Citation Statuses in the Leganto Administration Guide). You can change the name of the predefined statuses and you can add additional reading list statuses. Note that you cannot remove Alma's predefined statuses.
You configure reading list statuses on the Reading List Statuses code table (Configuration Menu > Fulfillment > Courses > Reading List Statuses). For more information about code tables, see Code Tables.
You can change the names of the reading list statuses on this page. You cannot edit or delete any system-defined statuses.
You add additional reading list statuses on the Additional Reading List Statuses code table (Configuration Menu > Fulfillment > Courses > Additional Reading List Statuses).
See also Configuring Additional Reading List Citation Statuses.
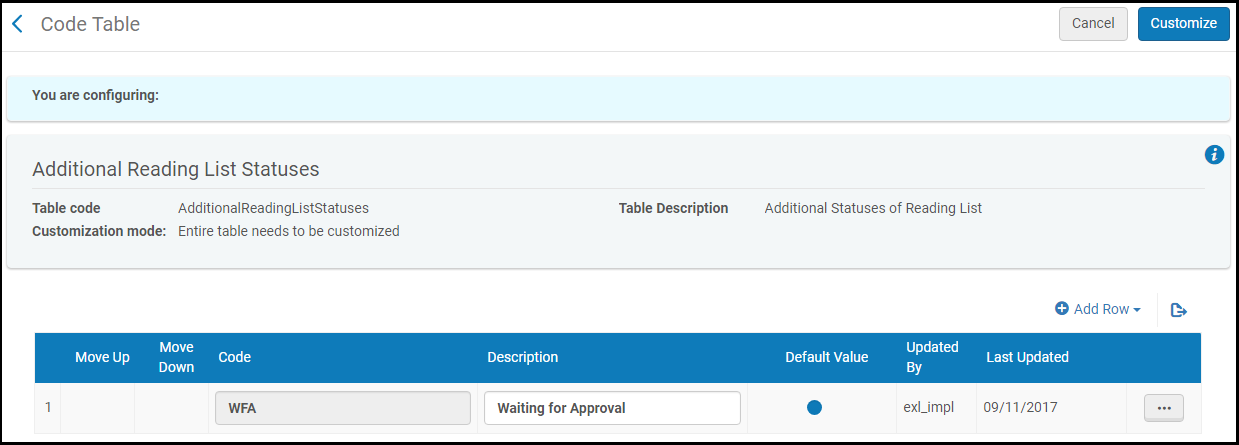
You can add, edit, and delete additional reading list statuses on this page. The default radio button has no effect on this page.
- Alma does not check if the codes you enter on the Additional Reading List Statuses code table are unique, both within the table and with the codes in the Reading List Statuses code table. If you enter a duplicate code, the results may be unexpected.
- If you remove a subject from the Additional Reading List Statuses code table that was assigned to a reading list, the status remains assigned to the reading list until you remove it from the reading list.
Mapping Bibliographic Record Fields to Citation Fields
The fields in a citation are copied from bibliographic records when a) you create a citation from a repository record or b) a resource locate is successfully performed (manually or automatically) on the citation, thereby connecting the citation to a repository record.
The BIB to Citation Normalization feature now supports both MARC 21 and UNIMARC formats.
Mapping fields is done using normalization rules, which contain a condition and one or more actions to be applied to records. The syntax for these rules is described in Normalization Rule Syntax. For a quick view of the default mapping, see Repository Fields Used to Overwrite Citation Fields.
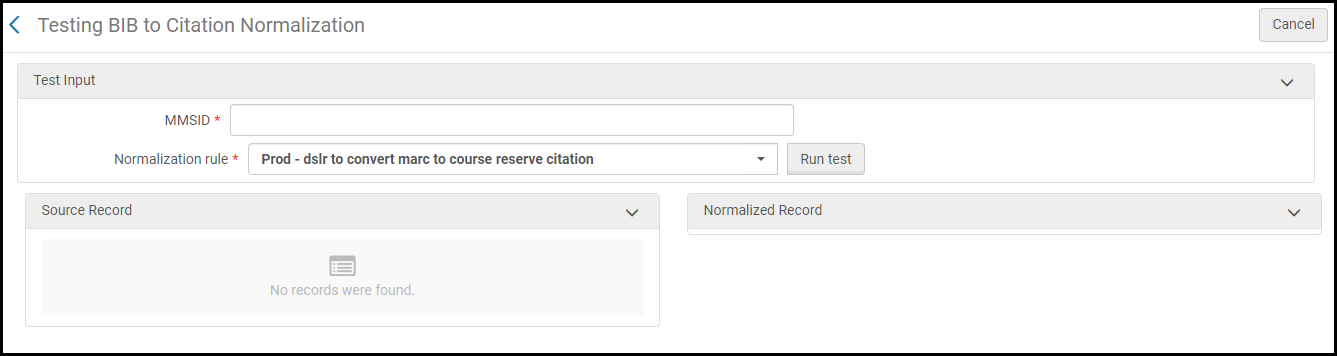
In the Bibliographic Mapping Rules page (Configuration Menu > Fulfillment > Courses > Bibliographic Mapping Rules), you can select to edit a set of test rules that you can then test on the Test BIB to Citation Normalization page (Configuration Menu > Fulfillment > Courses > Test BIB to Citation Normalization). When you are happy with the results, copy your changes to the production rules on the Bibliographic Mapping Rules page (and optionally test them again on the Test BIB to Citation Normalization page).
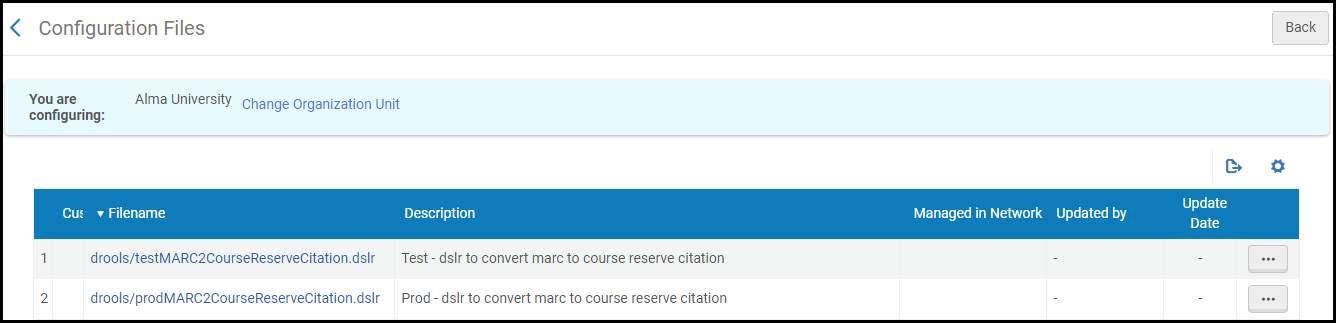
- In the Bibliographic Mapping Rules page, select Customize in the row actions list for the test rules (Test - dslr to convert marc to course reserve citation /Test - dslr to convert UNIMARC to course reserve citation). An edit page appears.
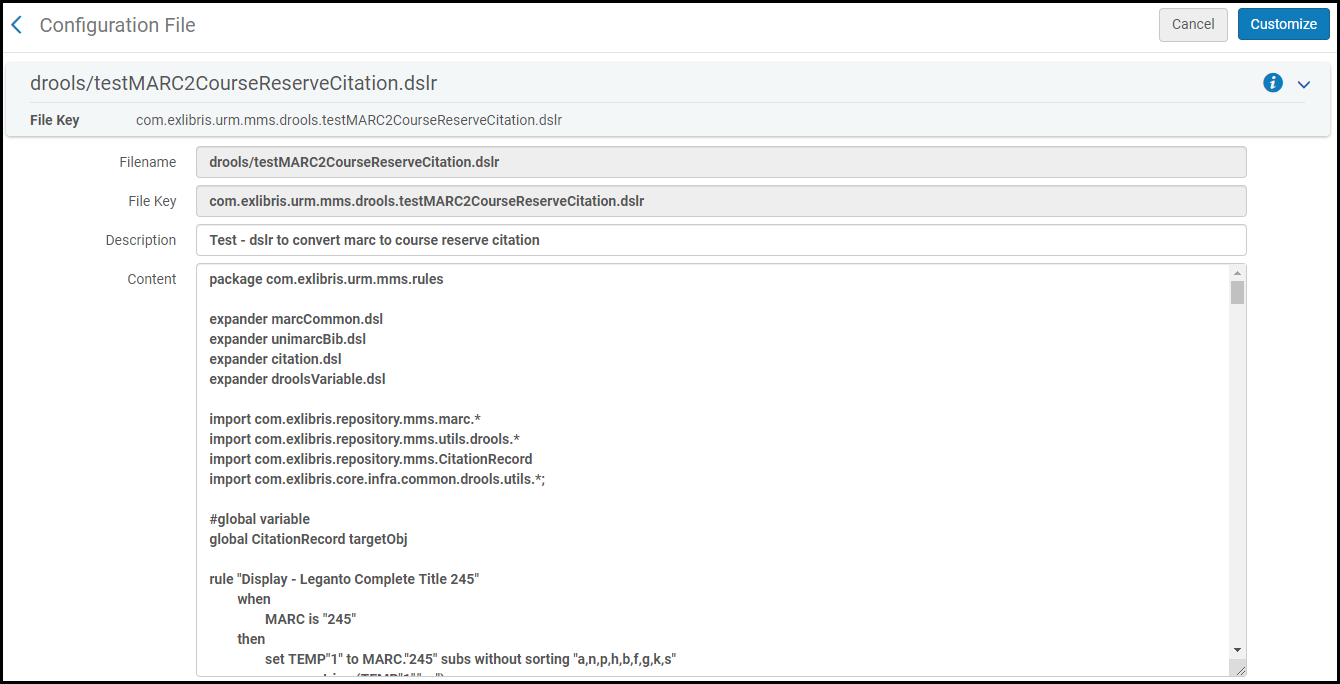 Bibliographic Mapping Rules Edit PageOn this page, do not change the filename or file key. In the content, do not change any lines in the file above the file rule (from the first line until the line global CitationRecord targetObj).
 - Add, edit, or delete rules in the content as required. For assistance, see Normalization Rule Syntax. When you are done, select Customize.
- On the Test BIB to Citation Normalization page:
- Enter the MMS ID of a record to test.
- Select the test normalization rule Test - dslr to convert marc to course reserve citation /Test - dslr to convert UNIMARC to course reserve citation.
- Select Run Test. The source fields of the bibliographic record appear in the Source Record pane, and the citation fields derived from the record appear in the Normalized Record pane.
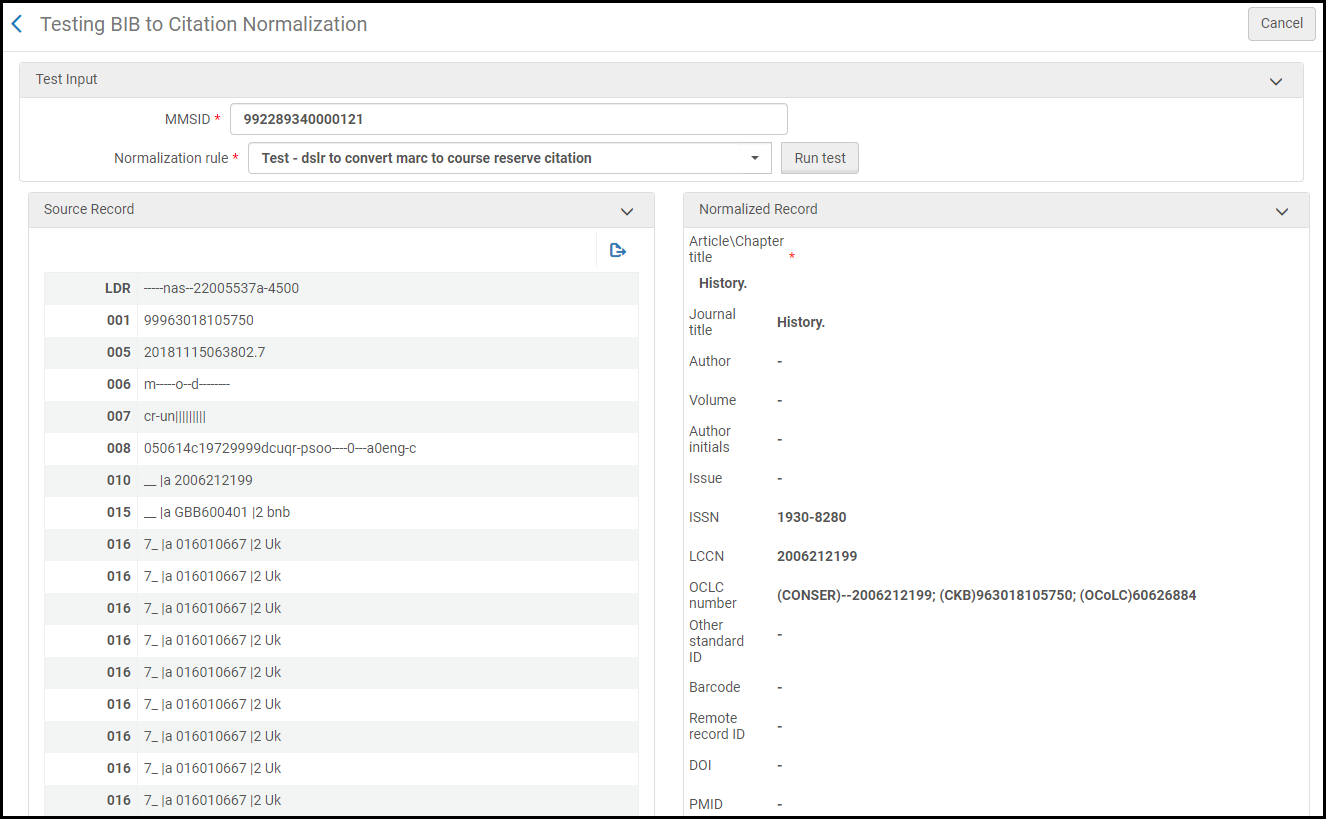 Test BIB to Citation Normalization Page, After Run
- If everything appears correctly, return to the Bibliographic Mapping Rules page, copy the changes from the test rules to the production rules (Prod - dslr to convert marc to course reserve citation /Prod - dslr to convert UNIMARC to course reserve citation) and save the changes.
- Optionally ensure that the rules work correctly by testing the production rules on the Test BIB to Citation Normalization page.
Page tags: article:topicproduct:almacontent:Documentationlang:englishcitation attributeacademic departmentprocessing departmentreading list citation statuscourse termcitation attribute typecitation matching criteriacitation and section tagsconfigure coursesautomatic purchase requestsautomatic purchasing requests
