
Upload Electronic Holdings from Elsevier
Overview for importing Elsevier holdings and instructions for configuring an upload electronic holdings type of integration profile.
You can both import and continuously update Elsevier electronic holdings by automatically retrieving the institution-specific holdings using an integration profile.
When uploading holdings using the Elsevier Upload Electronic Holdings integration profile, multiple Excel lines of the same ISSN/ISBN and with different coverages are concatenated and uploaded as one portfolio with multiple coverages.
Elsevier autoholdings transitions from ISSN/ISBN matching to a unique key matching approach. This change aims to reduce multi-match situations and enhance the autoholdings process.
All holdings, including local coverage, will be overwritten by the coverage in the vendor's file.
Prior to running an Elsevier integration profile job, you need to activate certain electronic collections. See Activating the Elsevier Electronic Collections from the Alma Community Zone for more information.
For more information on setting up continuous update for Elsevier portfolios using an Integration Profile, see this presentation(a .pptx file).
Creating the Elsevier Integration Profile
- Obtain an institution token from Elsevier. You can create an Elsevier token using the Elsevier admin tool. For more information, see Elsevier Trusted Partners.
- Confirm that the Elsevier collections for which you are updating holdings are active collections in Alma. See Activating the Elsevier Electronic Collections from the Alma Community Zone for more information.
- On the Integration Profile List page (Configuration Menu > General > External Systems > Integration Profiles) select Add Integration Profile to open the External System wizard for configuring an integration profile.

- In the Integration type field, select Upload Electronic Holdings. The other fields on the page change to reflect your selection.
- In the Vendor field, select ELSEVIER.When you run the Upload Electronic Holdings integration profile, the job report naming convention reflects the vendor option that you select for this parameter.
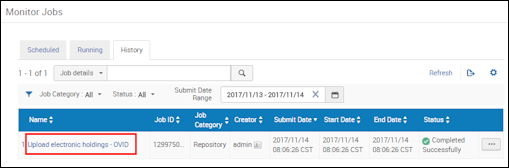
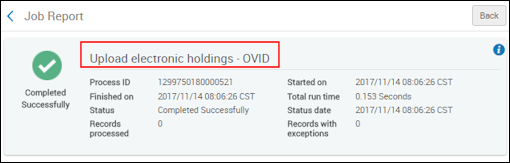
- Add a description (optional) and select Next. The second page of the wizard appears.
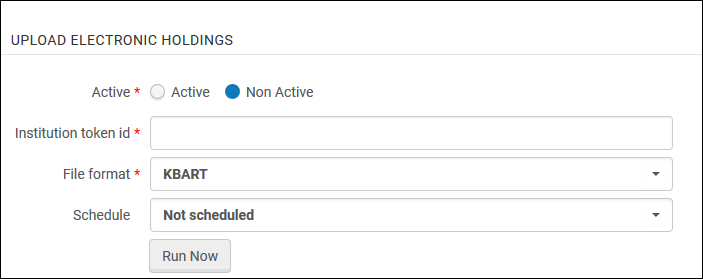
- Complete the Upload Electronic Holdings configuration section using the information in the table below.
Upload Electronic Holdings Section Parameter Description Active
Select Active to make this an active profile. The default setting is Inactive.
Institution token id
Enter the institution token ID that you received from Elsevier.
File format
Select the KBART file format.
Group
Use this parameter to select one or more groups from the list of multi-campus options in the drop-down list. This parameter is optional, so you may also choose to leave it blank.
The Group parameter appears when you have the multi_campus_inventory_management customer parameter set to true.
With the multi_campus_inventory_management customer parameter set to true, you can have multiple Elsevier integration profiles. When you have obtained multiple Elsevier token IDs from Elsevier, you may want to create multiple integration profiles using that identification information.
Note that when you have more than one active Elsevier integration profile with one or more multi-campus selections made for the Group parameter, any additional active Elsevier integration profiles must have one or more multi-campus selections made. In this situation, the Group parameter may no longer be left blank.
When the Elsevier integration profile job is run and multi-campus group information was configured, the multi-campus group information appears in the job report.
Schedule
Select the scheduling option that you prefer to have the integration profile job run automatically.When you have the multi_campus_inventory_management customer parameter set to true, and multiple Elsevier integration profiles, the first scheduling option that you select and save applies to all the subsequent, active Elsevier integration profiles that you create. Note that when the scheduled job begins to run, all of the Elsevier integration profiles that are set to Active are handled together by the job run. Any Elsevier integration profiles set to Inactive are not handled as part of the scheduled job run. -
Save the profile using one of the following options:
- Select Save. The integration profile is scheduled and appears in the list of scheduled jobs (see Viewing All Scheduled Jobs).
- Select Save and Run Now. This saves your profile settings and immediately queues the upload to run. The Save and Run Now button also appears on the Actions tab when you edit the profile. Note that when you edit your saved profile, the button appears as Run Now, and you can choose to manually run the upload job.
A message error "Electronic collection for update does not exist ..." appears if you activated only one of the Elsevier Electronic Collections from the Alma Community Zone. You can either ignore this error message or activate the remaining Elsevier collections and run the job again.
Activating the Elsevier Electronic Collections from the Alma Community Zone
The Community Zone provides the following Elsevier electronic collections:
- Elsevier ScienceDirect Books Complete
- Elsevier ScienceDirect Journals Complete
Search Alma to locate these electronic collections in the Community Zone and activate them prior to running the Elsevier integration profile.
Note that only the electronic collection and its service need to be activated (select the Activate this electronic collection service and Make service available Full Text Service options). There is no need to activate any portfolios (select the Manual activation - activate electronic collection and manually select portfolios Activation Type option). The activation of the portfolios is done by the upload electronic holdings integration process.
For more information on setting up continuous updates for Elsevier portfolios using an Integration Profile, see Upload Electronic Holdings from Elsevier.pptx.
If the Elsevier integration profile is being used, do not check Automatically activate new portfolios in the service level. If this checkbox is checked, incorrect portfolios could be activated.
Preserving Previous Elsevier Acquisition Details
If prior to the use of Upload Electronic Holdings from Elsevier, you managed Elsevier titles in different Community Zone electronic collections and you want to preserve the acquisition details associated with those titles (such as PO lines and licenses), you can use the Move electronic portfolio information job to move PO lines and licenses to the Elsevier ScienceDirect Books Complete and Elsevier ScienceDirect Journals Complete electronic collections.
- Create a set of the content type electronic collections that includes the previous electronic collections in which you managed the Elsevier titles.
- Open the Run a Job - Select Job to Run page (Admin > Manage Jobs and Sets > Run a Job), and search for the Move electronic portfolio information job.
- Select the Move electronic portfolio information job and select Next.
- Select the set that you created above and select Next.
- For the Target electronic collection, select the collection Elsevier ScienceDirect Books Complete or Elsevier ScienceDirect Journals Complete.
- Select the Move PO lines and Move licenses options and complete the required information as needed.
- Select Next and review/confirm the job summary information.
- Select Submit.
Page tags: article:topicproduct:almacontent:Documentationlang:englishElsevierupload electronic holdingselsevier portfoliocontinuous holdings update
