Managing Users
Ex Libris works with you during installation to set up your initial users - including at least one administrator - and user groups.
For more information about users and end-users, see Users.
For information about notification groups, see Working with the Notification Center.
Managing Users
You manage users on the Select a User to Change page (Users/Permissions > User). This page presents a list of users. For information about working with lists, see Working with Lists.
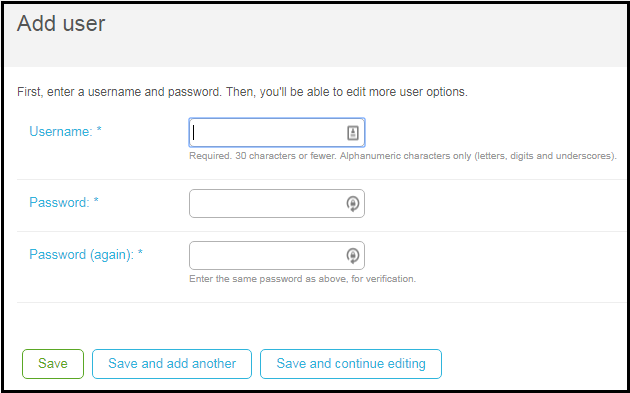
When adding a user, you must enter a unique Username and a Password.
Edit a user on the Change user page.
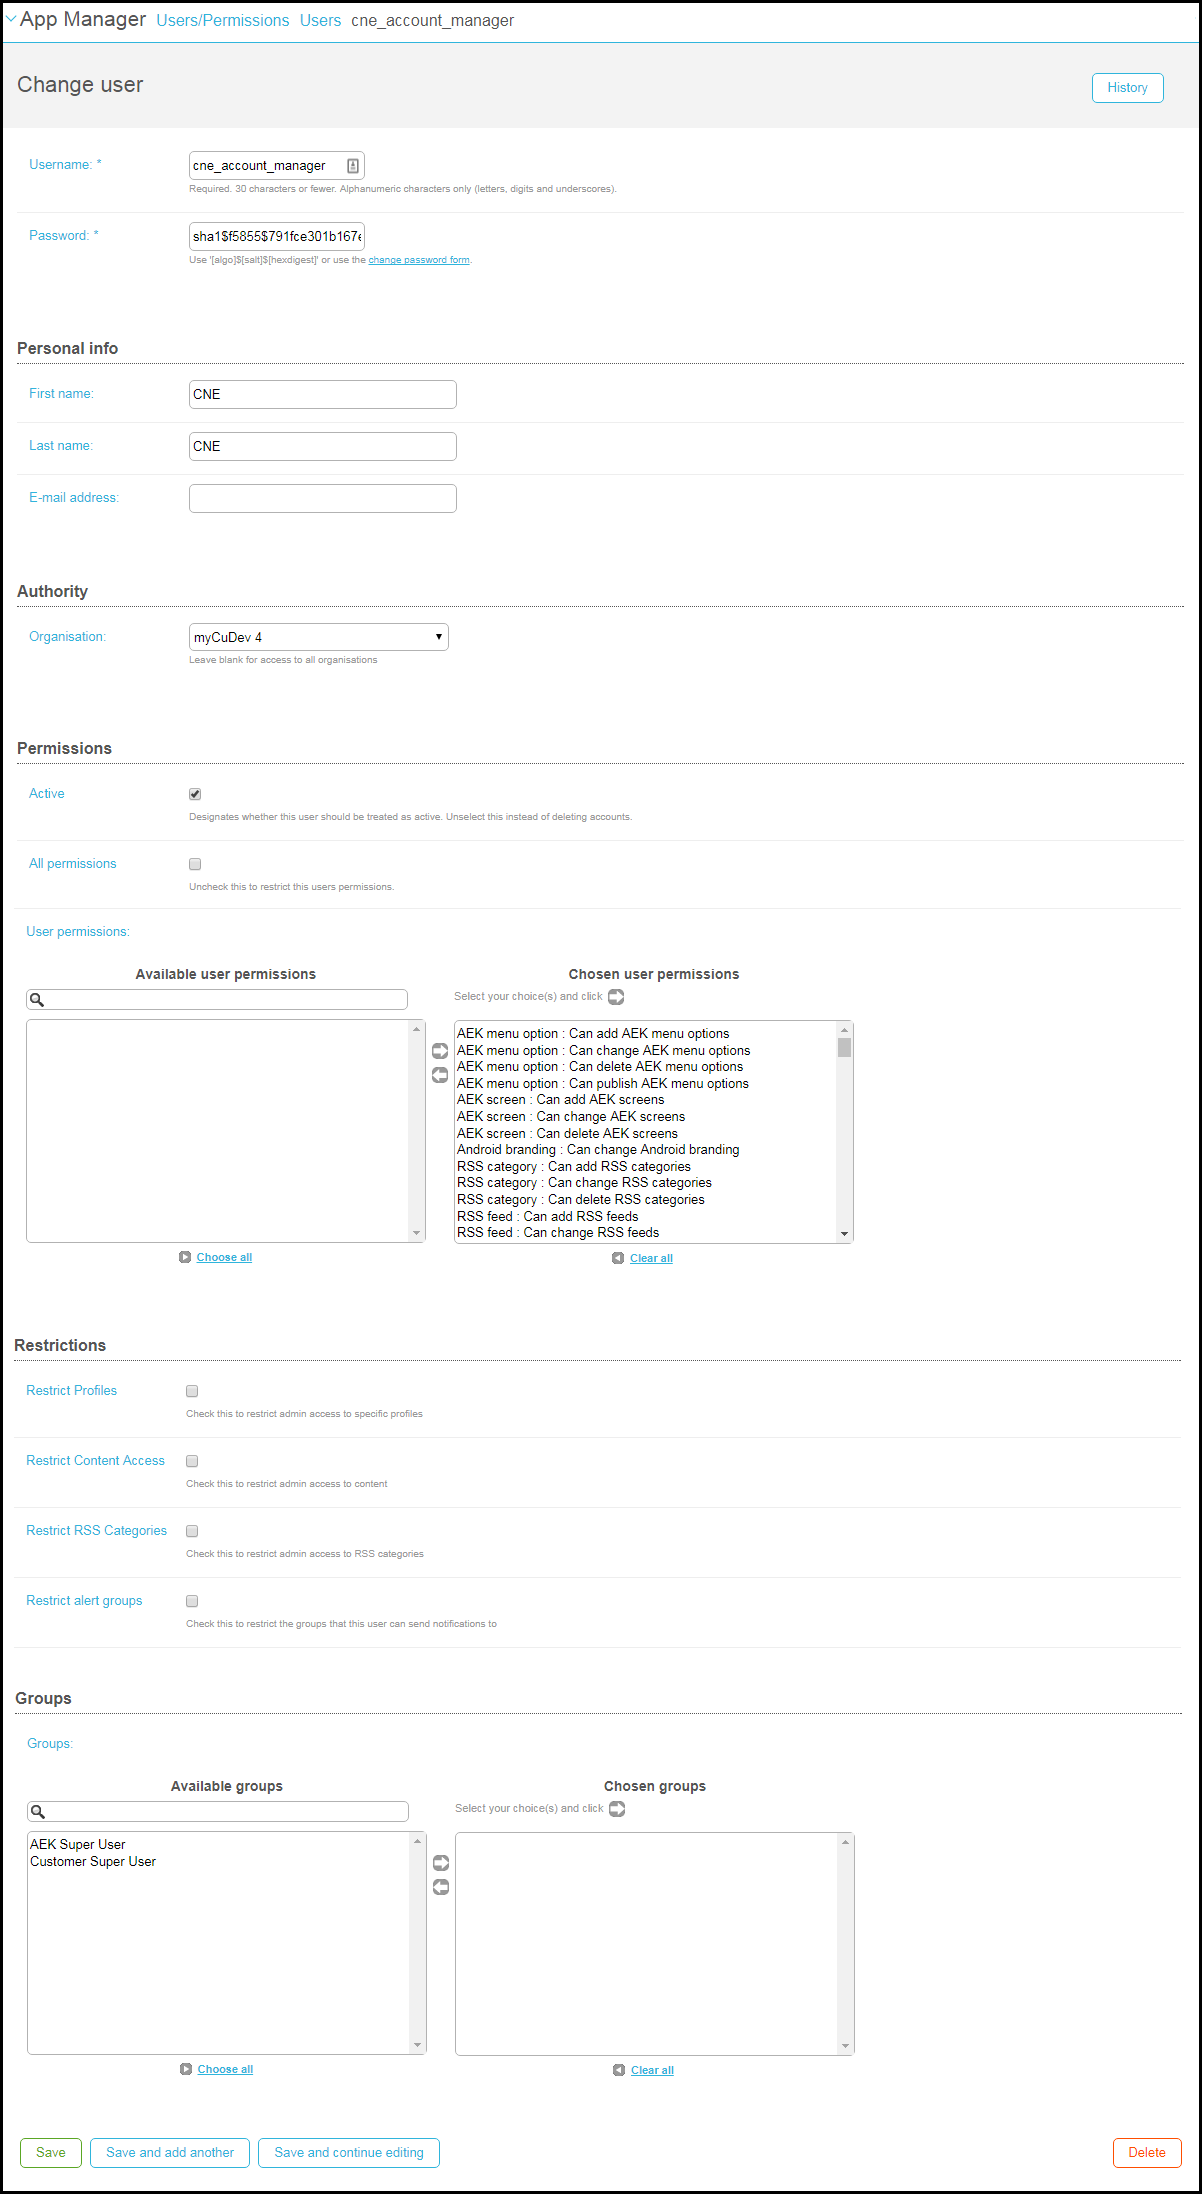
Configure the following for each user.
| Field | Description | Values |
|---|---|---|
| Username | A unique ID for the user. | 30 alphanumeric characters or fewer. Must be unique. |
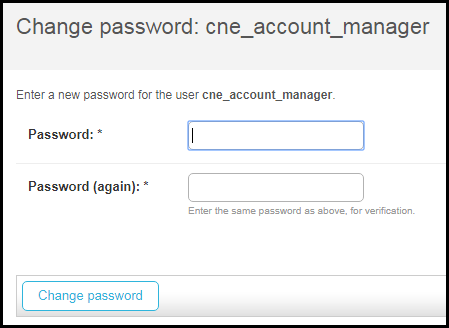
| Password | Select change password form to change the password.
 |
|
| Personal Info | ||
| First Name | ||
| Last Name | ||
| E-mail address | ||
| Authority | ||
| Organisation | The user's organization, if any. You can sort users by organization on the Select a User to Change page. Organizations have no other effect in the UI.
|
|
| Permissions | ||
| Active | Whether the user is enabled. You may want to disable users rather than delete them. | Select to enable the user. |
| All permissions / User permission | The permissions the user has to perform actions in the App Manager.
If you clear All permissions, you can select permissions one by one (see the on-screen text for instruction). For the list of permissions, see User Permissions. Alternately, enable permissions for the user by associating the user with one or more user groups (see below). The user is enabled with any permissions selected here OR within any user group associated to the user. |
Select All permissions to enable the user to perform any action, subject to any restrictions (see below).
Clear All permissions to select permissions manually in User permissions. |
| Restrictions | ||
| Restrict Profiles / All Profiles | The profiles that the user is permitted to manage. By default, a user can manage all profiles. For more information about profiles, see Managing Profiles. | Leave the checkbox cleared to enable the user to manage all profiles.
Select the checkbox to enable the All Profiles field with a link indicating the profile or number of profiles selected. Select the link to select profiles from a list (select away from the list to save your changes). |
| Restrict Content Access / Content Access | The static content services that the user is permitted to manage in the content menu. By default, a user can manage all content.
For more information about the content menu, see Working with Static Content and the Content Menu. |
Leave the checkbox cleared to enable the user to manage all content.
Select the checkbox to enable the Content Access field with a link indicating the number of content elements selected. Select the link to select content from a list (select away from the list to save your changes). |
| Restrict RSS Categories / RSS Categories | The RSS categories that the user is permitted to manage. By default, a user can manage all RSS categories.
For more information about RSS categories, see Configuring Default RSS Feeds. |
Leave the checkbox cleared to enable the user to manage all RSS categories.
Select the checkbox to enable the RSS Categories field where you can select RSS categories one by one (see the on-screen text for instruction). |
| Restrict alert groups / Alert groups | The alert/notification groups that the user is permitted to manage. By default, a user can manage all alert groups.
For more information about alert groups, see Configuring Alert Groups. |
Leave the checkbox cleared to enable the user to manage all alert groups.
Select the checkbox to enable the Alert groups field where you can select alert groups one by one (see the on-screen text for instruction). |
| Groups | ||
| Groups | User groups selected for the user. You can assign user groups to the user as a quick way of enabling a list of permissions for the user, instead of having to enable them one by one in User Permissions.
For more information about user groups, see Managing User Groups. |
Select user groups one by one (see the on-screen text for instruction). |
Managing User Groups
User groups are predefined lists of permissions that can be assigned to users, instead of having to enable them one by one (see Managing Users).
campusM includes out-of-the-box user groups, which cannot be viewed, edited, or deleted:
- AEK Super User- Access to AEK components, including supporting documentation. See Working with the Application Extension Kit.
- Customer Super User- Access to all components (all permissions).
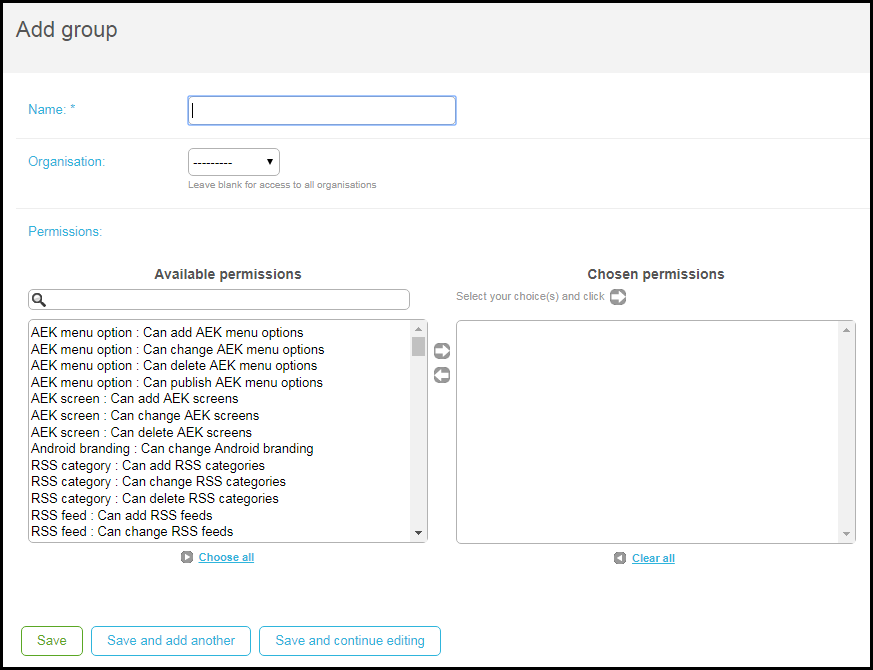
You manage your own user groups on the Select group to change pages (Users/Permissions > Groups). This page presents the list of user groups that you have created. For information about working with lists, see Working with Lists.
When adding or editing a user group, you must enter a unique name for the group. You can optionally select an organization to which this group is associated (see the notes about this field in Managing Users). Select permissions one by one for the group (see the on-screen text for instruction). For the list of permissions, see User Permissions.
User Permissions
The following permissions can be granted to/removed from a user, either one-by-one (see Managing Users) or as a group (see Managing User Groups).
- AEK menu option (add, change, delete) - See Creating Services.
- AEK menu option (publish) - See Publishing the App.
- AEK screen (add, change, delete) - See Working with the Application Extension Kit.
- Android branding (change) - Not in use
- RSS category (add, change, delete) - See Configuring Default RSS Feeds.
- RSS feed (add, change, delete) - See Configuring Default RSS Feeds.
- Alert group (add, change, delete) - See Configuring Notification Groups.
- Alert group category (add, change, delete) - See Configuring Notification Group Categories.
- Alert group subscriptions (change) - See Managing End-Users in Notification Groups.
- Android intro branding (change) - Not in use
- App data (homepage) (change) - Not in use
- App device icons (change) - See Configuring App Name and Icons.
- Add directory record (add, change, delete) - See Managing Manually Added End-User Accounts.
- App profile (add, change) - See Managing Profiles.
- App profile (publish) - See Publishing the App.
- App registration authentication (change) - Not in use
- App role (add, change, delete) - See Managing App Roles.
- Application server (add, change, delete) - See Changing App Manager Installation Settings
- Authentication access (add, change, delete) - See Changing App Manager Installation Settings
- Campus map (add, change, delete) - See Adding Maps.
- Campus map (publish) - See Publishing the App.
- Contact email addresses (change) - See Configuring Email Addresses to Receive Feedback.
- Content item (manage about menu) - See Working with Static Content and the Content Menu.
- Content item (manage iPad home) - See Working with Static Content and the Content Menu.
- Content item (manage content templates in Creative Studio) - See Page Menu and Creating a Page from a Template.
- Content item (manage) - See Working with Static Content and the Content Menu.
- Content item (publish) - See Publishing the App.
- Customer role (add, change, delete) - See Configuring Customer Roles.
- Email settings (change) - See Configuring Email Sharing.
- Email template (add, change, delete) - See Configuring App Emails.
- Facebook settings (change) - See Configuring Facebook Sharing.
- Feedback (view) - See Viewing Feedback.
- Feedback (publish) - See Publishing the App.
- General permissions (use App Builder) - See Creating Services and Configuring Services.
- General permissions (see AEK documentation) - See Working with the Application Extension Kit.
- General permissions (view device report) - Not in use
- General settings (access Analytics) - Enables access to Analytics; see Viewing App Usage Statistics.
- General permissions (view device report) - Not in use
- General settings (change)- See Configuring App Basics.
- Home page banner (add, change, delete) - See Configuring Default Banner Service Images.
- Home page banner (publish) - See Publishing the App.
- Home page feed (add, change, delete) - Not in use.
- Home page header settings (change) - Not in use
- iPad branding (change) - Not in use
- iPhone / Android branding (change) - Not in use
- Idea (view) - See Viewing Feedback.
- Location category (add, change, delete) - See Adding Map Location Categories.
- Location category (publish) - See Publishing the App.
- Menu option (add, change, delete) - See Working with Static Content and the Content Menu.
- Menu option (publish) - See Publishing the App.
- Notifications (send group) - See Sending Notifications to End-Users.
- Notifications (send individual) - See Sending Notifications to End-Users.
- Organisation (view Reports) - Not in use
- Person (view registered user) - Not in use
- Person roles (change) - See Enabling/Disabling App Roles for End-Users.
- Position (add, change, delete) - See Adding Map Locations.
- Position action (add, change, delete) - See Adding Actions at Map Locations.
- Problem (view) - See Viewing Feedback.
- Problem app category (add, change, delete) - See Configuring Problem Feedback Categories.
- Problem page category (add, change, delete) - See Configuring Problem Feedback Categories.
- Profile data (homepage) (change) - Not in use
- Profile group (add, change, delete) - Not in use
- Profile registration authentication (change) - See Configuring End-User Authentication Types.
- Profile settings (change) - Not in use
- Registered user (view) - Enables downloading a CSV file of end-user registrations in Insight Analytics; see Viewing App Usage Statistics.
- Resource (add, change, delete, publish) - Not in use.
- Role (change web branding) - Not in use
- Standard RSS groups (change) - Not in use
- Standard alert groups (change) - See Configuring Notification Groups.
- Tile data (menu option) (change) - Not in use
- Twitter settings (change) - See Configuring Twitter Sharing.
- User (add, change, delete) - See Managing Users.
- User authenticated RSS feed (add, change, delete) - Not in use
- Valid email (add, change, delete) - Not in use
- Web app branding (change) - Not in use
- Web service endpoint (add, change, delete, publish) - See Configuring Web Service Endpoints.
Managing End-Users
There is no single point for managing all end-users in the App Manager since the App Manager provides multiple types of authentication, including types where end-user accounts are managed by an external system.
Certain end-user management features are available, however, including:
- Configuring end-user authentication types - You select the authentication type for a profile group. All end-users logging in to that profile group are authenticated using the selected type.
- Managing manually added end-user accounts - For authentication type App Manager Directory, end-users are manually managed in the App Manager.
- Configuring customer roles - Customer roles are used to assign app roles to end-users when they first register to the app (see Configuring Customer Roles).
- Enabling/disabling app roles for end-users - You can enable or disable app roles for all registered end-users.
- Also see Managing End-Users in Notification Groups.
For more information, see Managing End Users. (3 min)
Registered Users
View, search, and filter by date range for groups or specific app users to view the date and time they registered in the app. The interface also enables you to download a CSV file with the data for external use.
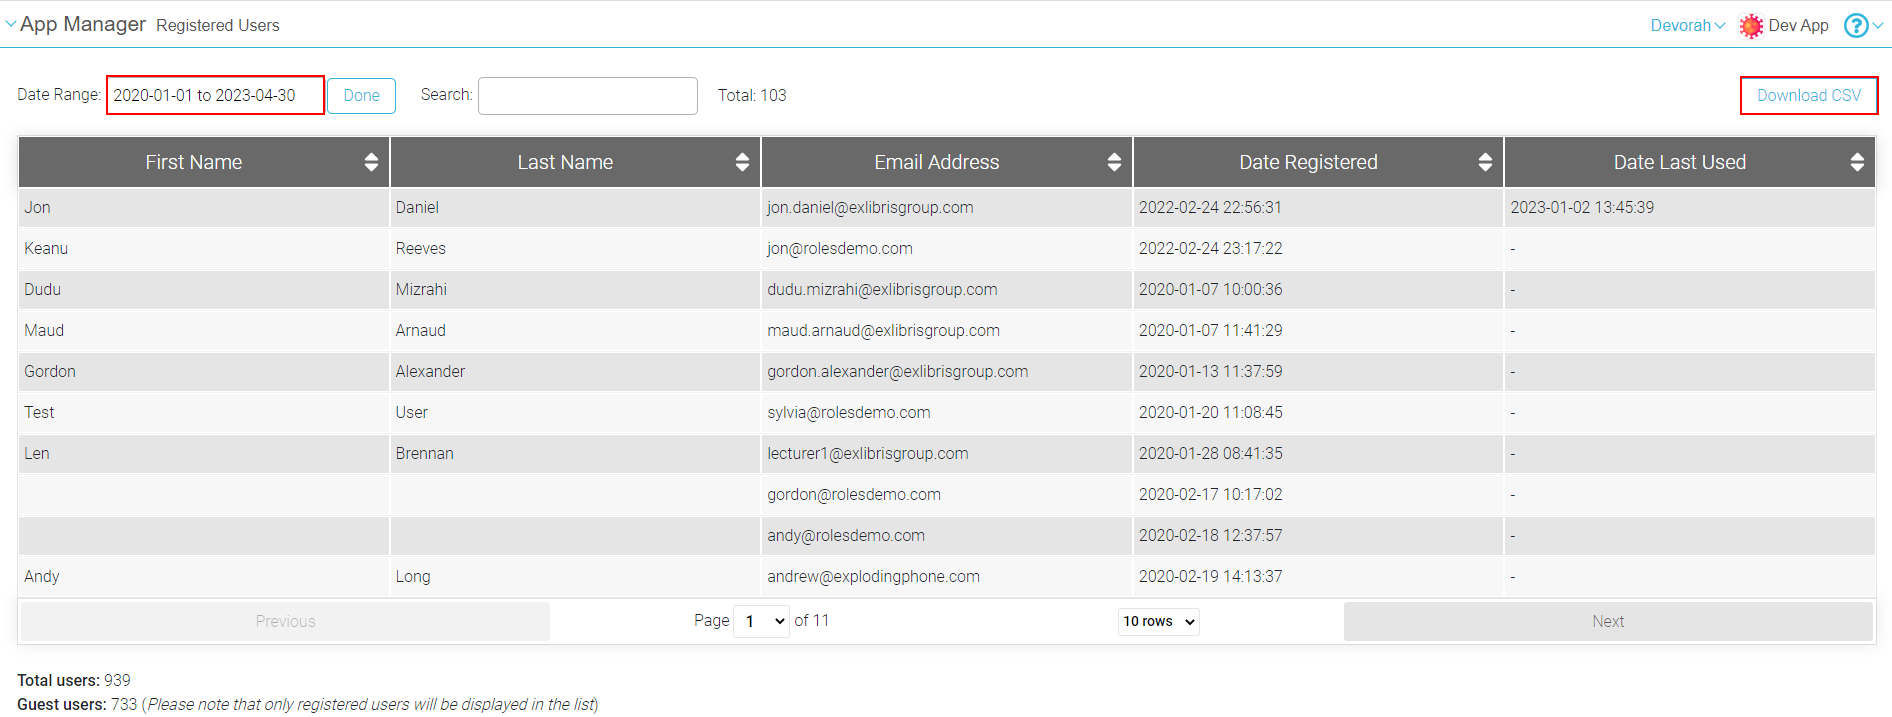
Null values appear for users whose Date Last Used was prior to September 2022
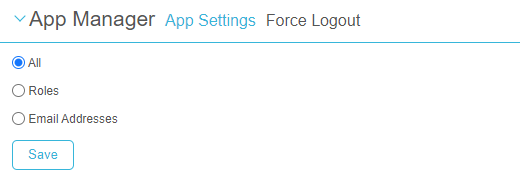
Force Logout
Force a user or group of users to log out and reauthenticate. You can apply this feature to all users, users with specific roles, or specific user email addresses. This action is available to App Manager users with the "All Permissions" checkbox checked under App Settings > Force Logout.
Configuring End-User Authentication Types
Each profile group can use a different authentication method to authenticate end-users. Before assigning an authentication method to a profile group, you must first configure the methods. Ex Libris works to help you configure these methods during installation.
You configure authentication for a profile group by selecting it from the list in the Select profile registration authentication to change page (App Settings > App Settings > Profile Registration Authentication). When you select a profile group, the Change profile registration authentication page opens the group's authentication settings, as follows:
- Sort order- The order in which this profile group appears in the drop-down list of profile groups presented to the end-user when they first open the app.
- Authentication type- Select the authentication type:
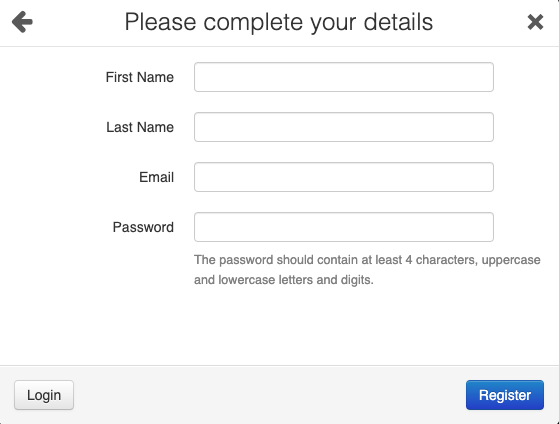
- Standard Authentication- Enable end-users to register an account when they first use the app. The end-user is presented with the Terms of Service and a registration screen, where they enter a username and password. Complexity requirements for the password can be specified in the configuration of the settings of this type of authentication; see Configuring Password Requirements for Standard Authentication, below. Users registering with this method are assigned the default app role.
- Authentication against LDAP- Enable students to log in using their institution's credentials. When selected, you must also configure the Auth app server,LDAP service access, and LDAP auth endpoint, and configure a failure message (text only). Customer roles, configured by the institution together with Ex Libris, map the correct app roles to users who register using this method.
- Authentication against App Manager Directory- Enable only end-users for which you have manually added accounts in the App Manager (see Managing Manually Added End-User Accounts, below). When selected, you must also configure a failure message (text only) and select whether or not a password is required. All manually added users are assigned the default app role,DEPRECATED.
- No Authentication- Use for guest users, to provide authentication-free access to general campus services. Guest users are assigned the default app role.
- Anonymous with registration- Combines no authentication with standard authentication: end-users can register by entering their name and email address, they have authentication access. Users are assigned the default guest role.
- SSO Authentication- Single sign-on using the institution's authentication system (similar to LDAP). When selected, you must also configure the Auth app server,LDAP service access,LDAP auth endpoint,SSO Directory, and SSO Auth Endpoint, and configure a failure message (text only). Customer roles, configured by the institution together with Ex Libris, map the correct app roles to users who register using this method.
- Authentication against Address- Not in use.
- Additional settings, as appropriate for the selected Authentication type. Contact Ex Libris customer support for help in configuring any additional required fields. Ex Libris helps you configure the initial values for these fields during installation.
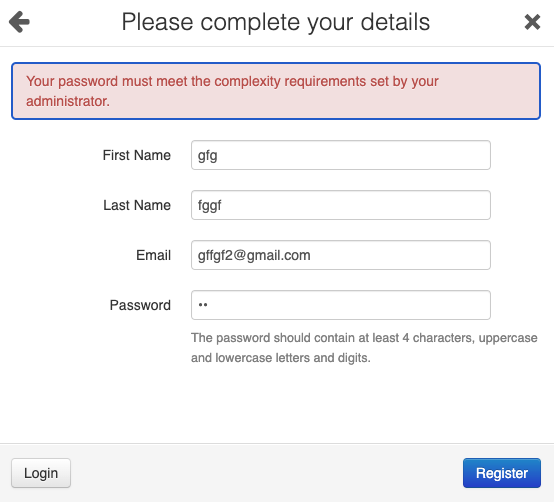
Configuring Password Requirements for Standard Authentication
If the selected Authentication type of a profile group is Standard Authentication, you can specify requirements that must be met by the password the end-user chooses. If the password does not meet the specified requirements, the password is not registered and an error message is displayed to the end-user.
- Select Enable password complexity. The fields in which you configure the requirements are added to the page.
- Fill in the fields to define the requirements:
- Password length – The minimum number of characters that must be included in the password.
- Require uppercase and lowercase – Select this to require at least one uppercase letter and one lowercase letter in the password.
- Require special character – Select this to require at least one special character in the password.
- Require digits – Select this to require at least one numeral in the password.
- Under Custom Password Guidelines, enter the text to display below the fields in the dialog box.
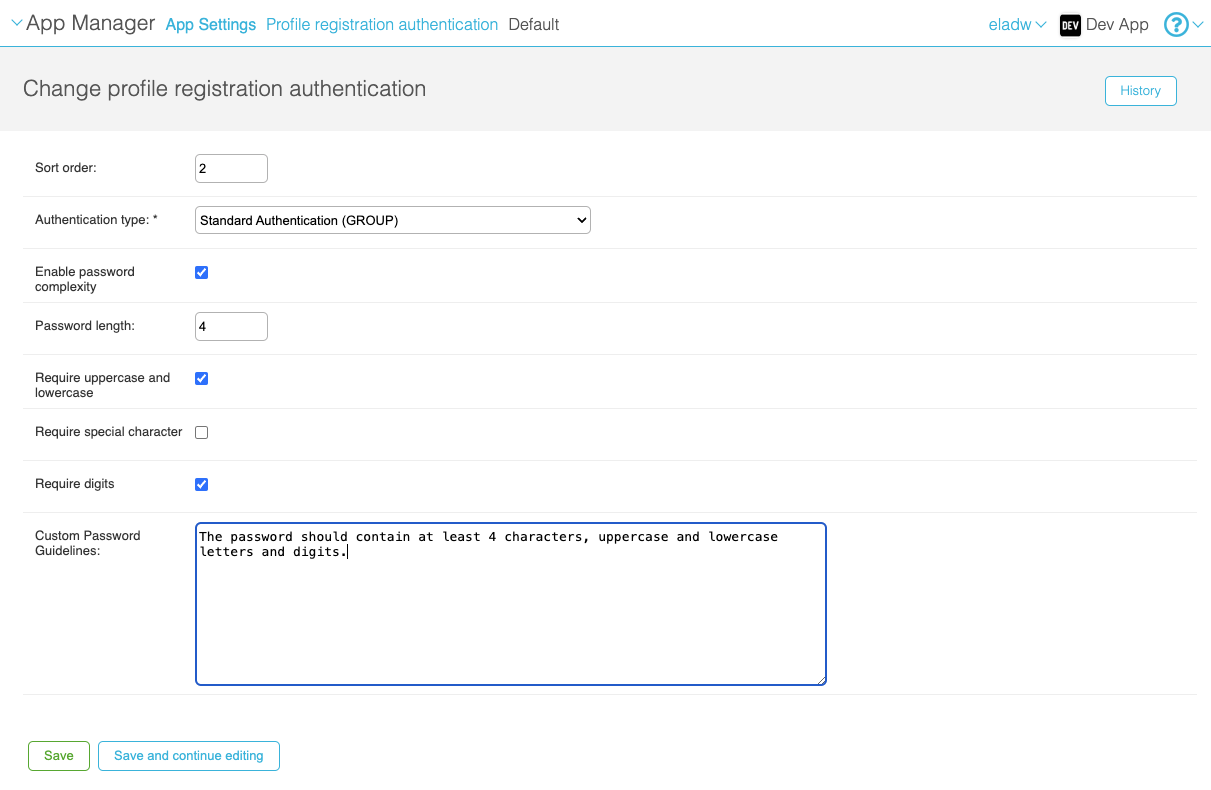
- Select Save or Save and continue editing.
Managing Manually Added End-User Accounts
You can manually add end-users for profiles using the Authentication against App Manager Directory authentication type on the Select app directory record to change page (App Settings > App Directory > App Directory). This page presents the list of end-users that can register with the app using this authentication type. For information about working with lists, see Working with Lists. You can filter the list by searching the list or by selecting one of the filters on the right.
All manually added users are assigned the default app role.
For each user, enter or configure the following information:
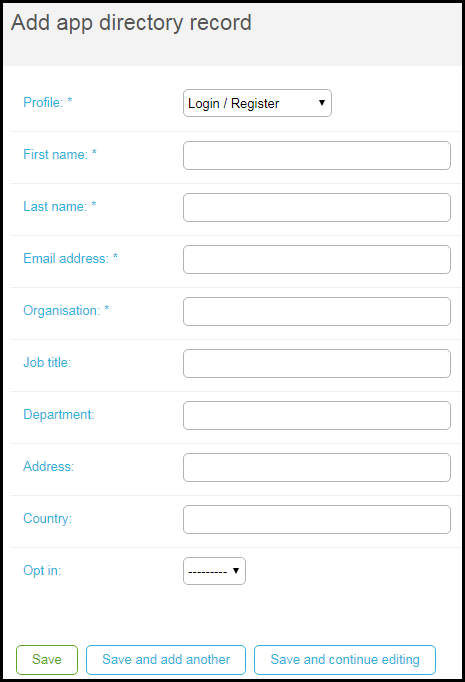
- Profile - The profile to which to associate this end-user.
- First name
- Last name
- Email address
- Organisation - Enter an organization name, in free text. The organization is useful for auditing purposes and can be used also to filter end-users in the list on the Select app directory record to change page. It has no other functional effect in the app or the App Manager.The organization field on this page has no relation to the organization field available when managing users (see Managing Users).The next four fields are optional and are used for auditing purposes only.
- Job title
- Department
- Address
- Country
- Opt-in - If enabled, the end-user is visible when searching a directory of end-users (a service provided by campusM during installation). If disabled, the end-user is not visible.
Enabling/Disabling App Roles for End-Users
You can enable or disable one or more app roles for a specific end-user on the Select user roles to change page (App Settings > User Management > User Roles). This page presents the list of end-users that have registered with the app. For information about working with lists, see Working with Lists.
Each record presents the list of app roles associated with the end-user. Select or clear a role to enable or disable it.
Page tags: article:topiccontent:Documentationproduct:campusmlang:englishcommunity:training_materials