
Soporte de RFID
- Administrador general del sistema
You can use RFID readers for scanning item barcodes and for registering their check-out and check-in. After the RFID integration profile is added, a connection icon appears in the main menu bar as long as a location is selected from the Currently At drop-down.
Supported RFID Devices
For a list of supported RFID devices, see https://developers.exlibrisgroup.com/alma/integrations/rfid.
For information for other vendors on how they can integrate with Alma (development may be needed on the vendor's side), see https://developers.exlibrisgroup.com/alma/integrations/rfid/information_for_rfid_vendor/
Using RFID to Read an Item Barcode
If the RFID connection is not currently active, it appears as grayed out:
- Seleccionar el icono de conexión para abrir una ventana emergente de comunicación RFID. This enables the communication with the reader and must be left open in order to read from or write to the reader.
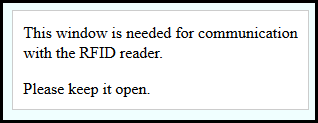
The connection icon on the menu bar changes to activated to show that the connection has been made. La conexión activa se mantiene para cada usuario y mostrador/departamento. Al cambiarse a otro mostrador, se debe activar de nuevo la conexión seleccionando el icono de conexión.
- Select the Read RFID icon (
 ) next to the search bar to activate the RFID reader to read the barcode of the item that is currently at the counter, and display the item.

All input boxes that accept a barcode show this icon as long as the RFID connection is active. These boxes are found in the following locations: Scan In, Return Items, Patron Services, Repository Search, Receive New Material, Physical Item Editor, Quick Cataloging, and Persistent Search (throughout Alma). Additionally, while on a screen that has the icon to read a barcode, the keyboard shortcut Alt+A, activates the reader to display the listing. When searching for physical items, the search result will display the RFID Security Status. When scanning a multi-part item using RFID, if some of the resources have not been scanned, a message will be displayed indicating that not all of the item resources were scanned. Utilizar el lector RFID para escanear y prestar un ejemplar desactiva el bit de seguridad de la etiqueta RFID. La devolución del ejemplar vuelve a activar la etiqueta de seguridad.
Configurar el perfil de integración de RFID
- On the Integration Profiles List page (Configuration Menu > General > External Systems > Integration Profiles), select Add Integration Profile. Se abre la primera página del asistente del Perfil de integración.
- Enter a Code and a Name for the profile.
- From the Integration Type drop down list, select RFID.
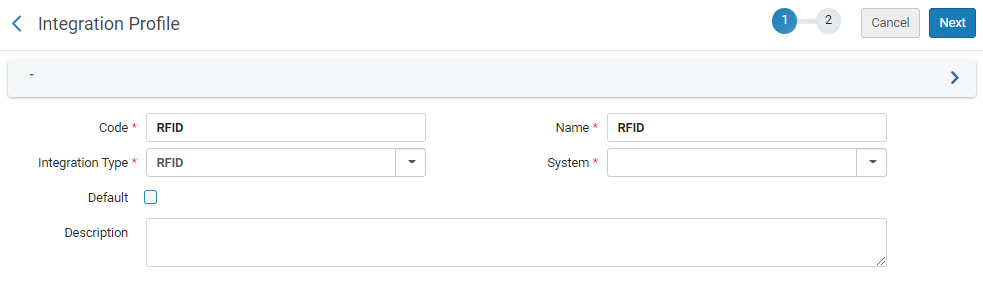 Perfil de integración: paso 1 con RFID seleccionada
- From the System dropdown list, select the RFID system that you are using. Supported systems are (see Supported RFID Devices):
- Biblioteca - Liber8Connect
- 3M - 896
- Seret
- Nedap
- OtroIf you select Other from the list of systems, the System Description field appears; add further system details there.
- Optionally, under Description, add a description for the profile.The Default field is not currently functional.
- Select Next. Aparece la segunda página del asistente.
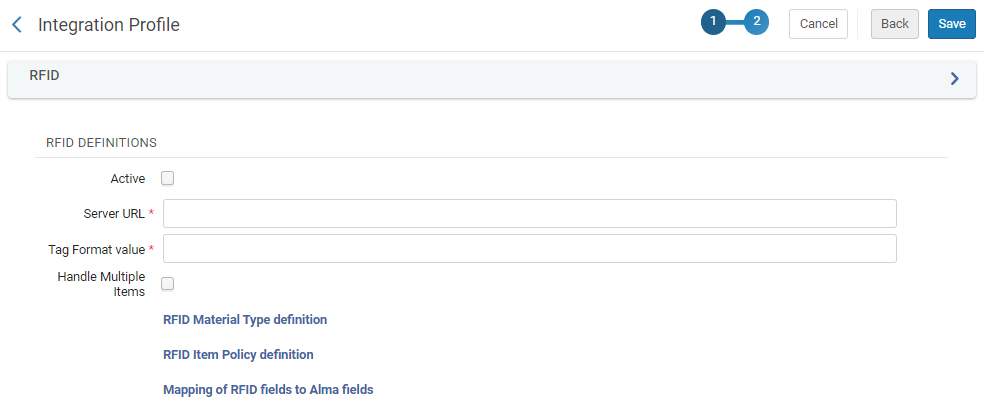
- Select the Active checkbox to make this an active RFID definition. Note: the profile is inactive by default.
- Under Server URL, enter the URL for the RFID system to which your RFID device is attached, as follows:
- For 3M™ RFID Staff Workstation (Model 896): http://localhost:5000/TagService
- For Bibliotheca: http://localhost:5000/BibliothecaRFIDPadService.svc
- For Nedap and Seret: If NGINX isn't needed, you can link directly to the RFID driver, e.g.http://localhost:1801
- For Nedap with NGINX: http://localhost:5000/NedapRfidWebService.asmx(and the NGINX on localhost should proxy to the main server)
- For MK Solutions: http://localhost:4039/mkStaffStation_Alma
- For other integrations that support one central server which then proxies the requests to the readers: https://server-address:port/path(must be http s)For additional information, see Alma – RFID Integration in the Developers Network.
- For 3M - 896 only, the Tag Format value field appears. Contact your RFID supplier for the relevant tag format for the device and enter it in this field.
- Select Handle Multiple Items to accept multiple items on the RFID reader.
- If the System(field on the previous page) is Other, the Item Information Update option appears. Select this option to enable Alma to update item information on RFID tags when they are updated in Alma.
- Configure o revise las siguientes definiciones:
- El sistema Nedap solo se usa para devolución y préstamo y no permite actualizar la etiqueta. Por tanto, las definiciones de mapeo no están disponibles para perfiles Nedap RFID.
- When Other is selected in the System field on page 1 of the integration profile, the Item Information Update field appears. En este caso, aparecerán las definiciones solo después de seleccionar la casilla de verificación.
- If IPs need to be configured for the RFID readers, the reader IPs need to be configured on the circulation desk configuration as well, for example when working with Nedap, or with some RFID vendors that integrate with the Alma Other RFID Integration profile type. See Adding a Circulation Desk.
- RFID Material Type Definition (see the Configuring the RFID Material Type Definition section below)
- RFID Item Policy Definition (see the Configuring the RFID Item Policy Definition section below)
- Mapping of RFID Fields to Alma Fields (see the Mapping the RFID Fields to Alma Fields section below)
- Select Save.
For more information on configuring RFID, see https://developers.exlibrisgroup.com/alma/integrations/rfid.
Configuring the RFID Material Type Definition
You can map the RFID material type codes used by your vendors to the alphabetic material type codes that you currently have defined in Alma in the RFID Material Type Code Table. La Tabla de códigos de tipo de material RFID utiliza las definiciones de la Tabla de códigos de tipo de material físico. See Configuring Physical Item Material Type Descriptions for more information.
- On the Integration Profiles List page (Configuration Menu > General > External Systems > Integration Profiles), open your RFID Integration Profile and select the RFID Material Type Definition link. Aparece la página de la Tabla de códigos de tipo de material RFID.In a Network environment, the Manage Table in Network options appear.


- In the Create a New Code Table Row section, select one of the existing material type codes from the Code drop-down list, enter the vendor's RFID code for the Description(mandatory), and select Add Row. Continuar añadiendo filas para cada tipo de material de Alma al que se desee asignar un valor de proveedor para el lector RFID.
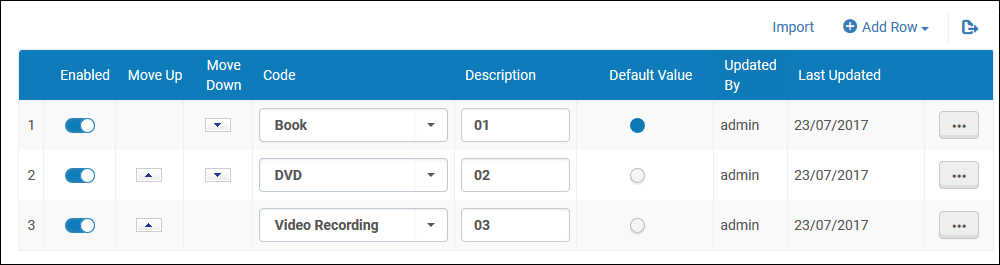 Si es necesario crear un nuevo tipo de material aparte de los que se proporcionan en la lista desplegable, utilizar las opciones de configuración de la Tabla de códigos de tipo de material. See Configuring Physical Item Material Type Descriptions for more information.
- Select Customize (or Save if you have previously edited this code table).
Configuring the RFID Item Policy Definition
You can map the RFID item policy codes used by your vendors to the alphabetic item policy codes that you currently have defined in Alma in the RFID Item Policy Code Table.
- On the Integration Profiles List page (Configuration Menu > General > External Systems > Integration Profiles), open your RFID Integration Profile and select the RFID Item Policy Definition link. Aparece la página de la Tabla de códigos de política del ejemplar RFID.In a Network environment, the Manage Table in Network options appear.
- In the Create a New Code Table Row section, select one of the existing item policy codes from the Code drop-down list, enter the vendor's RFID code for the Description(mandatory), and select Add Row. Continuar añadiendo filas para cada política del ejemplar de Alma a la que se desee asignar un valor de proveedor para el lector RFID.
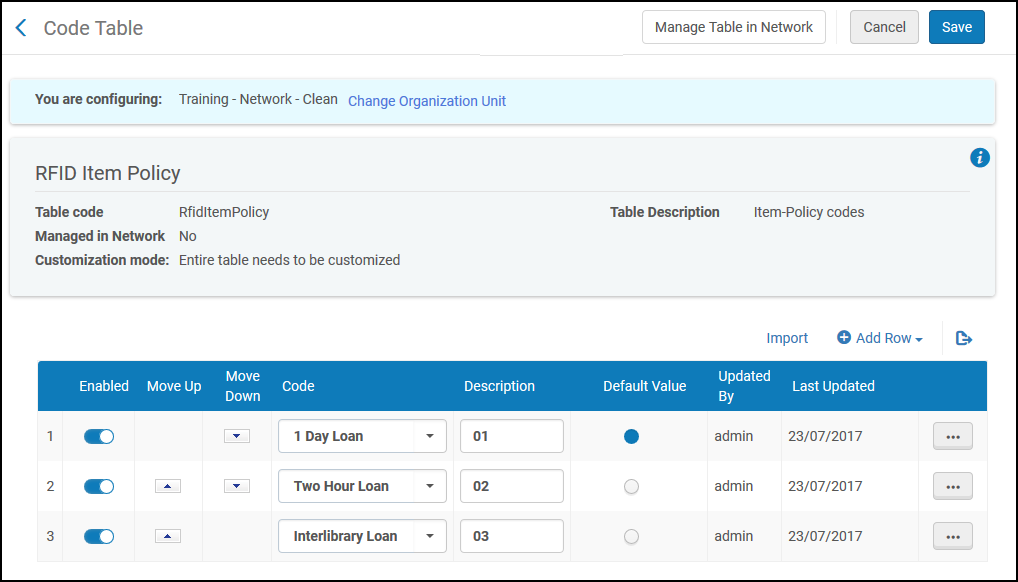
- Select Customize(or Save if you have previously edited this code table).
Mapping the RFID Fields to Alma Fields
The Mapping of RFID Fields to Alma Fields link displays the RFID Fields mapping table settings. Los ajustes de esta página determinan qué información se escribirá en la etiqueta RFID. Desde esta página se puede ver qué campos están habilitados para ser inscritos en la etiqueta RFID. Además, se puede ver uno de los siguientes ajustes de campo de Alma que ha sido asignado a cada uno de los campos de la etiqueta RFID:
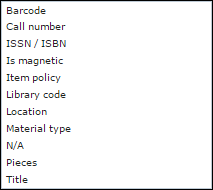
Si necesita personalizar el mapeo de campos o los campos habilitados para escribirse en la etiqueta RFID, contacte con el servicio de Soporte para obtener ayuda.
Configurar Códigos de biblioteca para RFID
You can map the RFID library codes used by your vendors to the alphabetic library codes that you currently have defined in Alma in the Alma library configuration (navigate to Configuration Menu > General > Libraries section > Add a Library or Edit Library Information, select the Library tab and then select the library to add the code for).
- The Code for RFID field needs to be configured in order to write RFID content.
- This field is only visible when the RFID connection is active as described in Using RFID to Read an Item Barcode.
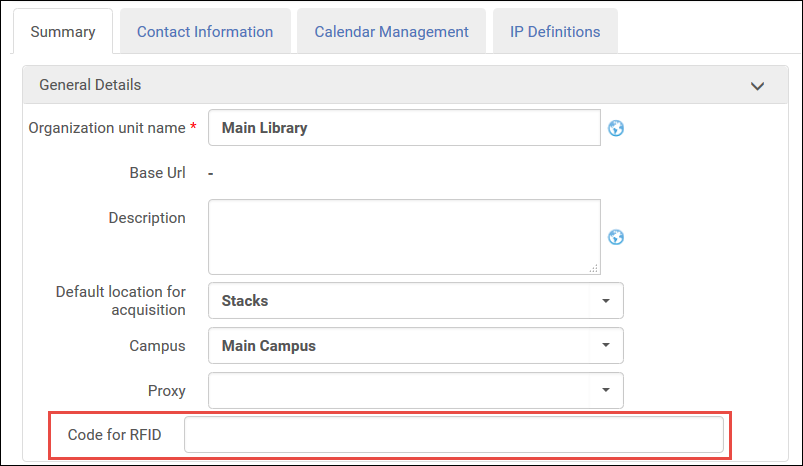
For more information, see Adding/Editing Institution Libraries.
Configurar Códigos de ubicación para RFID
You can map the RFID location codes used by your vendors to the alphabetic location codes that you currently have defined in Alma in the Alma location configuration (Configuration Menu > Fulfillment > Locations > Physical Locations when configuring a specific library). The Location Code for RFID field needs to be configured in order to write RFID content. Este campo sólo es visible cuando la conexión RFID está activa.
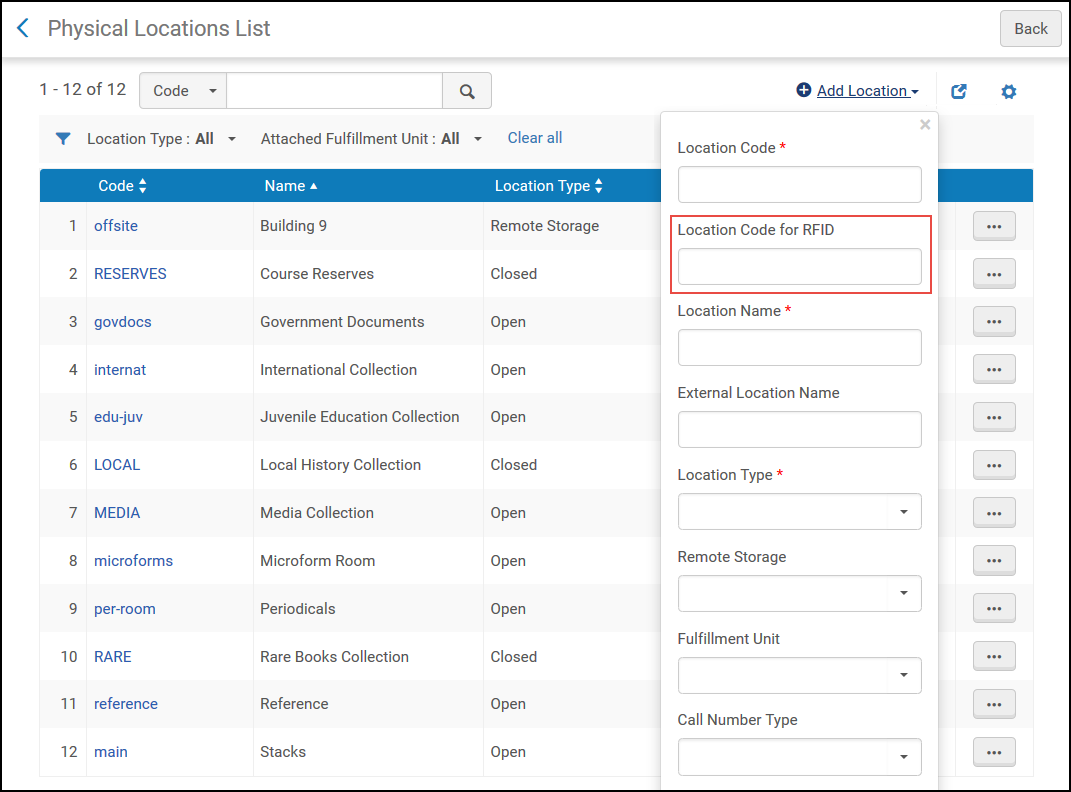
For more information, see Configuring Physical Locations.
Log de transacción
La ventana de Comunicación RFID que se abre al seleccionar el icono de conexión puede expandirse para visualizar una lista de la actividad de transacción RFID de solicitud y respuesta. Este log se debe utilizar cuando sea necesario resolver cualquier transacción fallida en la comunicación RFID. Se debe incluir una copia de este log siempre que se comunique un problema de RFID al equipo de ventas.
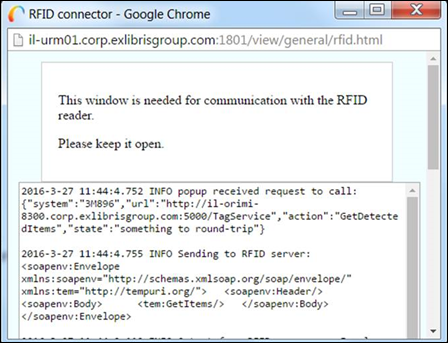
For more information, see https://developers.exlibrisgroup.com/alma/integrations/rfid.
Scanning Multiple Items
Cuando se presiona el botón RFID, se procesarán los ejemplares en la almohadilla de este. Cuando se completa el procesamiento, aparecerá una ventana emergente con el resumen de confirmación que detalla cuántos ejemplares se han gestionado con éxito, además de presentar cualquier alerta que haya aparecido durante la digitalización. If all items are successfully processed, a success message is displayed. If an item requires action, the process is paused until you select Confirm or Cancel. Selecting Cancel only stops processing for the specific item. Cuando se completa el procesamiento de digitalizaciones múltiples, se proporciona un resumen de aquel. Los ejemplares que requieren de acción aparecen bajo Ejemplares Erróneos/Cancelados. Los ejemplares que no necesitan acción aparecen bajo Ejemplares que requieren atención.
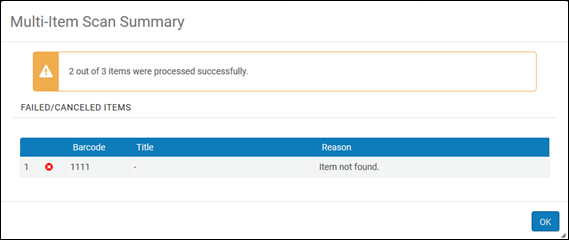
Puede usar el botón RFID en las páginas siguientes cuando hay un ejemplar único o múltiples ejemplares en la almohadilla:
- Digitalizar ejemplares
- Scan in items > change item information - On this tab, multiple items can be processed as stated above with the exception of the following circumstances;
- cuando se crea un nuevo código de barras
- When the RFID integration profile is configured to update items and Update RFID is selected on the tab.
- Pestaña Gestionar servicios al usuario > Préstamos
- Pestaña Gestionar servicios al usuario > Devoluciones
- Devolución de ejemplares
For Bibliotecha, this is only supported when using staffConnect Link (using the Other type in the integration profile) or D-Tech. For additional assistance with StaffConnect link, contact support-ch@bibliotheca.com.For a list of supported RFID vendors, see Alma - RFID Integration on the Developer Network.
Page tags: article:topicproduct:almacontent:DocumentationRFIDlang:englishConfigure an RFID integration profileConfigure an RFID Material Type DefinitionRFID material typeRFID item policyMap RFID fields to AlmaLibrary codes for RFIDLocation codes for RFIDRFID transaction log
