
Enabling Display Processing for a Shelf Location in Polaris System Administration (Web-Based)
To enable Display Processing for a Shelf Location in Polaris System Administration (Web-Based)
-
On the Polaris System Administration (web-based) Home page, select Settings and Tables.
The Settings and Tables page appears.
-
Select the Tables tab.
The list of tables appears.
-
Find the Shelf Locations table and open it. You can filter the list by typing “Shelf Location” in the Search box.
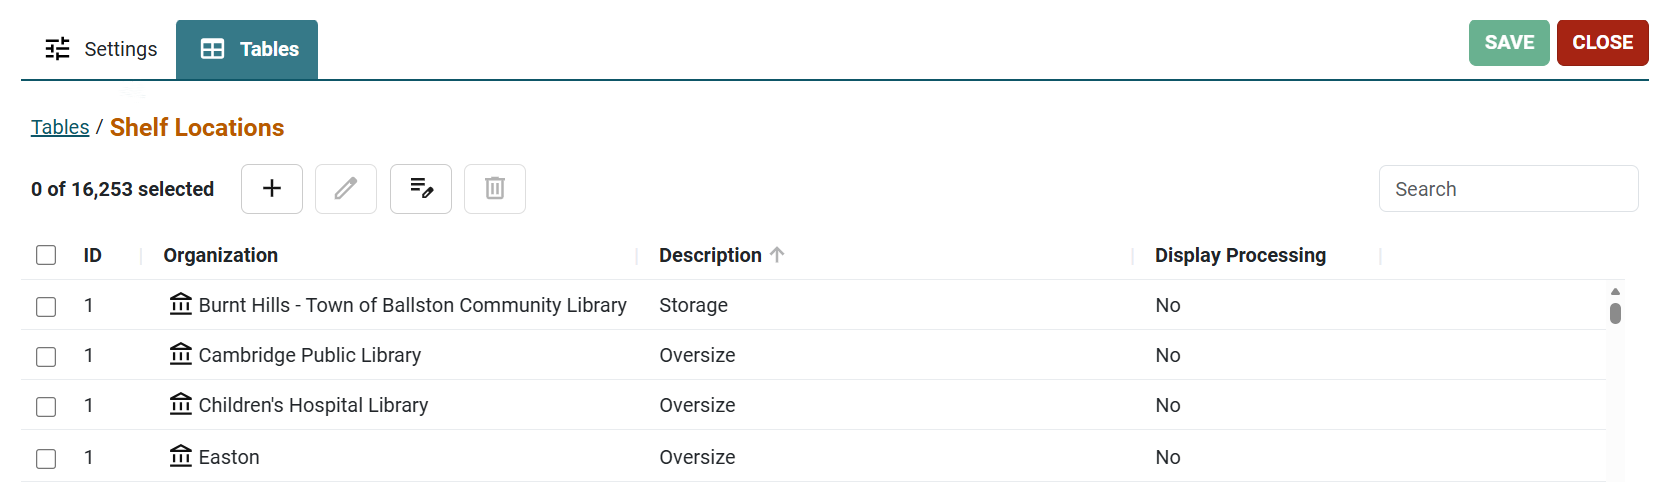
The Shelf Locations table appears with the Display Processing column indicating if the location is marked as a display location.
Note:
To make changes to the table you must have the system administration permission Modify shelf locations table set to "Allow". -
Select the checkbox next to the location you want to edit, and then select Edit
 .
.The Edit - Shelf Locations dialog appears.
-
On the Edit - Shelf Locations dialog, turn on the Display Processing toggle.
-
Select OK to confirm and close the dialog.
In the Shelf Locations table, the Display Processing column now shows 'Yes.'
Note:
The Display Processing setting doesn't automatically update the Shelf location description in the Item Record in Leap. If you want to change the Shelf location label, you can update it manually to “Display Case” in the Details view of the Item Record Workform.
