
Add a Workstation
To add a workstation
-
On the Polaris System Administration (web-based) Home page, select Workstation.
The Workstations page appears.
-
Select +New Workstation.
The New Workstation page opens.
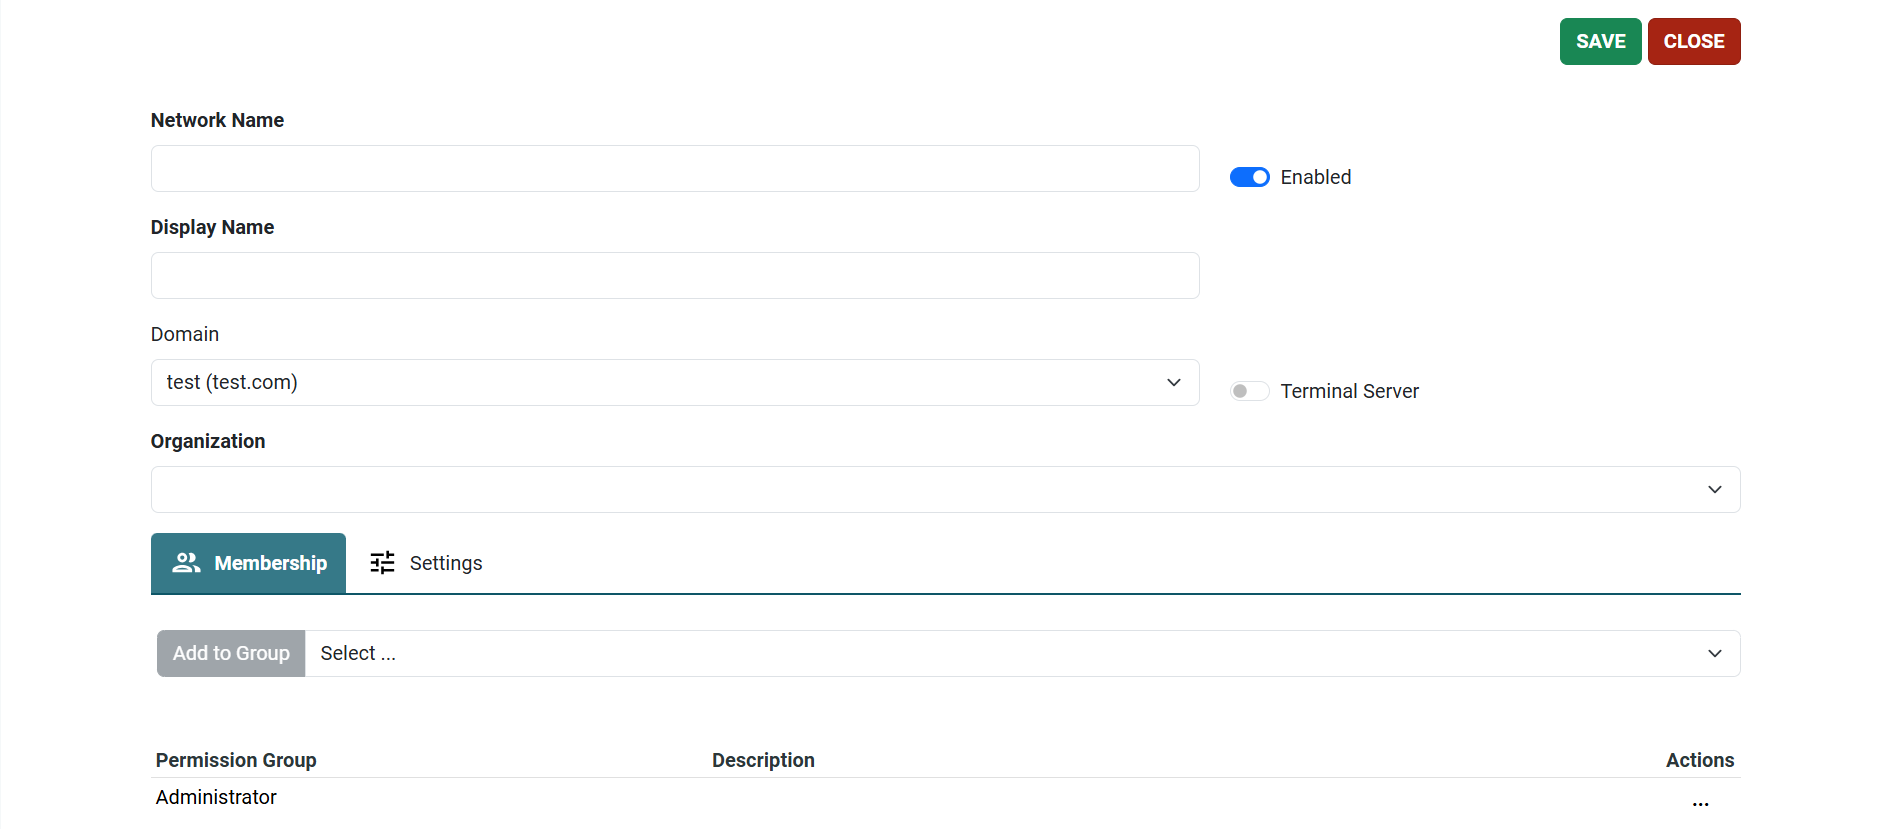
- Enter workstation information:
Enter the Network Name of the workstation.
To enable the workstation to log on to the staff client, turn on the Enabled toggle.
Enter a Display Name or common name for the workstation. You can use common names such as Tom's Laptop, or Conference Room, but each name must be unique within the domain.
If your Polaris installation is a multidomain system, select the workstation's network domain from the Domain list.
(Optional) If this workstation will serve as a terminal server on this domain, select Terminal Server . When this box is checked, the Leap user can select their workstation when they log in so that transactions are logged appropriately.
Select your Organization. If you select an organization that has Leap enabled, a Leap toggle appears.
To enable the workstation for Leap, turn on the Leap toggle.
(Optional) Select permissions for the workstation. To do this:
- In the Membership box, select a permission group.
- Select Add to Group.
Note:
For a staff member to do a task on a workstation, both the staff member and the workstation must have the appropriate permissions for the task.(Optional) Configure the workstation-level settings for this workstation. To do this:
- Select the Settings tab.
- Browse settings using the Module list or search for a specific setting by keyword.
- Select a setting to change it. For detailed instructions, see Configuring Administrative Settings and Tables in Polaris System Administration (Web-Based).
-
Select SAVE.
