
Institute Feature
Overview of the Institute Feature
The institute feature in SFX is used to store information about the context of the user and more specifically, the institution to which the user belongs. This is useful in consortia or group environments, when the context of the user has ramifications for the access to different SFX services.
The following is a description of the institute workflow:
- When SFX receives an OpenURL, it determines the institute to which the SFX user belongs.
- SFX includes the value of the institute in the ContextObject.
- SFX checks the SFX KnowledgeBase for specific institute settings. Some targets, for example, may be available for only certain institutes.
- Based on the information in step 3, an SFX menu appropriate for the institute of the SFX user is presented.
Currently, institute information about the SFX user can be derived from the following:
- A request that is forwarded from one instance to another in a consortium model
- A qualified base URL: http://<sfx_server>:<port>/<instance>-<institute>
- Part of an OpenURL element named sfx.institute
- The user’s IP address
- A cookie set using the user_profile cookie script (For more information, see Setting user_profile Cookies).
- Part of an OpenURL element named
The order in which the different methods are listed is also the order in which SFX checks for institute information.
Note that it is possible to change the order of the IP and cookie method checking. This may be useful in the following scenario: A user comes from an IP defined as part of an IP institute and has a cookie that identifies him as belonging to a different institute. By default, the system determines affiliation by IP (first method checked by SFX where institute affiliation can be established). If the cookie should take preference, the order can be changed by editing the config/institute.config_ file.
To have SFX check the cookie first, the select_inst_by section should be configured as follows:
|
Section "select_inst_by" IP "0" cookie "1" EndSection |
To have SFX check the IP first, the select_inst_by section should be configured as follows (this is the default setting):
|
institute.config_, with this section: Section "select_inst_by" IP "1" cookie "0" EndSection |
Defining Institutes and Institute Groups
When using the institute feature in SFX, the first step is to define institute names in the Institute section of KBManager.
Select Institutes on the main page of the SFX Admin Center to access the Institutes section.
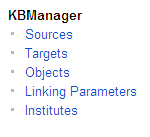
The Institutes section can also be accessed from the top KBManager toolbar.
Initially, no institutes are defined in the Institute section. Click Add Institute/Group to begin defining an institute.
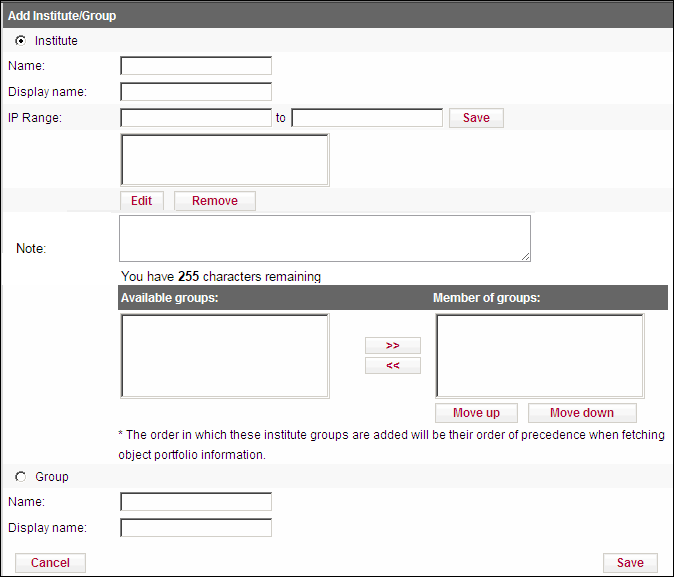
In the Add Institute/Group window, specify the following:
- The name of the institute (mandatory)
- The institute name cannot be changed once it is created. However, the display name (see below) can be changed after it is submitted.
- Do not use spaces or special characters such as !?‘;:” when choosing the institute name.
- A display name of the institute (mandatory)
- (Optional) The IP range(s) to used in identifying SFX users that are part of this institute. IP information must be specified only if IP is the method used to identify users. If cookies or consortia information are used to identify users, IP information is not required.
- (Optional) A note containing information about the institute.
- (Optional) Group information (the use of groups is explained in the following section).
Click Save at the bottom of the window to store the newly defined institute.
IP Information
To define IP ranges, specify the start and end of the IP range and click Save. The information is then listed in the list box. It is possible to define multiple ranges per institute by repeating this process.
To remove or edit IP ranges, select the IP range in the list box and click the Edit or Remove buttons.
The following are examples of IP ranges:
- One IP address: 10.1.1.1-10.1.1.1
- A range of IP addresses: 10.1.2.0-10.1.2.255; 10.1.3.10-10.1.3.21

Once the different institute names have been defined, the Institute section in KBManager will look like the following:
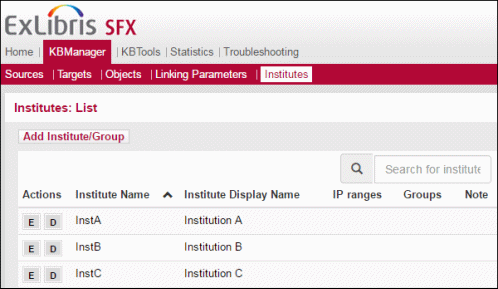
It is possible to group the different institutes. These groups can be used in KBManager in the same way as individual institutes—that is, you can activate institute-specific targets or define user name/password information specific to each institute or group.
- Click the Add Institute/Group link.
- Select Group at the bottom of the Add Institute/Group window.
- Specify the group name.
- Click Save at the bottom of the window to store the newly defined group.

In the Edit or Add Institute/Group window, select a group in the Available groups list and use the arrows to move the group to the box on the right:
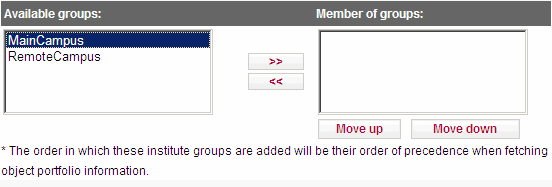
After defining groups and assigning institutes to groups, the lists of institutes and groups looks like the following:

The Edit and Delete buttons can be used on each of the institutes and groups that have been defined.
- Deleting institute or group information automatically removes all the institute or group settings in the SFX database.
- It is possible to create different groups and assign an institute to multiple groups.
- The lists of institutes and groups are searchable and sortable.
Institute Feature Testing and Troubleshooting
After the institutes and groups have been defined, it is important to test whether the institute information is stored in the ContextObject. The test depends on the method in which institute information is passed on to the SFX server.
The User’s IP Address
You can test the setup by creating a test institute with your own IP address.
When you send an OpenURL to the SFX server, you should see your test institute as one of the attributes in the ContextObject (the ContextObject data is shown in the HTML source for any SFX menu).
Using the user_profile Cookie Script
Use the following URL to set institute information using a cookie:
http://<sfx_server>:<port>/<instance>/cgi/public/user_cookie.cgi?usergroup=GUEST&language=NED&faculty=EXT&institute=test&source_id=&ml_session_id=&redirect= http://<sfx_server>:<port>/<instance>?rft.issn=0000-0019%26rft.date=2003
When you send an OpenURL to the SFX server, you should be able to see your institute test as one of the attributes in the ContextObject (the ContextObjectObject data is shown in the HTML source for any SFX menu).
Receiving Institute Information from Another SFX Instance
After the setup of consortium model 2 (where OpenURLs are forwarded to another instance), the instance_self_name is added to the ContextObject as an institute.
When you send an OpenURL to the SFX server, you should see your institute as one of the attributes in the ContextObject (the ContextObjectObject data is shown in the HTML source for any SFX menu).
Using Institute Information in KBManager to Store Information
Once the institute names have been defined, they can be used in KBManager when activating institute specific targets or defining user name/password information specific to each institute.
To define institute specific settings, use the Institute field in the TARGET, TARGET_SERVICE, or OBJECT_PORTFOLIO tables in KBManager.
It is possible to restrict or limit access for a particular TARGET, TARGET_SERVICE, or OBJECT_PORTFOLIO based on institute information.
The following general rules apply:
- If no institute or group information is assigned to a target, target service, or portfolio, the default activation status (active/inactive) is used.
- Specific institute or group information can be assigned to a target, target service, or portfolio. This option is used for the particular institute or group, if the availability information is different from the default activation settings.
For example:
- A specific target is available for everyone in a consortium sharing one SFX instance, except for one consortium member (defined as a specific institute to be called arts).
You configure this by adding specific institute information for arts to the target and setting the target to inactive for arts. All other consortia members use the default setting (which is active).
The following are some examples of the above scenario:
- All libraries except the Science library of a particular institution have access to MCB Emerald journals.
- All members of a library consortium except one have access to the Ebsco Academic Search Elite database.
- A specific target is available for only one member in a consortium sharing one SFX instance (defined as a specific institute to be called arts).
You configure this by adding specific institute information for arts to the target and setting the target to active for arts. All other consortia members use the default setting (which is inactive).
The following are some examples of the above scenario:
- Only the Science library of a particular institution has access to Elsevier Science Direct journals.
- Only a few members of a library consortium have access to Swets journals.
Institute thresholds can be set in the following database tables:
- TARGET
- TARGET_SERVICE
- OBJECT_PORTFOLIO
Setting Up Institute Localization
In KBManager, the Edit window of the TARGET, TARGET_SERVICE, and OBJECT_PORTFOLIO tables contains an Institute field.
To configure institute-specific information, click the Edit Institute Settings link in the Edit window of a particular target, target service, or object portfolio.

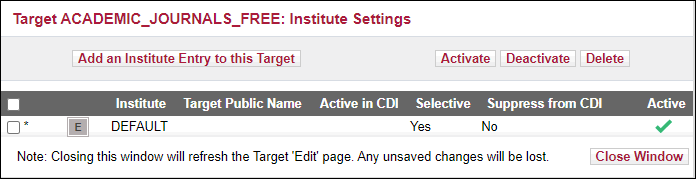
A list of currently defined institute settings appears in a separate browser window. In this window, it is possible to view, activate/deactivate, and remove institute-specific information. In the following example, no specific institute information has been added, so only the default activation is displayed:
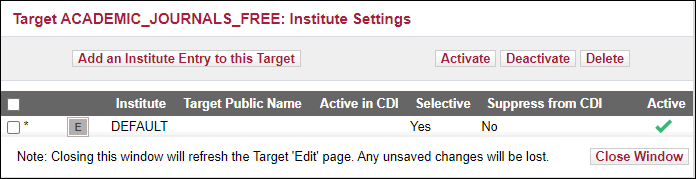
To add institute settings, click the Add an Institute Entry to this Target link. Another window opens:
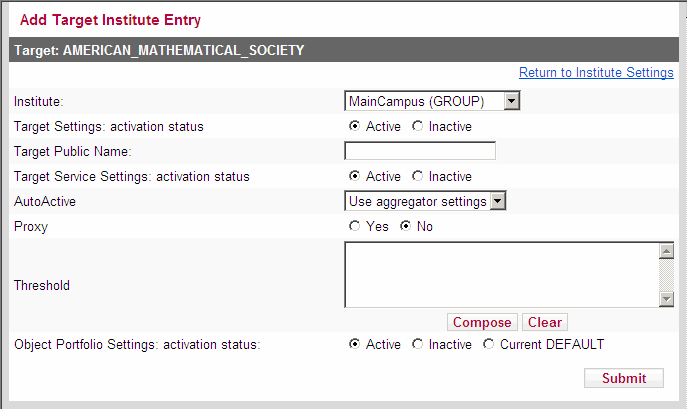
- Choose an institute or group name.
- Define the availability information of target/ target service/object portfolio for this institute or group.
- If you are defining a target or target service, you must also set the autoActive and Proxy settings.
- Click Submit to save the new institute information.
Viewing Institute Localization
If institute-specific information has been defined for a target, target service, or object portfolio, the institute column is displayed. If there are no active institute settings, the I in the column is gray. If there are active institute settings, the I is yellow. Clicking the I opens the Institute Information window for this target.
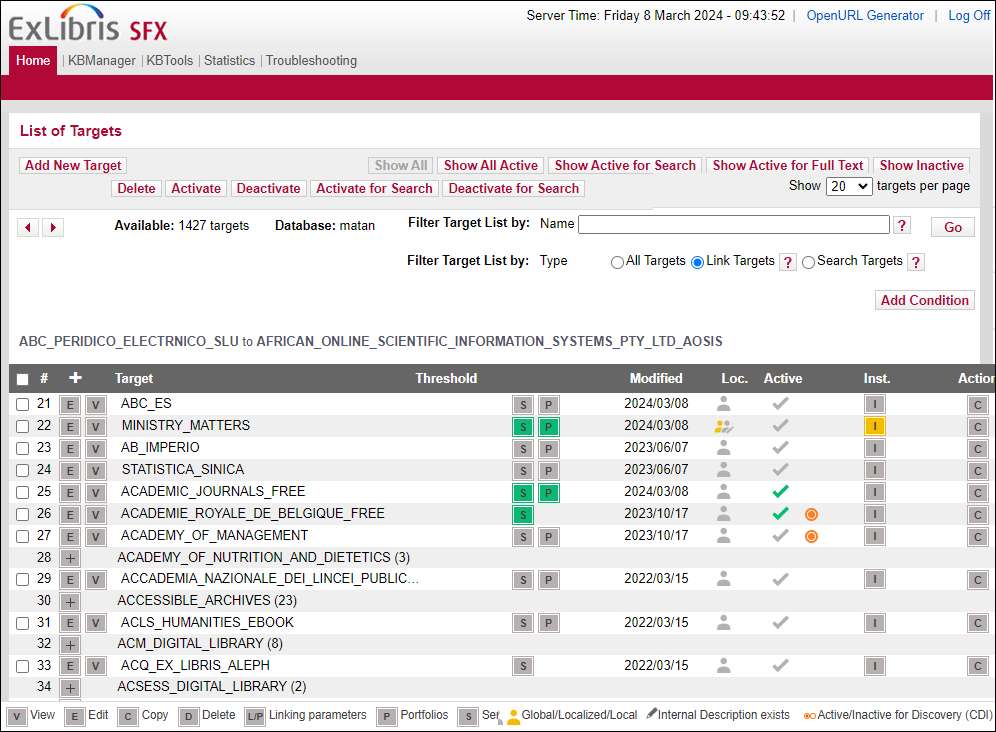
The Show Active, Show All, and Show Inactive filter buttons in the list of targets, target services, and portfolios will take into account availability information from default and institute-specific settings. For example, even though the Wiley target is not active, the target is active for one of the institutes defined in the SFX instance. As a result, the target is listed if you click the Show Active button.
Copying Institute Settings When Copying a Target, Target Service, or Object Portfolio
In KBManager, when copying a target, target serice, or object portfolio, there is an option to copy institute settings.
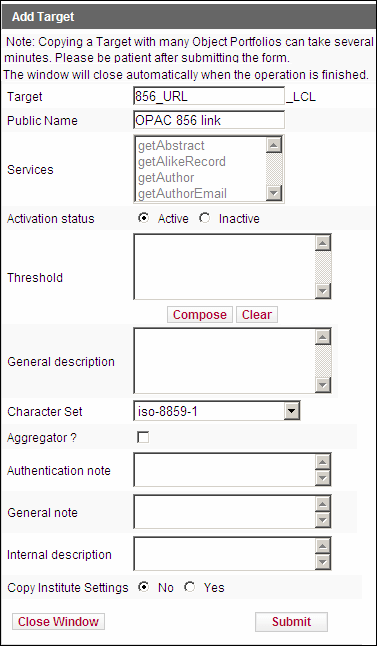
Select Yes to copy the institute activation and institute specific threshold information to the newly created target, target service, or object portfolio.
Storing Institute Information in Different Database Tables
It is possible to combine institute settings in different database tables and to assign both group and institute-specific information. To make sure the SFX software can handle a situation where availability settings exist for an institute and one or more groups to which an institute belongs, a feature called Ranking is used.
Ranking works in the following way:
- If institute settings exist for a specific target, target service, or object portfolio, these take preference over any group settings.
- If multiple group settings have been defined, one group takes preference over another by taking into account the order in which an institute has been assigned to groups.
For example, the institute arts is first part of the Campus1_College1 group, and then the College1 group.
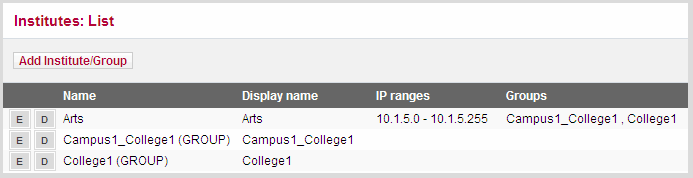
A particular target has the following institute-specific activation:
- Active setting for Campus1_College1
- Inactive setting for College1
The SFX software will take into account the active setting for Campus1_College1 and ignore the inactive setting for College1 .
Setting user_profile Cookies
An external database can send user information to SFX using a cookie named user-Profile.
To achieve this, the external database should send a request to the SFX server for the creation of the cookie with the appropriate user information in the following way:
http://<sfx_server>:<port>/<sfx_instance>/cgi/public/user_cookie.cgi?usergroup=<user_group>&language=<language>&faculty=<faculty>&institute=<institute>&redirect=<url_to_go_back_to>
Section "sfx_language_code_to_sfxmenu"
dut "Dutch"
spa "Spanish"
eng "English"
EndSection
For example: http://demo.exlibrisgroup.com:3210/demo/cgi/public/user_cookie.cgi?usergroup=GUEST&language=English&faculty=LAW&institute=test&redirect= http://demo.exlibrisgroup.com:3210/demo?issn=0000-0019%26date=2003Once SFX receives the above request, it creates a cookie named user-Profile that contains the content of the user group, faculty, language, and institute fields and redirects the user to the URL specified in the redirect field.
Every time a user accesses SFX, SFX attempts to read the user-Profile query. If the cookie is available, SFX adds the content of the cookie to the appropriate ContextObject attribute:
- Faculty maps to the Faculty attribute.
- Institute maps to the Institute attribute.
- Language maps to the Language attribute.
- User group maps to the UserGroup attribute.
- Use the following URL:
http://<sfx_server>/<sfx_instance>/user_cookie?usergroup=<user_group>&language=<language>&faculty=<faculty>&institute=<institute>&redirect=<url_to_go_back_to>
where all the info between <> should be replaced with actual information.
- Send an OpenURL to your instance with some metadata. For example:
http://<sfx_server>:<port>/<sfx_instance>?genre=journal&issn=0000-0019
- Check the HTML source of the SFX menu screen and verify that the ContextObject now contains usergroup, language, faculty, and institute information.
For example:
|
<!-- <ctx_object_1>$VAR1 = bless( { |req.user_group| => |GUEST|, |req.faculty| => |LAW|, |req.language| => |English|, |@req.institutes| => [|test|], }, |ContextObject::Generic| ); </ctx_object_1> //--> |
