This page describes general configuration related to fulfillment including item policies, self check machine messages, printers, etc. For links to all the main fulfillment documentation pages see Fulfillment.
Configuring Item Policies
アイテムポリシーを設定するのは、次のいずれかの役職でなければなりません。
一般システム管理者
フルフィルメント管理者
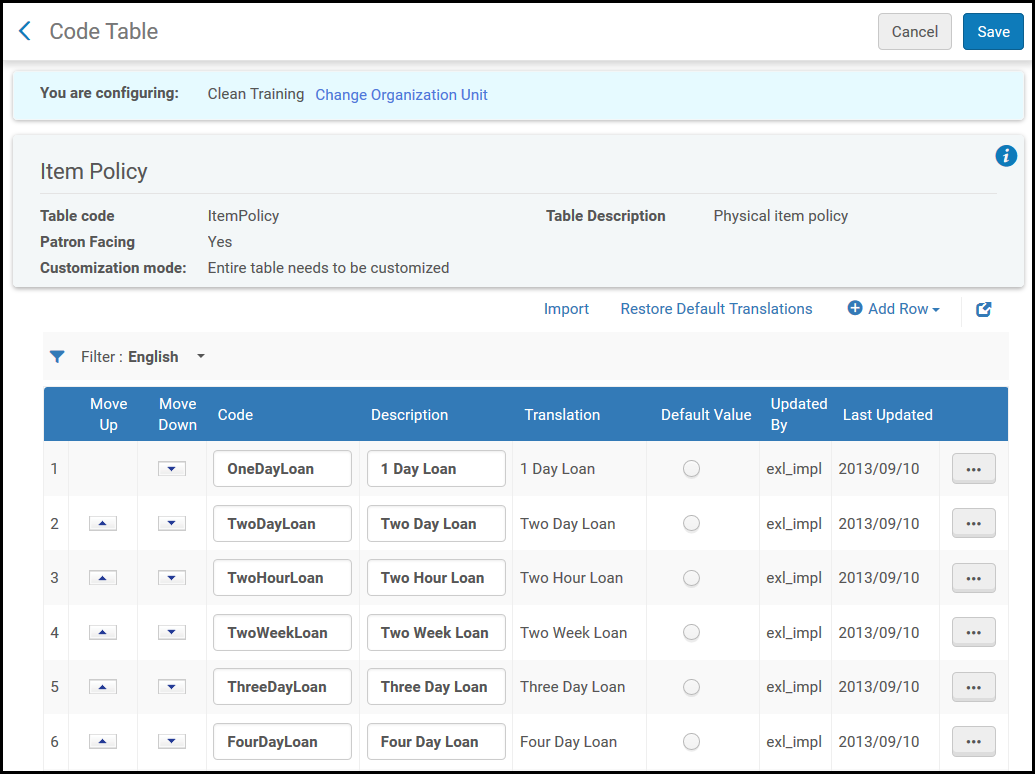
アイテムポリシーは、フルフィルメントユニットルールに例外ルールを作成し、特定のロケーションにある特定のアイテムが、そのロケーションに保存されている一般的なアイテムとは異なる方法で貸出・返却できるようにします。See Creating a Request.
Once you define item policies for a library at the library level, that library will no longer automatically inherit changes that are made to the item policies defined at the institution level.
Modifying an item policy may have implications for several functional areas in Alma.行った変更を適切に調整するようにしてください。
To configure an item policy so that all of the items associated with the policy are not available for resource sharing, see Configuring Item Policy Exceptions.
You can configure how item alerts display in the Scan In Interface (Acquisitions > Post Receiving Processing > Scan In Items or Fulfillment > Resource Requests > Scan In Items).You can configure them to appear as pop-up messages, feedback messages, or to not appear at all.
アラートタイプ
例
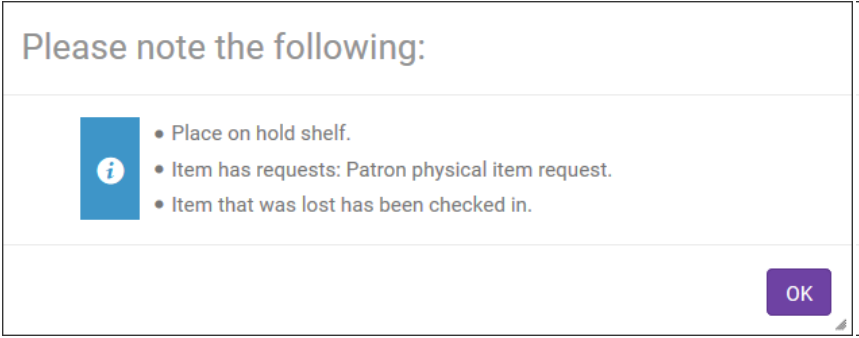
ポップアップ
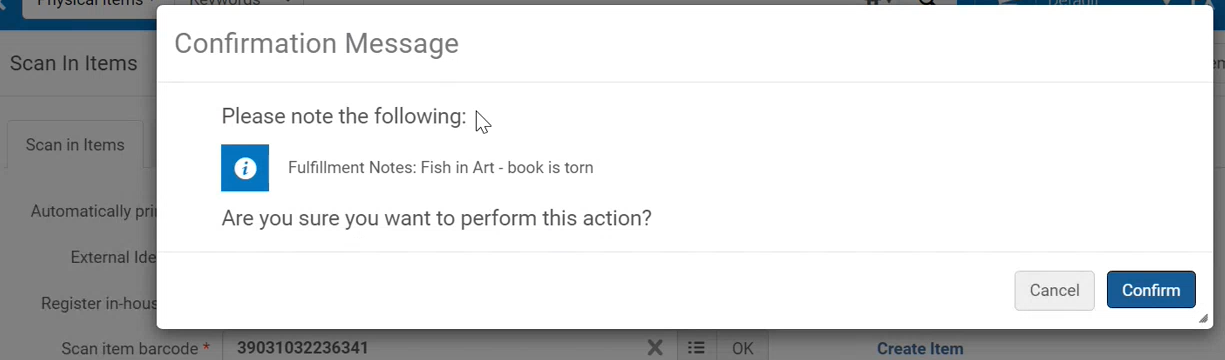
The message is shown as a pop-up and the operator must pause to make this selection before moving on to scan the next book.
各ポップアップメッセージに[確認]ボタンを表示させるかさせないかは構成できます。For messages where it appears, the pop-up message appears before the scan-in is performed.Based on the contents of the message, the operator can decide not to continue with the scan-in (select Cancel in the message), or to continue with the scan (select Confirm).
「確認」が表示されないメッセージの場合、ポップアップメッセージは情報提供のみを目的としています。
ポップアップメッセージの内容を設定することはできません。
フィードバック
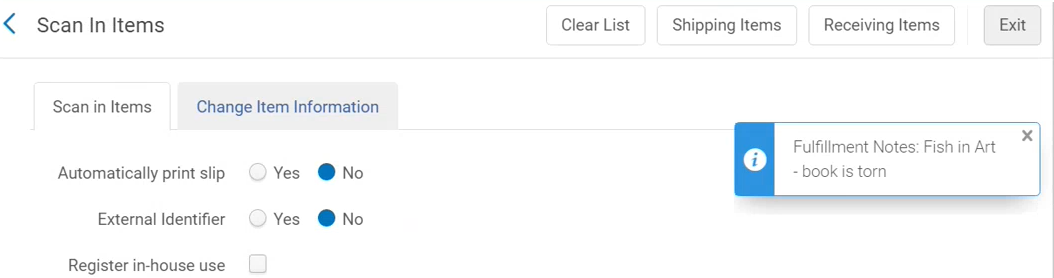
The feedback message pops up after the scan has been performed and it serves an informative function only.The operator does not have to pause to make any selection before moving on to scan the next item.
It is not possible to configure the feedback message's content.
なし
メモについてユーザーに通知されることはありません。メッセージは表示されません。
To configure scan-in alerts:
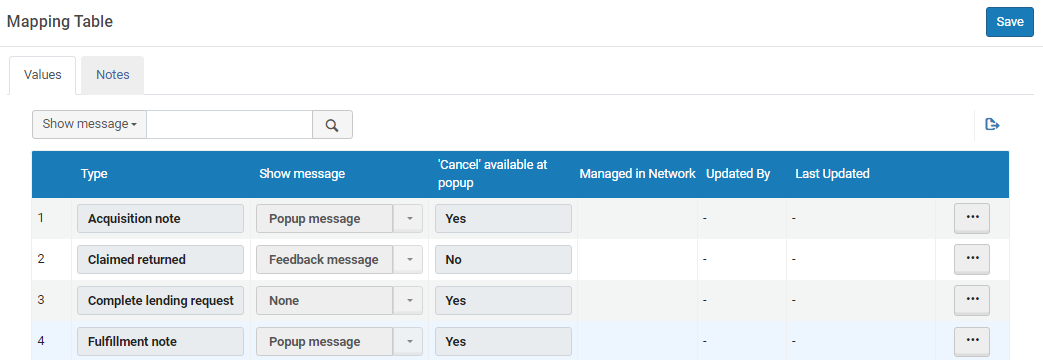
On the Scan In Messages Configuration page (Configuration Menu > Fulfillment > Physical Fulfillment > Scan In Messages Configuration), select Customize from the row actions list of the message that you want to configure.
以下のように情報を選択してください。
列
説明
タイプ
メモタイプのリストは組み込みのリストです。
メモの種類は次のとおりです。
Acquisition note - The message is:Item has not been received by Acquisition Department.
Claimed returned - The item was on loan and claimed returned.
Fulfillment note - A fulfillment note exists on the item.
Hold shelf processing - A request to put the item on the local hold shelf exists, but no message has yet been sent to the patron.This message appears if the circulation desk has been configured with the Has hold shelf processing option selected, and the Place directly on hold shelf option has been selected in the Scan In Items page.
Internal note 1, 2, 3 - An internal note (general notes regarding the item visible only to library staff in Alma) exists on the item.
Item has requests - This item was requested.
Lost - The book was on loan and registered as lost in Alma.
Magnetic material - The value of the Is magnetic field in the scanned-in item's record is Yes.
Missing - The book was registered as missing in Alma.
Overdue loan was returned - The item was returned late and may have fines standing against it.
Personal delivery - The scanned-in item is requested for personal delivery (such as home or office delivery).
Place on hold shelf - The item needs to be placed on the hold shelf to be picked up by a patron.
Public note - A public note (general note regarding the item that is visible to patrons in Primo as well as in Alma) exists on the item.
Remote storage location - The item needs to be returned to its remote storage location.
Request note - This item was requested and the request placer entered a note on the request.
一時的な場所 - アイテムは現在、永続的な場所にないため、一時的な場所に保管する必要があります。
移行 - アイテムは別の受付/図書館に送信する必要があります。
Work Order - The item needs to go into a work order.
メッセージを表示
メモを表示するかどうか、および表示する方法を選択します。
If several popup messages of the same “Cancel available at popup” type should be shown for the item, the system merges multiple messages into a single pop-up window.
If a pop-up message and a feedback message of the same “Cancel available at popup” type are defined for the same item, both will be displayed as a pop-up message, in order for the feedback message not to get obscured by the pop-up and be missed by the operator.For example, if two messages are triggered for the same item, an Acquisition note and a Fulfillment note, but one is set to Popup message and the other is set to Feedback message, both messages will appear in a pop-up message, instead of a pop-up message and a feedback message.
ポップアップで利用可能な「キャンセル」
Defines the phase during which a pop-up action is performed during the scan-in process.For Feedback Message or None, this is not applicable
Yes- for actions that are done before the scan-in operation is performed and support cancelling the scan-in action..
No- Messages that appear only after the scan-in operation is completed and do not offer a Cancel option.
Messages where the Cancel available at popup=yes are displayed in a single pop-up window (for the same item) and all messages where Cancel available at popup=no are displayed in a separate window.Thus, the operator can potentially receive two sets of messages for a single item.ただし、最初のセットのメッセージがキャンセルされた場合、それ以上のメッセージは表示されません。
変更を保存するには、保存を選択します。
プリンターの設定
プリンターを設定するのは、次のいずれかの役職でなければなりません。
一般システム管理者
フルフィルメント管理者
AlmaはSaaS環境でホストされています。セキュリティ上の問題と技術的な制限により、SaaS環境はローカルプリンターまたはネットワークプリンターの直接接続をサポートしていません。代わりに、Almaでの印刷は、Eメールまたは印刷列を使用して機能します。Printout queue is the preferred option though email printing is still supported (see Printouts Queue).各図書館/機関は、AlmaにあるローカルプリンターのEメールアドレスを定義する必要があります。このプリンターは、スタッフ向けのAlma発祥のEメール(リクエストおよび通過伝票を含む)を適切なプリンターにルーティングします。The printing queue method is the preferred method when printing to a physical printer.
For information on printing in Alma, watch Printing (3:22)
In the Add Printer dialog box, enter a code and a name (both required).If you are not using the printouts queue or quick printing (see Printouts Queue), enter an email address for the printer.必要に応じて、説明も追加します。
[プリンターの追加]ダイアログボックス
追加して閉じるを選択して、ダイアログボックスを閉じます。定義されたプリンターは、[プリンター]ページのプリンターのリストに追加されます。プリンターページプリンターを定義し、どの貸出・返却受付とサービスユニットがプリンターによってサービスされるかを指定できます。For details, see Editing Printer Information.
プリンター情報の編集
任意のプリンターの詳細を編集できます。詳細については、次のとおりです。
一般的なプリンター情報
プリンターが提供する貸出・返却受付とサービスユニット
プリンター情報を編集する場合:
On the Printers page (Configuration Menu > Fulfillment > General > Printers), in the Code column, select the printer code link, or select Edit from the row actions list for the specific printer record whose information you want to update.[プリンターの編集]ページが開きます。
プリンターの編集で、必要に応じて一般的なプリンターの詳細を編集します。When you want print routed to a queue in addition to an email address, select the Printout Queue option.See Printouts Queue for more information.印刷列オプションを選択すると、プリンターのリストに追加の列(オンライン列)が表示され、オンライン列オプションが選択されていることを示すチェックマークが付きます。
Configure mandatory fields for resource sharing request forms (see To configure mandatory fields for resource sharing request forms:)
Configure a group of fields in which at least one of the fields is mandatory when configuring a resource sharing request (see To configure a group in which one field is mandatory:)