
Configuring Fulfillment Networks
A fulfillment network can be set up for two or more institutions regardless of whether they work with a Network Zone. For general information about fulfillment networks, seeFulfillment Networks.
When a patron from institution A walks into institution B, a circulation desk operator must retrieve the patron's information from institution A as the first step of managing the patron's activities. All identifier fields (such as student ID, barcode, etc.) remain non-unique between institutions. Alternatively, Ex Libris can configure shared user identifiers to ensure that one or more user identifiers are identical throughout all of the fulfillment network's linked institutions. For example, you can set that a specified user name configured at one fulfillment network institution is automatically configured at the network's linked institutions.
Téngase en cuenta que si usa el mismo identificador para identificar estudiantes en múltiples instituciones, debe asegurarse que ese ID sea único en todas las instituciones miembro.
Se deben configurar las reglas de cuentas enlazadas para que una red de servicios al usuario funcione correctamente. For more information on linked accounts, see Linking Users in Collaborative Networks.
To use the fulfillment network functionality:
- For each member institution of the fulfillment network, verify that the networkSearchPassword customer parameter is set to the password to be used by all the institutions that are part of the fulfillment network. See Configuring Other Settings (Resource Management).
- Añadir cada institución que sea parte de la red de servicios al usuario en la página Miembros de Servicios al Usuario. See Configuring Fulfillment Members. Esto solo es necesario si no se está trabajando con una institución de la Zona de red.
- When the fulfillment network is configured for institutions that are working with a Network Zone institution, you can add network group members on the Fulfillment Networks Management Groups page (see Configuring Fulfillment Networks Management Groups). La misma institución de la Zona de red es la que debe configurar los grupos de gestión de redes de servicios al usuario.
For information on working with fulfillment networks, see Fulfillment Networks.
Watch the Configuring a Fulfillment Network video (4:00 mins).
Configuring Fulfillment Members
Para configurar miembros de servicios al usuario, se debe tener el siguiente rol:
- Administrador general del sistema
Each institution that is part of a fulfillment network must be listed in the Fulfillment Members page (Configuration Menu > General > Network Groups > Fulfillment Member).
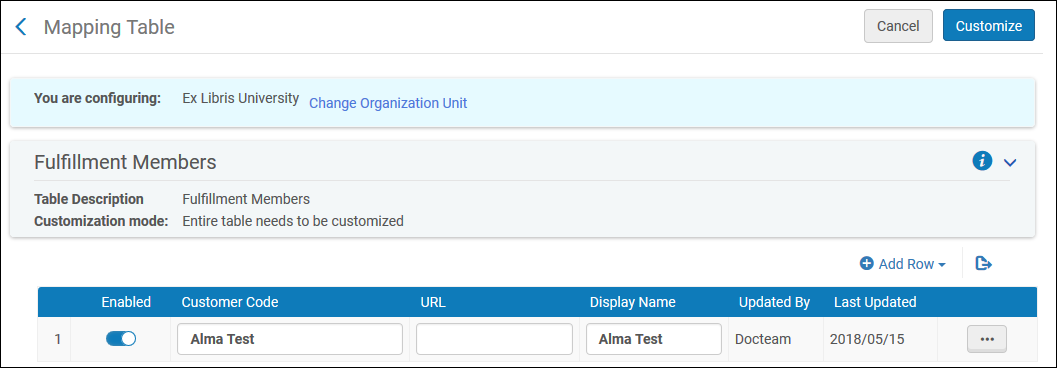
- Select Add Row and enter the following details in the dialog box for each library that is to be part of the fulfillment network:
- Código de cliente – El Código de Institución de Alma
- URL – la URL base usada por la institución para acceder a Alma
- Mostrar nombre – el nombre de la institución a ser mostrada en Alma
- Select Add Row. Los detalles para la institución que se agregaron aparecen en las filas de lista de tablas de mapeo. Realizar los dos pasos previos para cada institución que va a ser parte de la red de servicios al usuario.
- Select Save.
Configuring Fulfillment Networks Management Groups
Para configurar grupos de gestión de redes de servicios al usuario, se debe tener el siguiente rol:
- Administrador general del sistema
Within a Network Zone, all member institutions can potentially participate in a fulfillment network. Una institución de la Zona de red crea los grupos de gestión de redes para definir qué instituciones pueden participar en realidad en la red de servicios al usuario. Las instituciones de la Zona de red agrupan campus y bibliotecas que tienen una relación de servicios al usuario entre sí. Access the Fulfillment Networks Management Groups page (Configuration Menu > General > Network Groups > Fulfillment Network Groups).
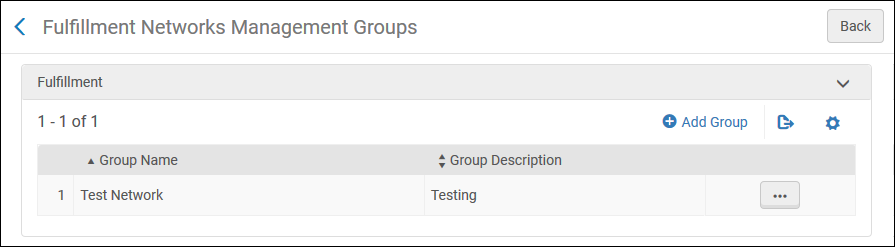
To be able to add partners (Fulfillment > Partners) of type 'Fulfillment Network', you have to add a placeholder entry to the Fulfillment Members table (Configuration > General > Network Groups > Fulfillment Member). Only then can you add the partners to the Fulfillment Networks Groups page (Configuration Menu > General > Network Groups > Fulfillment Network Groups). Once you have set up all the Partners in the Network Zone, you can either leave that placeholder entry in the Fulfillment Members table in the Network Zone or delete it. If you decide to delete it, the partners will show as Profile Type 'Fulfillment Network (Not Listed)' in the Fulfillment Partners table, but they will still be functional as Fulfillment Network partners.
To add a Fulfillment Networks Management Group:
- Select Add Group. Aparece el cuadro de diálogo Añadir grupo.
- Define a name for the fulfillment network group, add a description of the group (optional), and select Add and Close. El grupo que se definió se añade a la lista de grupos en la página Grupos de gestión de redes de servicios al usuario.
- Editar el grupo que definió. In the Add Another Member section, select the campus or library that you want to include in the fulfillment network group, and select Add Campus or Add Library(accordingly). Los miembros seleccionados aparecen en la lista de miembros de grupo de redes de servicios al usuario.
Configuring Pick Up Anywhere/Return Anywhere
Los siguientes pasos de configuración deben completarse para asegurar que todos los campos descritos a continuación aparezcan en todos los procesos recoger en cualquier lugar y devolver en cualquier lugar.
- Add a relation in the Institutions Relations page:
In the Network Zone (if you are implementing a Network Zone) or each fulfillment network member institution (if you are working in a fulfillment network that is not implementing a Network Zone), open the Institutions Relations Setup page (Configuration Menu > General > Network Groups > Institutions Relations),
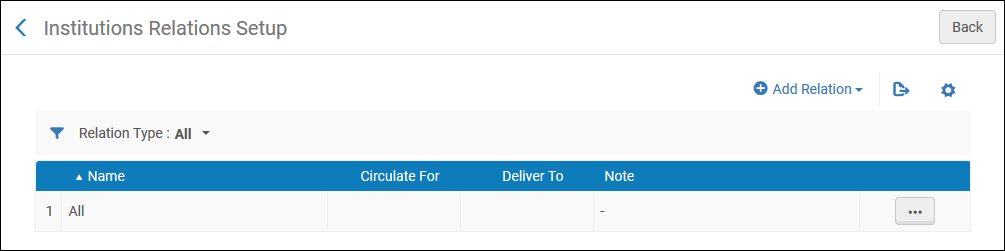
- Select Add Relation to add a new relation. Aparece el panel Añadir Relación. Rellenar el panel de la siguiente manera:
- From- select the institution whose fulfillment network behavior is configured. Este campo solo se configura para una instución de la Zona de red.
- To- configure the institution who participates as a remote institution in the fulfillment process.
- Select Deliver To and/or Circulate For.
- Optionally add a note in Note.
- Select Add Relation to finish. Se cierra el panel Añadir Relación. La relación aparece en la tabla en la página de Relaciones de las instituciones.
Dadas dos instituciones, A y B, el siguiente ejemplo de configuraciones existe para configurar institución A:
- Si se selecciona Circular en, los usuarios de la institución A pueden pedir préstamo y devolver ejemplares pertenecientes a la institución B.
- Si está seleccionado Entregar a, la institución A puede enviar sus propios ejemplares a la institución B para recoger en institución B.
- Select Add Relation to add a new relation. Aparece el panel Añadir Relación. Rellenar el panel de la siguiente manera:
- The Pickup Location policy must be set to At Any Institution in a request Terms of Use. Esto permite recoger ejemplares en otras instituciones en la red de servicios al usuario y se debe completar por todas las instituciones, sin importar si participan con una Zona de red. See Adding Fulfillment Policies.
- The Serves Other Institutions check box must be selected in each library's summary (on the Summary tab of the Libraries page at Configuration > General > Libraries > Add a Library or Edit Library Information > Libraries). Seleccionar esta casilla de verificación afecta a las devoluciones y a los préstamos de otras bibliotecas de la siguiente manera:
- The Item Owner drop-down list is available to display when scanning in returns for other institutions. Whether the Item Owner list is displayed also depends on the setup in the fulfillment_network_unique_barcodes parameter. See Configuring Other Settings (Fulfillment).
- Only those libraries that have the Serves Other Institution check box selected are displayed in the Pickup Institution drop-down list when creating a hold request for an item whose location for check out is not at the item owner's library.
For more information about return anywhere, see Returning Items.
