
Configuring Fulfillment Networks
A fulfillment network can be set up for two or more institutions regardless of whether they work with a Network Zone.For general information about fulfillment networks, seeFulfillment Networks.
When a patron from institution A walks into institution B, a circulation desk operator must retrieve the patron's information from institution A as the first step of managing the patron's activities.すべての識別子フィールド (学生ID、バーコードなど) は、機関間での重複があり得ます。Alternatively, Ex Libris can configure shared user identifiers to ensure that one or more user identifiers are identical throughout all of the fulfillment network's linked institutions.For example, you can set that a specified user name configured at one fulfillment network institution is automatically configured at the network's linked institutions.
同じ識別子を使用して複数の機関の学生を識別する場合、これらの識別子がすべてのメンバー機関間で重複していないことを確認する必要があります。ご注意ください。
フルフィルメントネットワークが正しく機能するには、リンクされたアカウントルールを設定する必要があります。For more information on linked accounts, see Linking Users in Collaborative Networks.
To use the fulfillment network functionality:
- フルフィルメントネットワークの各メンバー機関の場合、顧客パラメータnetworkSearchPasswordが、フルフィルメントネットワークの一部であるすべての機関が使用するパスワードに設定されていることを確認します。See Configuring Other Settings (Resource Management).
- フルフィルメントネットワークの一部である各機関を、フルフィルメントメンバーページに追加します。See Configuring Fulfillment Members.これは、ネットワークゾーンの機関と連携していない場合にのみ必要です。
- When the fulfillment network is configured for institutions that are working with a Network Zone institution, you can add network group members on the Fulfillment Networks Management Groups page (see Configuring Fulfillment Networks Management Groups).ネットワークゾーン機関自体が、フルフィルメントネットワーク管理グループを設定する必要があります。
For information on working with fulfillment networks, see Fulfillment Networks.
Watch the Configuring a Fulfillment Network video (4:00 mins).
フルフィルメントメンバーの設定
フルフィルメントメンバーを設定するには、下記の役職が必要です:
- 一般システム管理者
Each institution that is part of a fulfillment network must be listed in the Fulfillment Members page (Configuration Menu > General > Network Groups > Fulfillment Member).
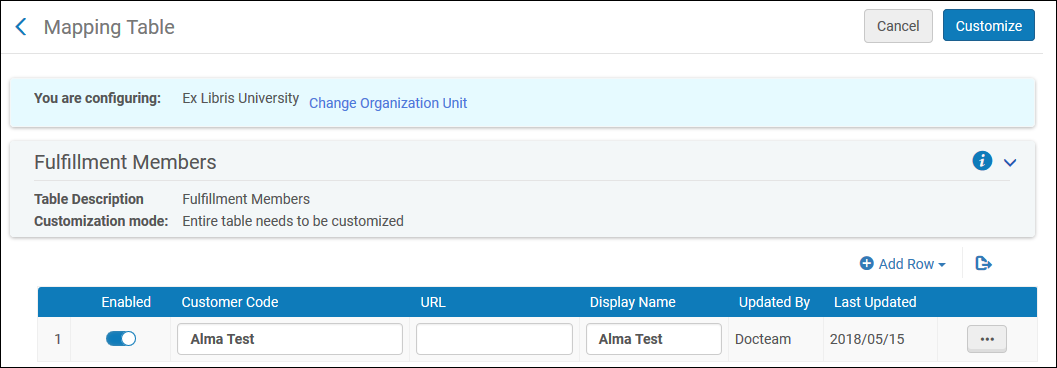
- Select Add Row and enter the following details in the dialog box for each library that is to be part of the fulfillment network:
- 顧客コード – Alma機関コード
- URL – 機関がAlmaにアクセスするために使用する基本URL
- 表示名 – Almaに表示される機関の名称
- 行を追加を選択します。追加した機関の詳細は、マッピングテーブルの行のリストに表示されます。フルフィルメントネットワークの一部となる各機関について、上記の2つの手順を実行します。
- [保存]を選択します。
Configuring Fulfillment Networks Management Groups
フルフィルメントネットワーク管理グループを設定するには、下記の役職が必要です:
- 一般システム管理者
Within a Network Zone, all member institutions can potentially participate in a fulfillment network.ネットワーク管理グループは、どの機関がフルフィルメントネットワークに実際に参加できるかを定義するために、ネットワークゾーン機関によって作成されます。ネットワークゾーンの機関は、互いにフルフィルメント関係にあるキャンパスと図書館をグループ化します。Access the Fulfillment Networks Management Groups page (Configuration Menu > General > Network Groups > Fulfillment Network Groups).
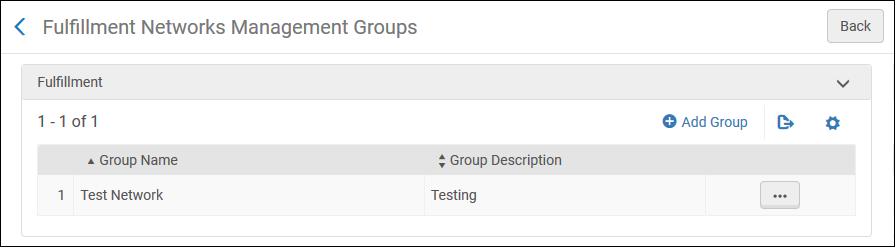
To be able to add partners (Fulfillment > Partners) of type 'Fulfillment Network', you have to add a placeholder entry to the Fulfillment Members table (Configuration > General > Network Groups > Fulfillment Member).Only then can you add the partners to the Fulfillment Networks Groups page (Configuration Menu > General > Network Groups > Fulfillment Network Groups).Once you have set up all the Partners in the Network Zone, you can either leave that placeholder entry in the Fulfillment Members table in the Network Zone or delete it.削除する場合、パートナーは[フルフィルメントパートナー]テーブルにプロファイルタイプ「フルフィルメントネットワーク(リストされていません)」として表示されますが、フルフィルメントネットワークパートナーとしては引き続き機能します。
To add a Fulfillment Networks Management Group:
- グループを追加を選択します。「グループを追加」するダイアログボックスが表示されます。
- フルフィルメントネットワークグループの名称を定義し、グループの説明を追加して (任意入力)、追加して閉じるを選択します。定義したグループは、「フルフィルメントネットワーク管理グループ」ページにあるグループのリストに追加されます。
- 定義したグループを編集します。In the Add Another Member section, select the campus or library that you want to include in the fulfillment network group, and select Add Campus or Add Library(accordingly).選択したメンバーが、フルフィルメントネットワークグループメンバーのリストに表示されます。
Configuring Pick Up Anywhere/Return Anywhere
以下で説明するすべてのフィールドが「どこでも受取/返却」プロセス全体に表示されることを確認するには、下記の設定手順を完了する必要があります。
- 機関の関係ページで関係を追加します:
In the Network Zone (if you are implementing a Network Zone) or each fulfillment network member institution (if you are working in a fulfillment network that is not implementing a Network Zone), open the Institutions Relations Setup page (Configuration Menu > General > Network Groups > Institutions Relations),
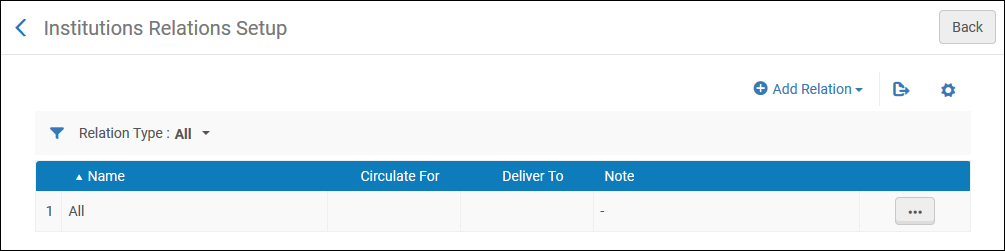
- 新しい関係を追加するには、関係を追加を選択します。「関係を追加」パネルが表示されます。パネルには下記のように入力します:
- From- select the institution whose fulfillment network behavior is configured.このフィールドは、ネットワークゾーン機関についてのみ設定されます。
- To- configure the institution who participates as a remote institution in the fulfillment process.
- 配信先や貸出・返却先を選択します。
- 任意でメモにメモを追加します。
- 終了するには、関係を追加を選択します。「関係を追加」パネルが閉じます。関係は、「機関の関係」ページの表に表示されます。
2つの機関AとBがある場合、機関Aを設定するには下記の設定例が存在します:
- 「貸出・返却先」が選択されている場合、機関Aのユーザーは、機関Bに属するアイテムをチェックアウトおよびチェックインできます。
- 「配信先」が選択されている場合、機関Aは自機関のアイテムを機関Bに送付して、機関Bで受け取ることができます。
- 新しい関係を追加するには、関係を追加を選択します。「関係を追加」パネルが表示されます。パネルには下記のように入力します:
- 利用規約のリクエストでは、受取場所ポリシーを[任意の機関]に設定する必要があります。This allows picking up items at other institutions in the fulfillment network and must be completed by all institutions regardless of whether they are participating with a Network Zone.See Adding Fulfillment Policies.
- The Serves Other Institutions check box must be selected in each library's summary (on the Summary tab of the Libraries page at Configuration > General > Libraries > Add a Library or Edit Library Information > Libraries).このチェックボックスを選択すると、下記のように他の図書館のチェックインとチェックアウトに影響します:
- The Item Owner drop-down list is available to display when scanning in returns for other institutions.Whether the Item Owner list is displayed also depends on the setup in the fulfillment_network_unique_barcodes parameter.See Configuring Other Settings (Fulfillment).
- チェックアウトする場所がアイテム所有者の図書館でないアイテムの取り置きリクエストを作成する場合、「他機関にサービスを行う」チェックボックスが選択されている図書館のみが受取機関のドロップダウンリストに表示されます。
For more information about return anywhere, see Returning Items.
