
Configuring Work Orders and Departments
Configuring Work Order Types
- 一般システム管理者
Watch the Work Orders video (7 min.).
次のフローチャートは、作業指示書のタイプと部門を追加するための高レベルの論理ステップを示しています。
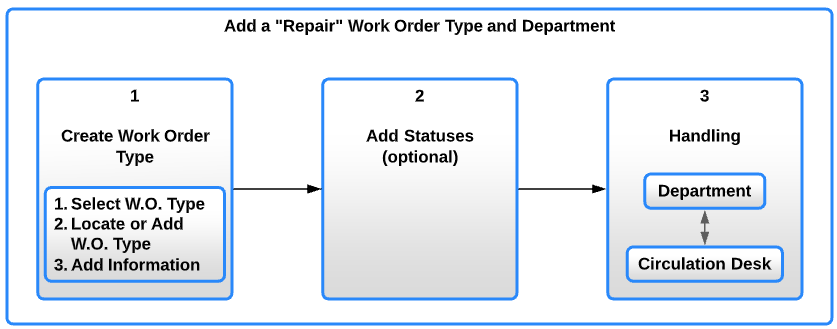
A work order is an internal library request to route physical materials to a specific department for internal processing.ワークオーダーにより、アイテムを部署に送付します(書架では利用不可とマークします)。その部署では、アイテムを内部ステータスに従って管理できます。Departments and statuses can be configured according to a library's local needs.
A work order type indicates the type of library process to be carried out on a resource, such as binding or cataloging.Each department in your library is assigned to handle a specific work order type.
ワークオーダーの各タイプには、そのタイプのワークオーダーに割り当てることができるステータスのリストがあります。たとえば、ワークオーダーのタイプが「装丁」のステータスは、「接着」「縫製」などです。ワークオーダーのタイプが「デジタル化」のステータスは、「デジタル化中」「ドキュメントデリバリー」などです。
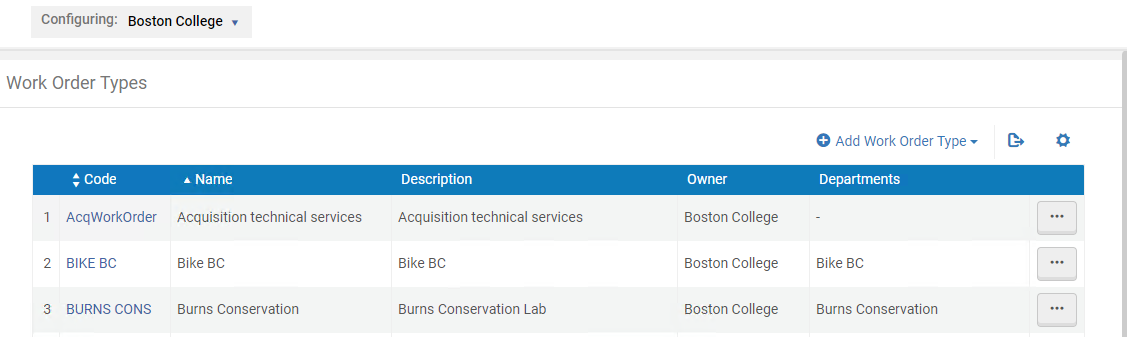
You configure work order types on the Work Order Types page (Configuration Menu > General > Work Orders and Departments > Work Order Types).
Work orders can be initiated by placing a request on the item or from the List of Items page (see Working with the List of Items).
[ワークオーダータイプ]ページでは、次のアクションを実行できます。
- Add a work order type (see Adding a Work Order Type)
- Add, edit, or delete departments (see Adding a Department)
- ワークオーダータイプからステータスを追加・削除する(その行のアクションリストで[ステータスを管理])。
- ワークオーダータイプを編集する(その行のアクションリストで[編集])。
- ワークオーダータイプを削除する(その行のアクションリストで[削除])。
ワークオーダータイプを作成すると、次の1つ以上を設定できます。
- Departments (see Configuring Departments)
- Statuses (see Configuring Work Order Type Statuses)
Having work order types configured enables you to monitor physical items with work requests and identify their processing status (see Requests Monitor).
For more information on Alma work orders, see the  Physical Inventory - Defining and managing work orders in Alma document.
Adding a Work Order Type
ワークオーダータイプを作成すると、そのワークオーダータイプに関連付ける部署とステータスを指定できます。For details, see Configuring Departments and Adding a Work Order Type Status.
作業指示書のタイプを追加すると、作業指示書部門が自動的に作成されます。The administrator can then update it and/or add departments as needed (see Configuring Departments).
To add a work order type:
- On the Work Order Types page (Configuration Menu > General > Work Orders and Departments > Work Order Types), select Add Work Order Type.
- 次を入力/選択してください。
- ワークオーダータイプのコード
- ワークオーダータイプの名前
- 説明
- 貸出のリコール – このタイプのワークオーダーの貸出では、アイテムをより迅速に返却する必要があります。Selecting this causes a Recall Request to be sent to the patron that borrowed the item.To configure the letter, see Configuring Alma Letters.
- [ワークオーダータイプの追加]を選択します。
A work order name cannot be customized if the AcqWorkOrder code is used.The name is always displayed as Acquisition technical services, or its translated equivalent.
Configuring Work Order Type Statuses
ワークオーダータイプのステータスにより、ワークオーダーの処理段階を定義して、ワークオーダーリクエストの進捗を監視することができます。For details regarding monitoring requests in Alma, see Managing Requests and Work Orders.
ワークオーダータイプのステータスは、追加後に編集することはできません。いずれかのフィールドを変更するには、作業指示書タイプのステータスを削除 (削除) し、再度追加する必要があります。
ワークオーダータイプのステータスの追加
ワークオーダータイプのステータスの定義と設定は、以前に設定・保存された特定のワークオーダータイプに関連付けられ、[ワークオーダータイプ]ページに表示されます。ワークオーダータイプには、それに関連付けられているステータスが少なくとも1つ必要です。
To add a work order type status:
- On the Work Order Types page (Configuration Menu > General > Work Orders and Departments > Work Order Types), select Manage Statuses in the row actions list for a specific work order type.The Work Order Type Statuses page appears.
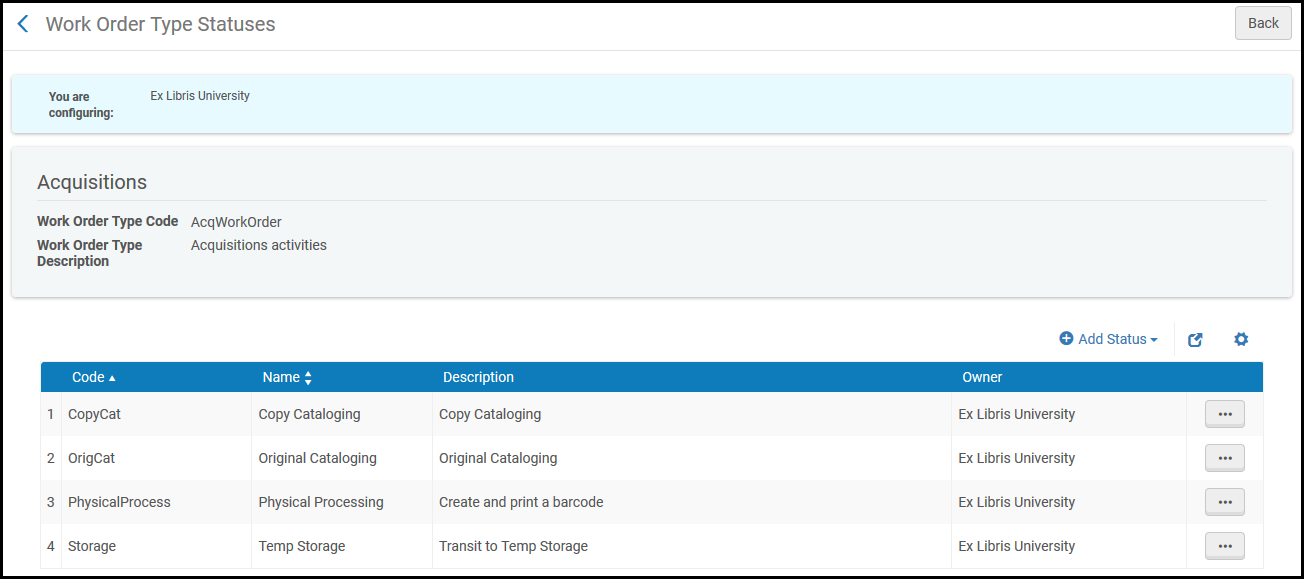
- [ワークオーダータイプのステータス]ページで、[ステータスを追加]を選択します。
- 作成中のステータスのコード、名前、説明を入力し、[ステータスを追加]を選択します。ステータスが[ワークオーダータイプのステータス]ページに追加されます。
Configuring Departments
- 総合システム管理者
部署とは、購入した資料の受入や、痛んだアイテムの装丁と補修などのワークオーダーを処理する図書館の部門のことです。オペレータを特定の部署に関連付けることができ、特定の部署でのみ実行されるようにアクティビティを設定できます。You configure departments on the Department List page (Configuration Menu > General > Work Orders and Departments > Work Order Departments).
図書館が所有する作業指示書部門が機関全体で機能し、どの図書館が所有する作業指示書タイプも処理できることを示す作業指示書。
For digitization departments, see Configuring Digitization Departments.
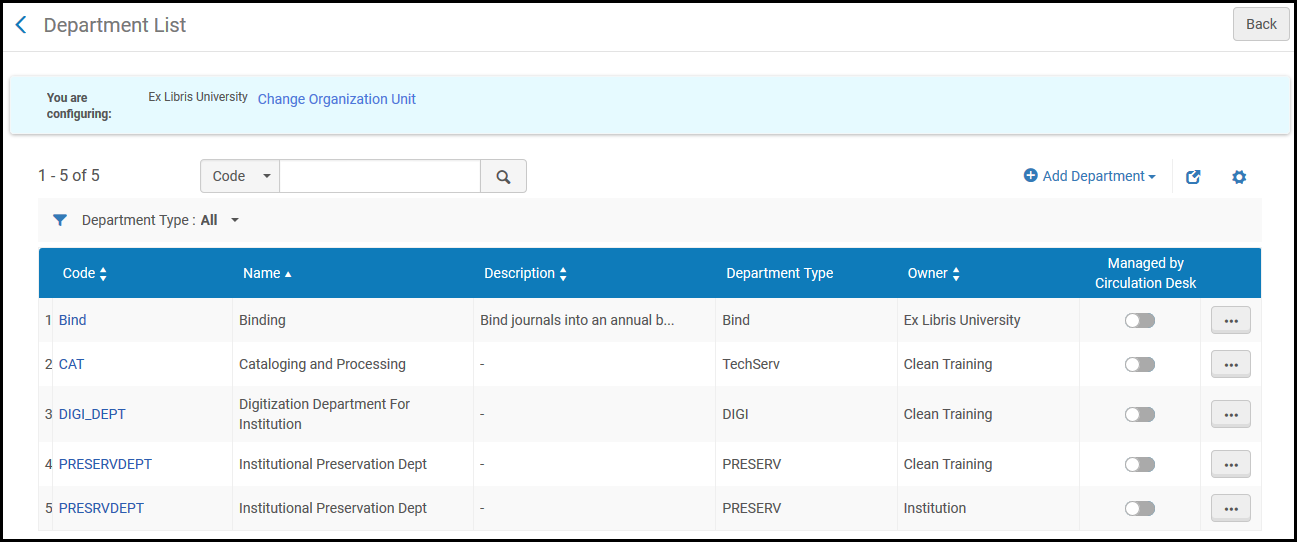
このページで次のアクションを実行できます。
- Add a department (see Adding a Department)
- 部署を編集する(その行のアクションリストで[編集])
- 部署を削除する(その行のアクションリストで[削除])
Adding a Department
To add a department:
- 次のいずれかの方法で[部署リスト]ページにアクセスします。
- Select Manage Departments in the row actions list for a specific work order type/row on the Work Order Types page
- Navigate to Configuration Menu > General > Work Orders and Departments > Work Order Departments
- [部署を追加]を選択します。
- If you accessed the page from the Work Order Departments link, select the work order type to be associated with the department (to define these types, see Configuring Work Order Types).それ以外の場合、タイプは事前に選択されています。The department can be attached to a single work order type.
[一般情報]ページが開きます。これは、[部署を追加]ウィザードの最初のページです。
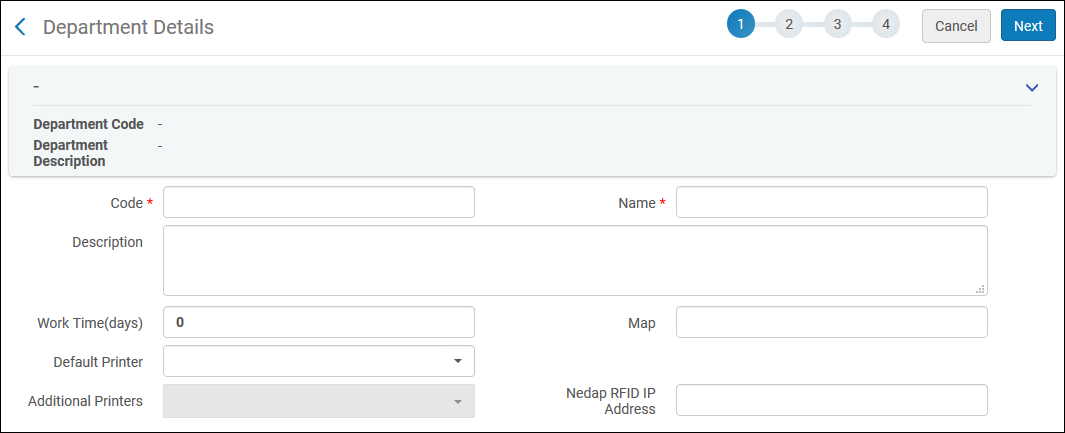
- 以下のテーブルの説明を利用して、作成する部署の一般情報の詳細を入力します。
部署 – 一般情報の各フィールド
フィールド 説明 コード 一意のコード 名称 A unique name that you want to display in the drop-down list for Target Destination when you create a work order (see Creating a Work Order Request) 説明 [部署リスト]ページに表示される部署の説明です。 勤務時間(日数) 処理中のアイテムのリソースリクエストのモニタページに表示される有効期限の計算に使用される日数です。フィールドを空欄のままにするか、0に設定すると、デフォルトの7日間が使用されます。999999を入力すると、リソースリクエストのモニタページに有効期限は表示されません。 For details about the Resource Request Monitoring page, see Managing Requests and Work Orders.
「有効期限」フィールドには「実際の」影響はありませんが、ワークオーダーを処理する必要があることをオペレータに示すインジケーター/リマインダーとしてのみ機能します。
地図 ユーザーがその部署を見つけるのに役立つ地図のURLです。 デフォルトのプリンター その部署に関連付けられているデフォルトのプリンター。デフォルトのプリンターのみが選択されている場合、これはすべての非自動印刷ジョブに使用されるプリンターです。If more printers are selected in the Additional Printers field, each user has the option of where to print. 追加プリンター
[デフォルトのプリンター]を選択すると、このフィールドを使用して、ユーザーが印刷用に設定できる追加プリンターを1つ以上選択できます。ここで1つ以上のプリンターを選択すると、現在のドロップダウンウィンドウに追加のドロップダウンリストが表示されます。
Nedap RFID IPアドレス
The Nedap RFID IP address of the relevant RFID reader.If the department is not managed by a circulation desk, enter the IP address here.If the department is managed by a circulation desk, the IP address is entered in the circulation desk (see Adding a Circulation Desk). - 次へを選択します。The Served Libraries page opens.
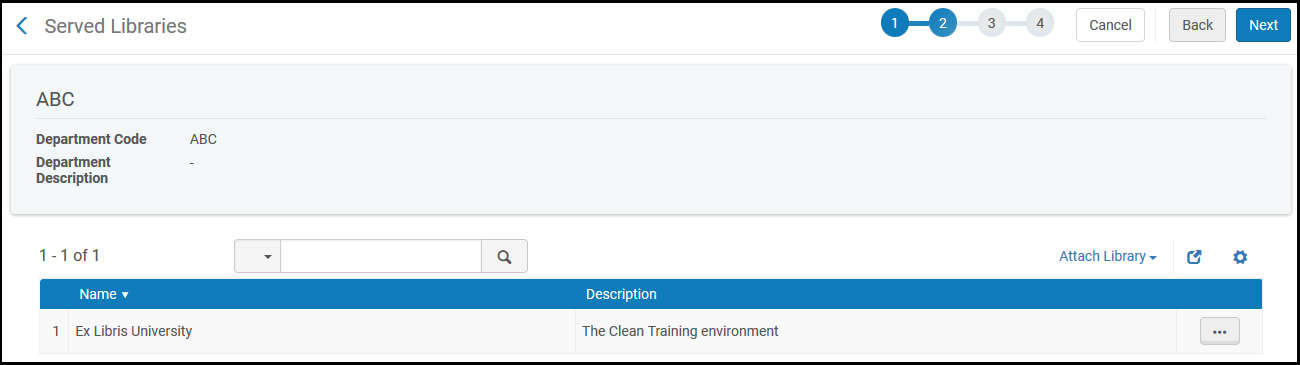
When configuring a department for an institution, the department applies to all of the institution's libraries.In this case, the Work Order Operator role should only be configured in the institution's scope.Configuring Served Libraries is not relevant when working on the institution level; continue with step 7.
- [図書館をアタッチ]を選択し、図書館を選んで[アタッチ]を選択します。図書館がアタッチされます。必要に応じて繰り返します。
- 次へを選択します。The Contact Information page opens.
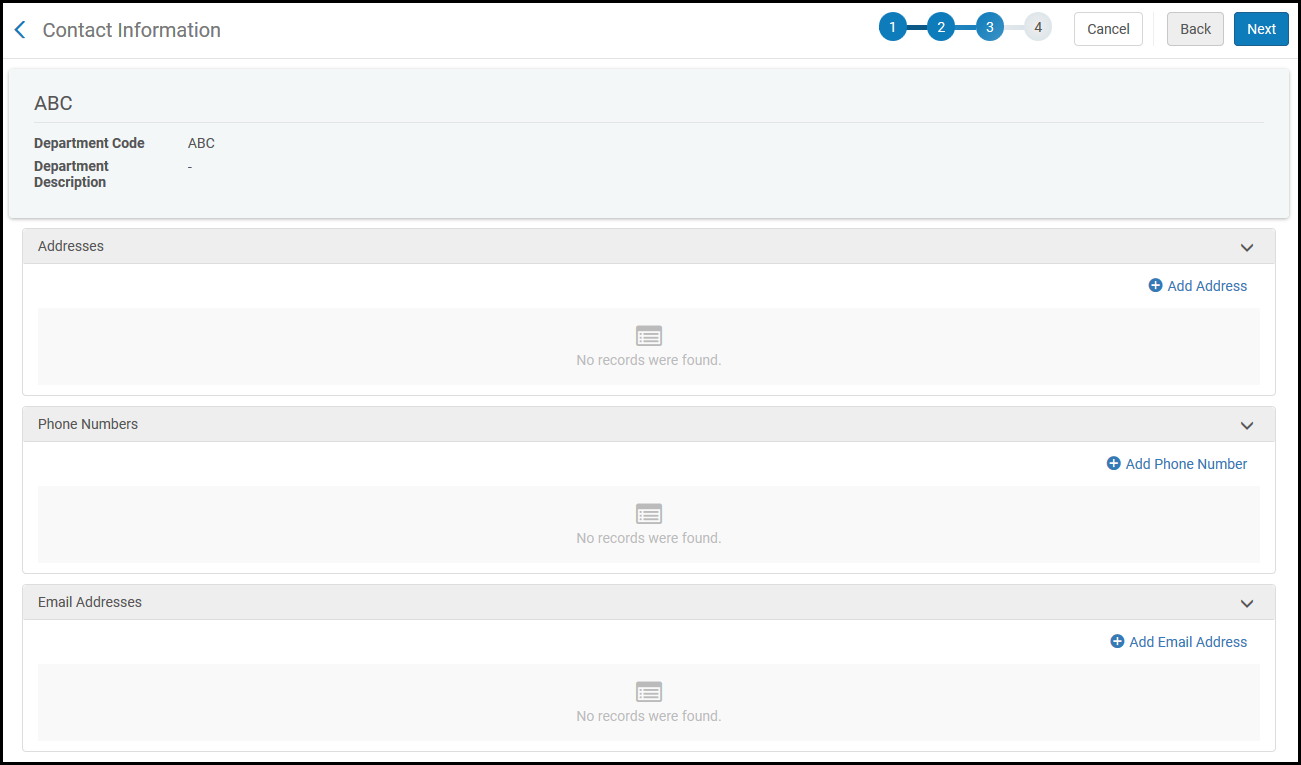
- 作成する部署の住所(プライマリ、問い合わせ、送付先)、電話番号、またはEメール情報を入力します。The fields are the same as when Configuring Institution/Library Contact Information.
- 次へを選択します。The Operators page opens.
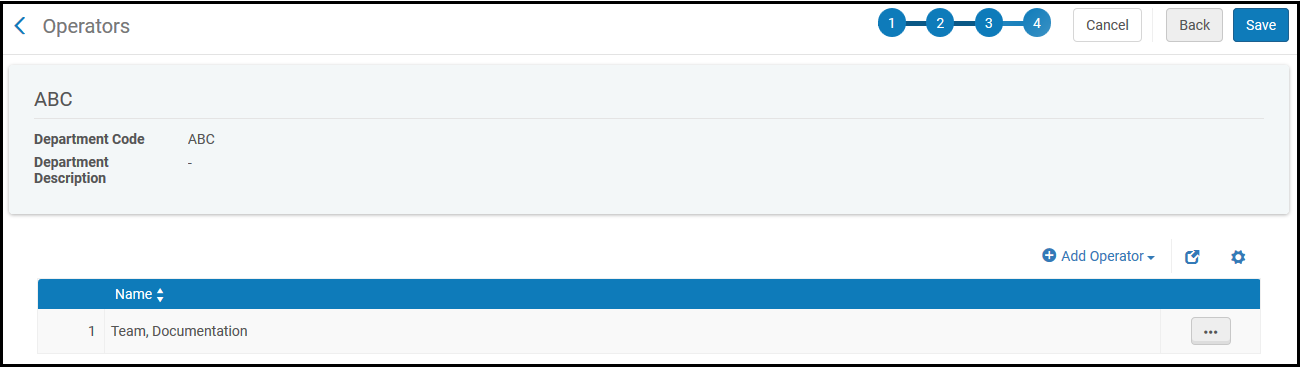
- オペレータを追加するには、[オペレータを追加]を選択します。
- 追加するAlmaユーザーを選択します。[オペレータを追加]を選択します。追加するオペレータごとに繰り返します。
The specified operators receives the Work Order Operator role for the department.If no operators are specified at this time, they can be assigned the role in User Management (see Managing User Roles).
- [保存]を選択します。その部署が部署リストに追加されます。
貸出・返却受付が管理している部署は、[貸出・返却受付による管理]列のスライダーで表示します。For details on defining a circulation desk as a department, see Adding a Circulation Desk.
