Directory Search
The campusM Directory Search product integration allows users to search for individuals and view contact information, such as phone numbers and email addresses.
Overview
The campusM Directory Search product integration allows users to search for individuals and view contact information, such as phone numbers and email addresses.
Vendors
The Directory Search product integration is currently supported by the Azure Active Directory vendor.
User Experience
The following section describes information relating to the user experience for the Directory Search product integration.
User Activities
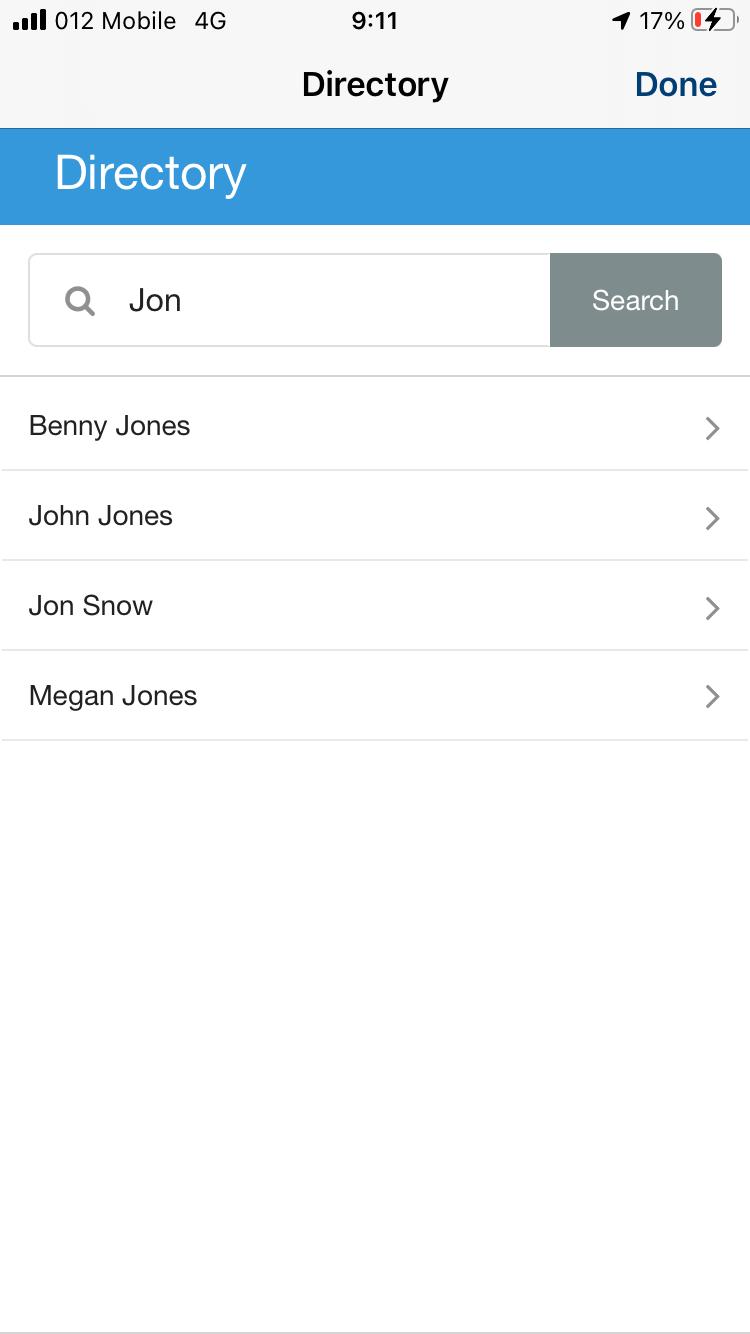
- Users can search the directory for an individual based on first or last name.
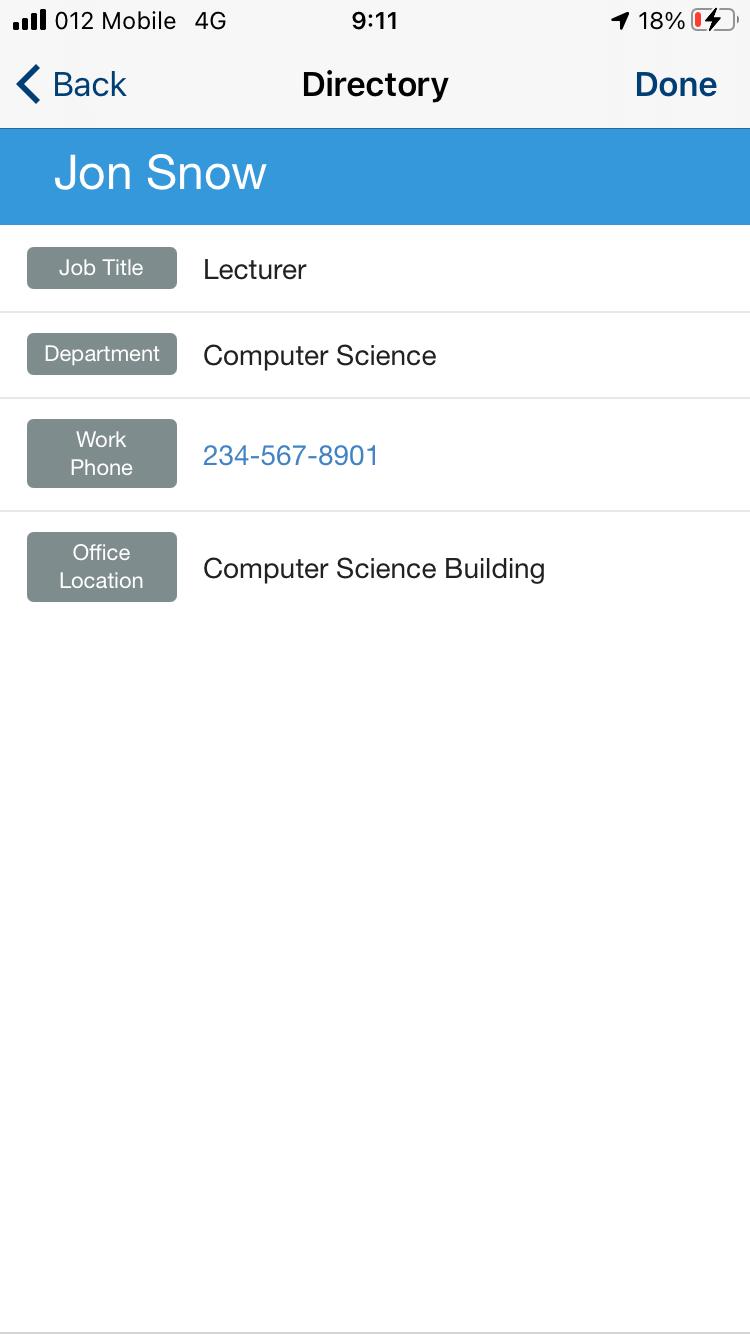
- Users can select an individual from the directory to view the available contact information.
Offline Support
No offline support is provided. The user must be online to retrieve the directory data.
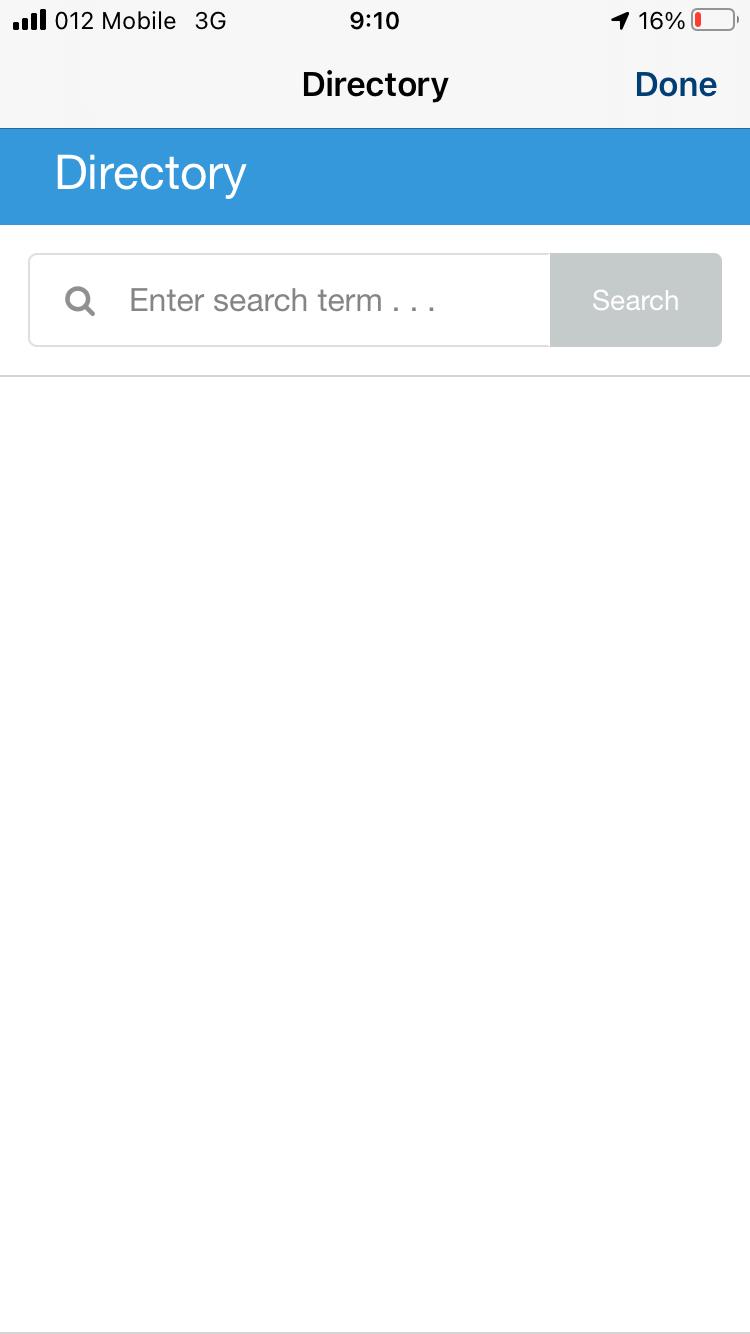
Screenshots
The following is an overview of the Directory Search product integration user interface for reference when configuring it:
| Directory Search | Directory Search Results | Directory Search Contact Information |
|
|
|
Technical Overview
The following section describes technical information for the Directory Search product integration.
Supported Versions
The following version is supported: Microsoft Graph API v1.0.
Prerequisites
For the Directory Search product integration to work, you must:
- Register an app in the Microsoft Azure Portal (to receive the client and tenant IDs to be used at a later point)
- Grant the correct API permissions
- Create a client secret
This information is stored in campusM's App Manager in the Directory Search product integration configuration page.
For information concerning prerequisites, see the Microsoft documentation for the Microsoft Graph API for Azure Active Directory.
For more information about the recommended Permissions, see Microsoft Graph API Permissions and campusM Product Integrations, and the Microsoft Graph documentation.
From the Microsoft Azure Portal:
- Click
 and select Azure Active Directory.
 - Select App registrations.
- Select New registration.
- From the Register an application page:
- Choose a display name to represent the app, for example, "Directory PI Test."
- Set Supported account types to the relevant value, for example, "Account in this organizational directory only (example: only - Single tenant)."
- Leave the Redirect URI field blank.
- Select Register.
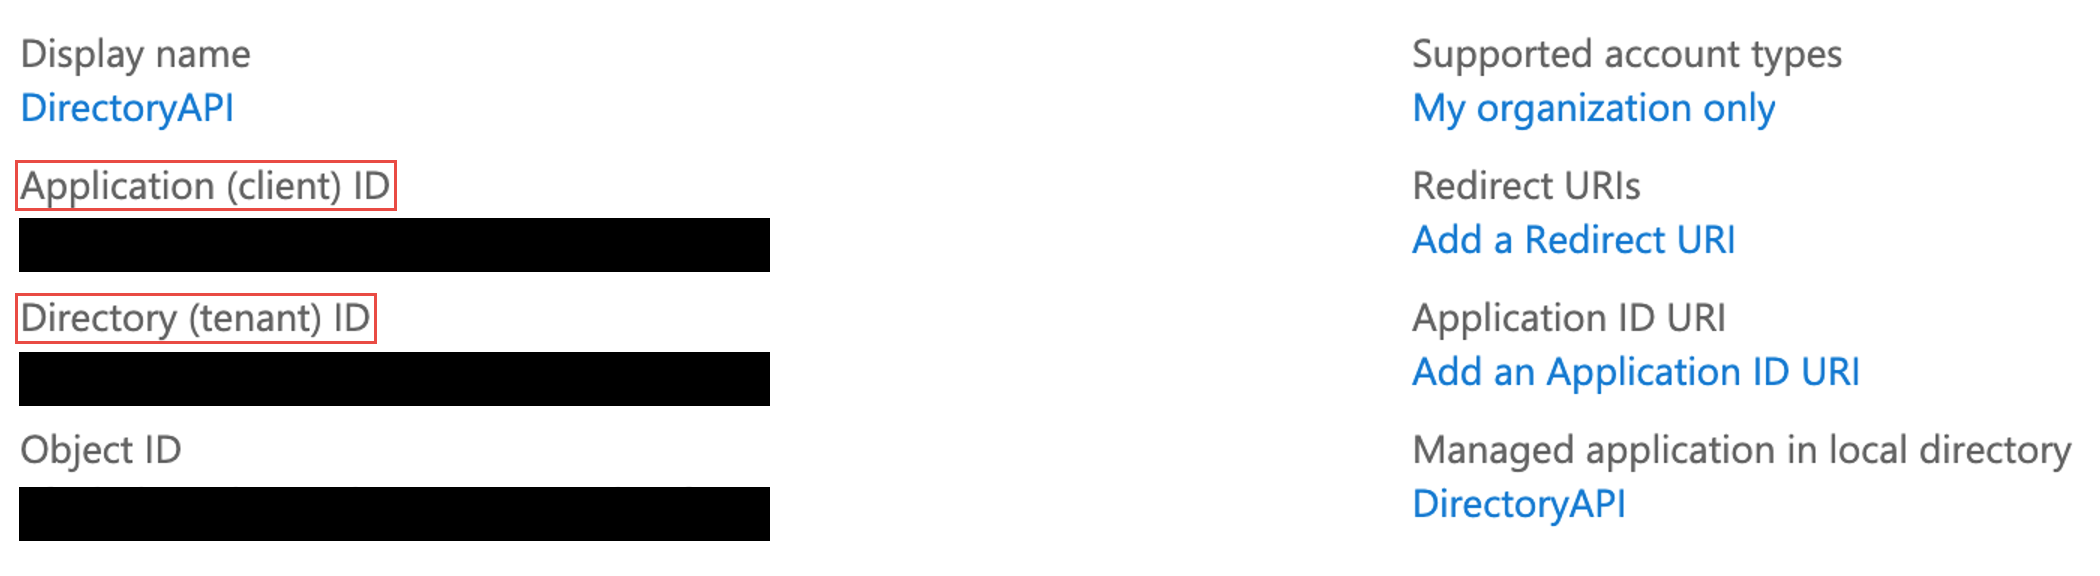
- From the page that displays, record the following information to later enter on the Directory Search product integration configuration screen:
- Application (client) ID
- Directory (tenant) ID
- Example
- From the left menu bar, select API permissions and:
- Select Add a permission
- Select Microsoft Graph
- Select Application permissions
- Enter "User.Read.All"
- From the User dropdown list, select "User.Read.All"
- Select Add permissions
- Select Grant admin consent for...
- When prompted, select Yes. A success message displays.
- From the left menu bar, select Certificates & secrets.
This value is not retrievable once you leave the page. Your client secret is required for the Directory Search product integration configuration screen.
- From Client secrets select New client Secret.
- Enter a meaningful description, for example, "Directory PI Test."
- Set the expiration, for example, "Never."
- From the bottom of the page,copy the client secretvalue.
- From the campusM App Manager Directory product integration page:
- Enable the PI.
- Enter a name.
- Select the Azure vendor.
- Enter the client ID,tenant, and client secret.
- Select Save and Continue Editing.
- Select Test API Connection. A similar window to the following displays.
Configuration
To configure the Directory Search product integration, select Product Integrations > Add Product Integration.
Select Directory Search. The following table describes the configuration options available on this page. Note that while the majority of these fields are not mandatory, they are displayed with their default values unless otherwise stated.
| Configuration Option | Description | Mandatory | Data Type | Default | Example |
|---|---|---|---|---|---|
| Manage Integration | |||||
| Enable Product Integration | Select to enable the product integration on the user's campusM app. | No | Checkbox | Unselected | |
| Product Integration Description | A description of the product integration for internal use | Yes | String | ||
| Screen Title | Appears in the top header (of the integration, in the app). | No | String | Directory | |
| Vendor | |||||
| Vendor Name | Defines which vendor the integration connects to. | Yes | Object | - | Azure Active Directory |
| Tenant | Sets the tenant ID for the integration, your Microsoft 365 tenant ID is a globally unique identifier (GUID) that is different than your organization name or domain | Yes | String | - | |
| Client ID | Sets the client ID for the integration | Yes | String | - | |
| Client Secret | Sets the client secret for the integration | Yes | String | - | |
| Directory Page | |||||
|
Filter Contacts |
Filters out contacts from displaying within the Directory |
No |
Boolean |
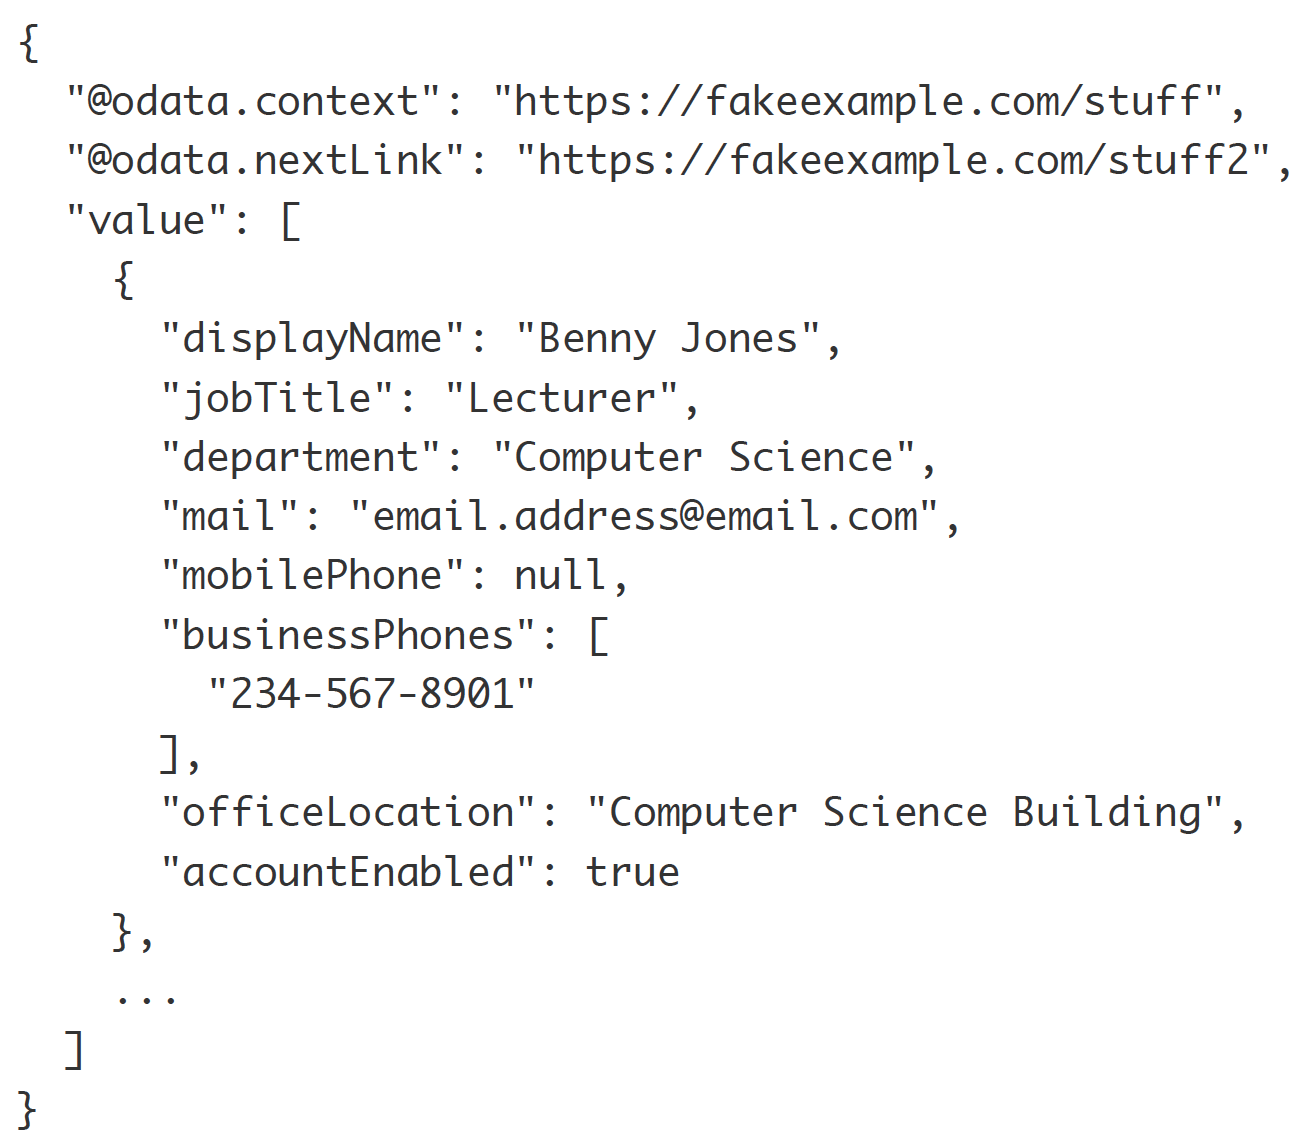
False Only the following attributes are currently returned in the response, so only these can be used as filters. Additional filters can be added upon request.
|
|
|
Filter Code |
This defines the attribute that will be used to filter out users |
No |
String |
accountEnabled |
|
|
Filter Value |
This defines the value of the attribute that will be used to filter out users |
No |
String |
false |
|
|
Display Additional Data
|
Display up to two extra fields in addition to the contact's name
|
No
|
Boolean
|
False
|
|
|
Field 1
|
Pick an extra field to display
|
No
|
Object
|
Email
|
|
|
Field 2
|
Pick an extra field to display
|
No
|
Object
|
Department
|
|
| Contact Page | |||||
|
Display Contact Photo
|
Select this box to get a contact photo through Azure and display it in the Contact page.
|
No
|
Boolean
|
False
|
|
|
Display Job Title |
Select this box to display the contact's job title. |
No | Boolean | True | |
|
Display Department |
Select this box to display the contact's department. |
No | Boolean | True | |
|
Display Email |
Select this box to display the contact's email. |
No | Boolean | True | |
|
Display Mobile Phone |
Select this box to display the contact's mobile phone. |
No | Boolean | True | |
|
Display Work Phones |
Select this box to display the contact's work phone numbers. |
No | Boolean | True | |
|
Display Location |
Select this box to display the contact's location. |
No | Boolean | True | |
| Look and Feel | |||||
| Primary Theme Color | Used for the Screen Title header and other header elements. | No | Color Picker | #444444 | |
| Secondary Theme Color | Used for the block headers. | No | Color Picker | #6f8ea4 | |
| Text / Labels | Enter replacement text for the default titles and labels | No | String | ||
| Directory Page Header | This is shown at the top of the page | No | String | Directory | |
| Search Bar Text | Sets the placeholder text in the search bar | No | String | Enter search term . . . | |
| Search Button Text | Sets the text displayed in the search button | No | String | Search | |
| More Results Button Text | Sets the text displayed in the button that displays additional results | No | String | Show More Results | |
| No Results Message | Sets the texts that display when the search returns zero results | No | String | Your search did not match any records. | |
| Service Failure Message | Sets the message that appears when the integration is unable to reach or process the service call correctly | No | String | The page is having trouble fetching the directory - please try again shortly | |
| Job Title Label Text | Sets the label for the job title field on the contact details page | No | String | Job Title | |
| Department Label Text | Sets the label for the department field on the contact details page | No | String | Department | |
| Email Label Text | Sets the label for the email field on the contact details page | No | String | ||
| Mobile Phone Label Text | Sets the label for the mobile phone field on the contact details page | No | String | Mobile Phone | |
| Work Phone Label Text | Sets the label for the work phone field on the contact details page | No | String | Work Phone | |
| Office Location Label Text | Sets the label for the office location field on the contact details page | No | String | Office Location | |
| Display Labels If Empty | Shows all the contact detail labels, even if the field is empty | No | Boolean | No | |
| Import/ Export Configuration You can configure product integration and then export it to another campusM environment, for example, from sandbox to production or from preview to production. | |||||
| Export | Create a JSON file with all product integration configuration. | No | |||
| Import | Use this option in order to load configuration from JSON of an exported product integration. | No | |||
Page tags: article:topiccontent:Documentationproduct:campusmlang:english