Events
Institutions provide a wide breadth of events, activities, and ancillary opportunities to enrich the curricular and experience for their users. The campusM Events product integration provides users with an attractive and engaging events discovery experience. Users can browse, search, and filter their way through all the activities the institutions have to offer.
Introduction
Institutions provide a wide breadth of events, activities, and ancillary opportunities to enrich the curricula and experience for their users.
The Events product integration provides users with an attractive and engaging events discovery experience. Users can browse, search, and filter their way through all the activities the institution has to offer.
Users can favorite, register, and check-in to events and receive reminder notifications (if configured) to drive attendance. When a user registers to an event or favorites it, it will also appear in the campusM calendar.
The experience within the Events product integration is easily managed through App Manager, with a wide range of configuration options to customize the interface for end-users.
The event information itself can be populated by importing a populated Excel spreadsheet into the Product Integration Configuration screen, as well as dynamically through configuring one or more RSS endpoints, as well as one or more RESTful API endpoints.
Each customer can deploy multiple instances of the Event product integrations to support a range of user segments. Access and visibility of these instances can be managed through Profiles and Roles.
Vendor/Data Source
Currently, the Events product integration supports three different data sources for the events displayed:
- Importing events via an Excel file (see Importing Events from an Excel File, below).
- Importing events from one or more RSS feeds (see Importing Events from an RSS Feed, below).
- Importing events from one or more RESTful API endpoints (see Importing Events from a JSON API, below).
Authentication
Registering and checking in to an event requires a valid CMAuth token.
Offline Support
No offline support is available.
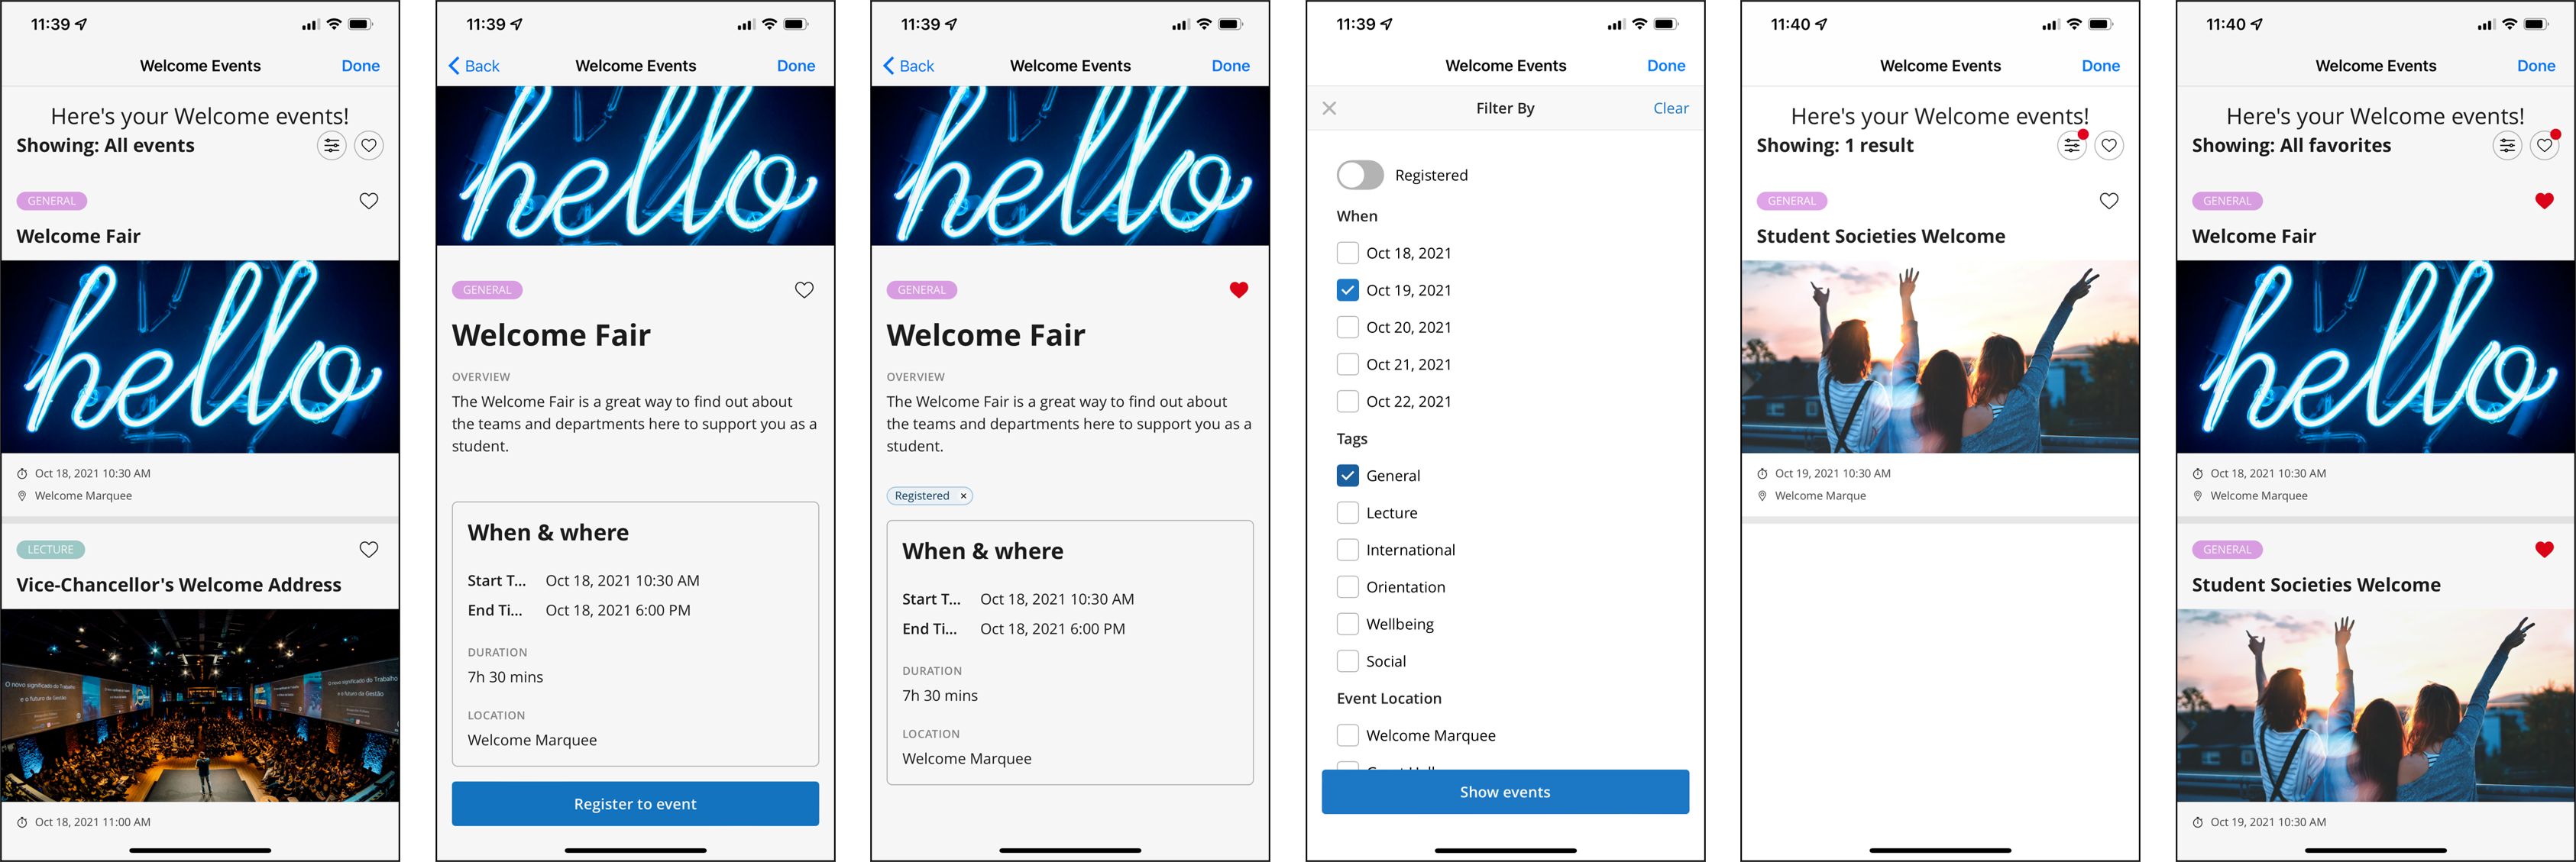
User Experience
The following is an overview of the Events product integration user interface for reference when configuring it.
| Native App Experience | ||
|
||
| Web App Experience | ||
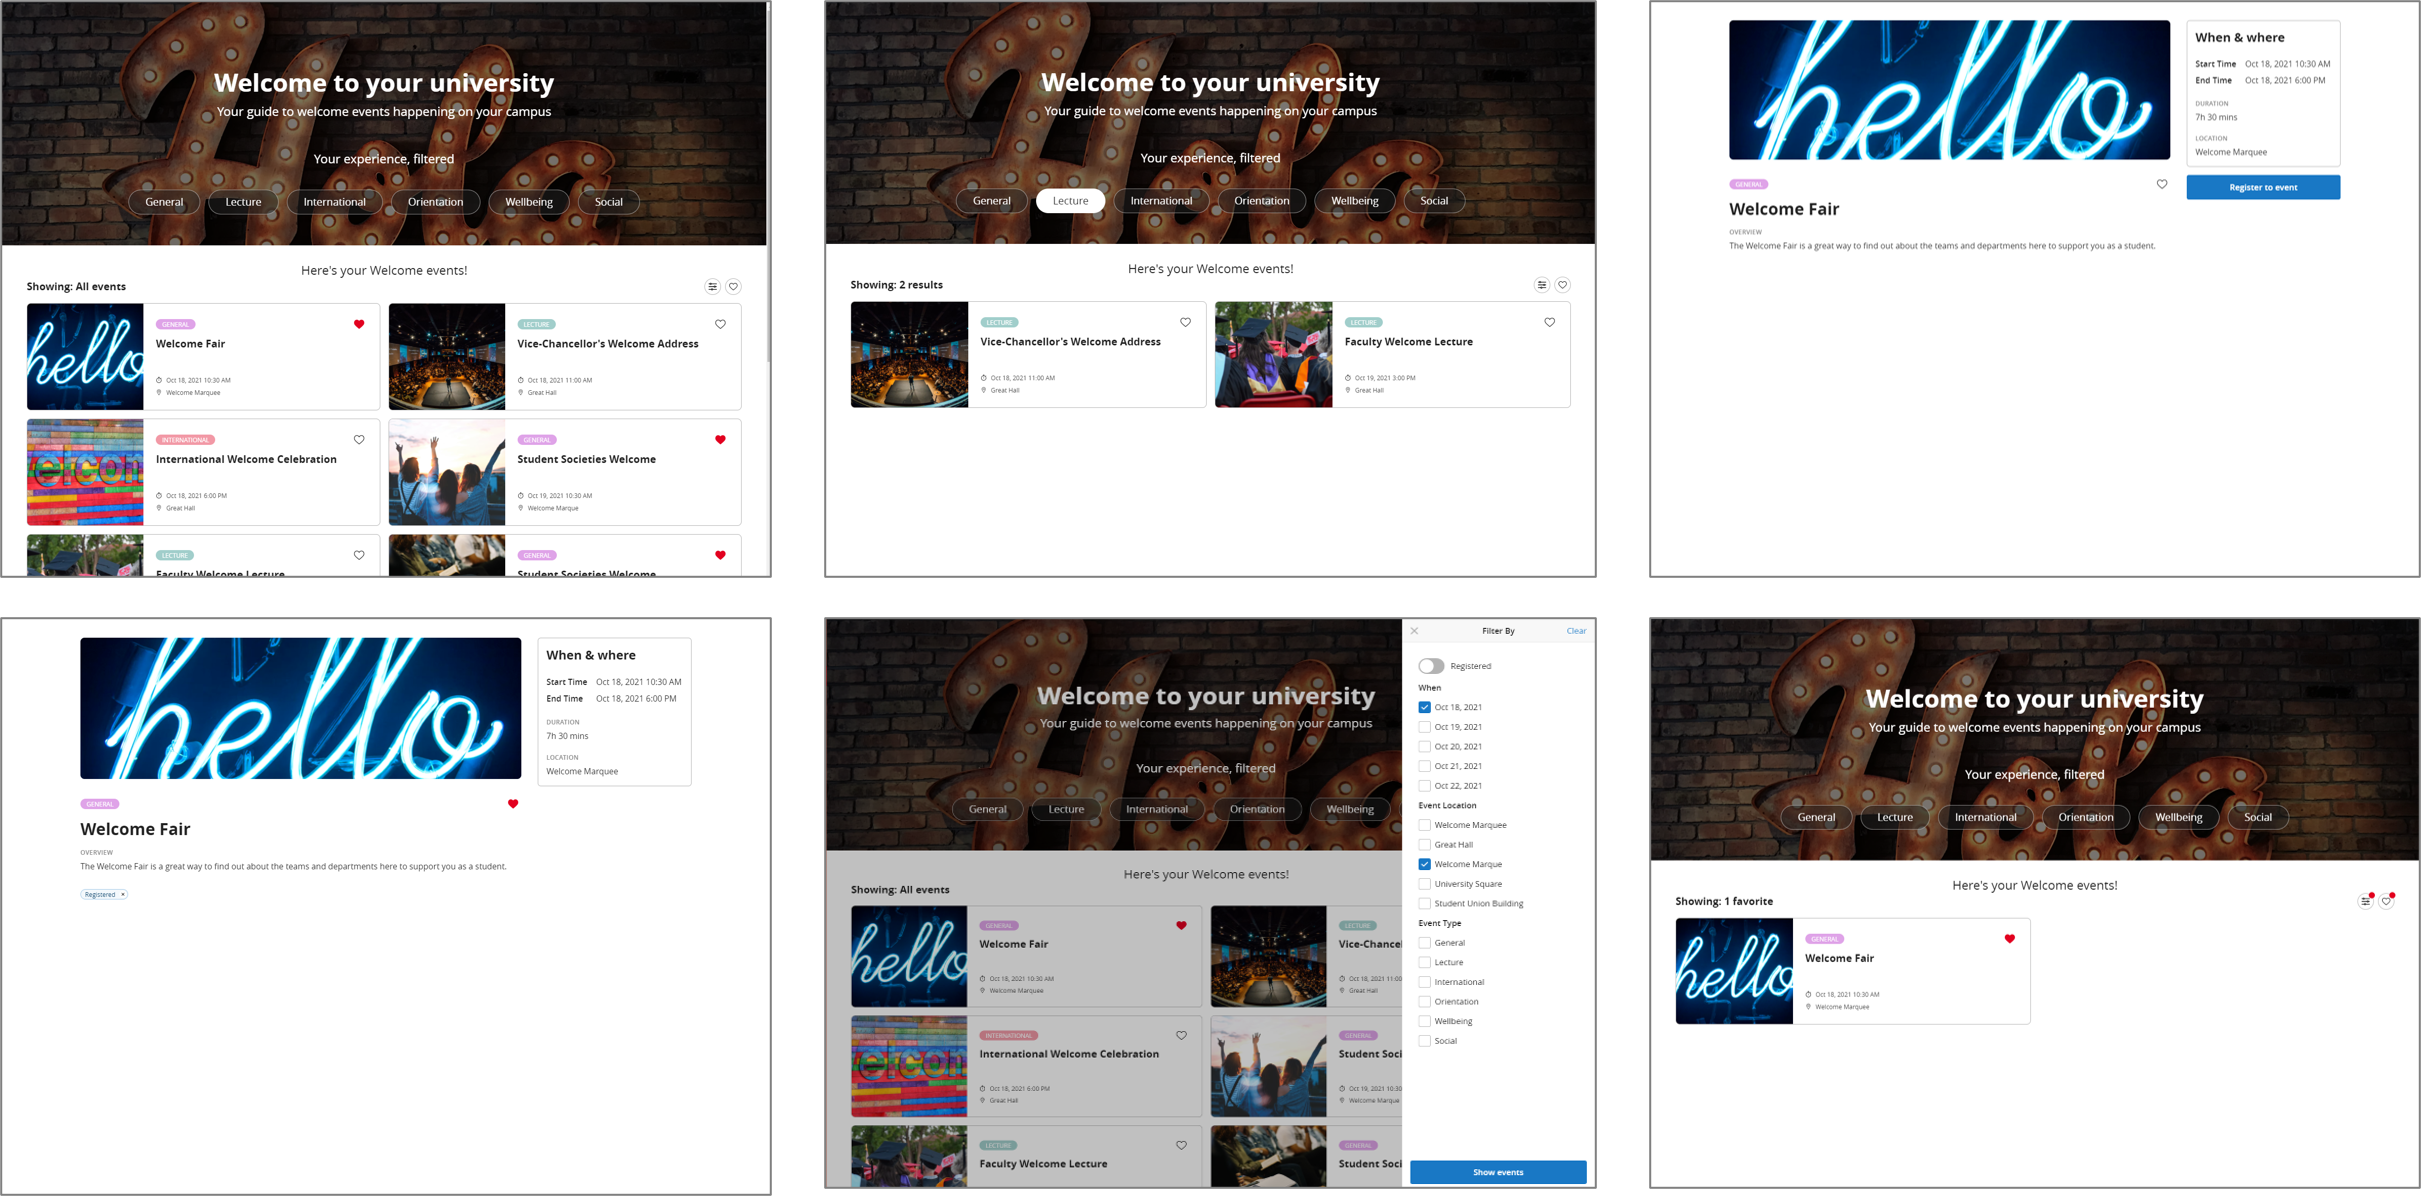
|
||
Additionally, users can do the following:
- View all events
Up to 200 events can be viewed at a time. If more than 200 events are available the user will see a configurable message (see table below) prompting them to filter their search further. If past events are configured to be visible, this may mean that users will only see past events until they filter their search.
- Search for events
- Filter events by date, tags, or any additional info provided for an event
- Add an event to their favorites
- View their favorite events
- View an event's details
- Register for an event
- Check-in to events for which they have registered, either without validation (when validation is not required) or by scanning a QR code (for native) or using a text-based code (for web). This requires the option to be configured (see Configuration).
- View the events they registered to or favorited in the campusM calendar, and configure reminder notifications for events for which they have registered (under Settings > Notifications > Calendar Reminders > Events Timetable; see Feature Focus – My Calendar)
Events Smart Tile
The smart tile highlights upcoming events. A smart tile can be added for the Events product integration from the App Builder.
- Select Add.
- In the first field, select Smart Tile.
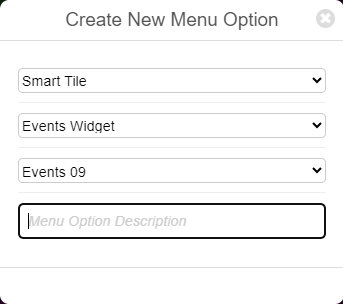
- In the second field, select Events Widget.
- In the third field, select the relevant product integration configuration.
- In the last field, ("Menu Option Description"), enter a name for the tile. A Create button is added to the dialog box.
- Select Create.
- Select Save & Publish. The new Events tile is added to the interface.
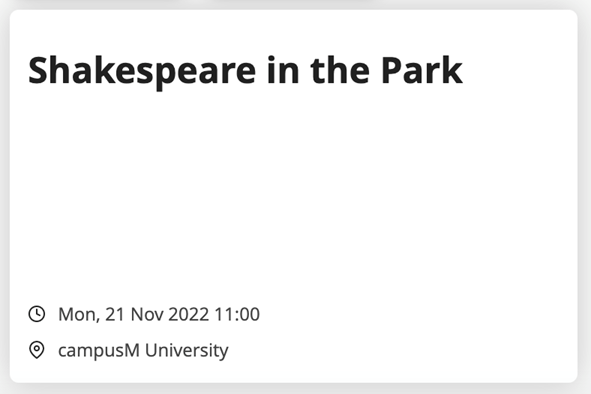
You can configure this tile to include images and/or a title. Selecting the tile sends you directly to the highlighted event that appeared on the homescreen. From here you can view all events.
The Events Widget looks similar to the following on your homescreen:
Technical Overview
The following section describes technical information for the Events product integration.
Prerequisites for Importing Events Data
When importing event data using an Excel file, an RSS feed, or via API, images must must meet the following requirements:
- File size – Under 1 MB
- Orientation – Landscape. Common landscape ratios are:
- For desktops: 3:2, 4:3
- For phones: 5:4, 2:1
Images are cropped as needed in a symmetrical manner such that the center of the image always remains visible.
Importing Events from an Excel File
You can import events data using an Excel file to the Events service. The first 11 columns of the Excel file can have only the following columns:
| Column | Heading Name | Description | Mandatory |
|---|---|---|---|
| A | Unique ID | Event unique identifier | Yes |
| B | Start Date | Event start date (MM/dd/yyyy format) | Yes |
| C | End Date | Event end date (MM/dd/yyyy format) | No |
| D | Start Time | Event start time | Yes |
| E | End Time | Event end time | No |
| F | Tags | Tags for the event — must be separated by a comma (,) | No |
| G | Location | Location of the event | No |
| H | Location URL | URL of the location. URLs that contain special characters may need to be ASCII encoded to work as intended. | No |
| I | Location Code | Location code (Number) — this enables institutions to send users to the maps for the event location | No |
| J | Title | Event name (Up to 800 characters) | Yes |
| K | Description | Event description (up to 4000 characters) | No |
| L | Image | Event image URL | No |
| M | External Link | External link for the event (maximum 2048 characters; must be in http://... format) | No |
- For the import to work, the worksheet must be named "Events".

- You can add additional columns to the Excel file after the M column. These additional headings appear for the user but are not configurable on the configuration page.
- Do not change the order of the columns.
- All cells' must be of format General, except for the cells in the Start Date and End Date columns.

- Excel auto-changes the type of date cells to type Date. If you are using an old file (from before January 2022), edit the dates so that they auto-format to type Date.
- All times should be of the same type that was selected in the Events product-integration instance configuration.
- If no end date is provided, then the end date defaults to the start date (i.e. a one-day event).
- Event start times are mandatory; end times are not mandatory. If no end time is provided, in the React Native calendar, the event is displayed as taking one hour (although no end time is included in the label of the event).
- The value of each field must not be longer than 255 characters.
Importing Events from an RSS Feed
RSS requires specific mandatory fields. See Mandatory Fields, below, for RSS-configuration information. In addition, note the following requirements:
- The RSS feed must map a Start Date and Title.
- The start date must have its format specified. The default is "YYYY-MM-DDTHH:mm:ssZ".
- If the Event ID isn't mapped, it defaults to a generic randomly-generated UUID.
- Tags must be separated by commas (,).
- Event start times are mandatory; end times are not mandatory. If no end time is provided, in the React Native calendar, the event is displayed as taking one hour (although no end time is included in the label of the event).
The following is an example:
<?xml version="1.0" encoding="UTF-8"?>
<rss version="2.0">
<channel>
<title>Example RSS Feed</title>
<link>https://www.example.com</link>
<description>This is an example RSS feed.</description>
<item>
<title>Sample Article</title>
<link>https://www.example.com/sample-article</link>
<description>This is a sample article.</description>
<pubDate>Wed, 04 Sep 2023 12:00:00 GMT</pubDate>
</item>
</channel>
</rss>
Importing Events from a JSON API
Events can be imported via REST API in JSON format.
- The RESTful API must return data in JSON format.
- The JSON API must map a Start Date and Title.
- The start date must have its format specified. The default is "YYYY-MM-DDTHH:mm:ssZ".
- If the Event ID isn't mapped, it defaults to a generic randomly-generated UUID.
- Generate EventID from GUID does not do anything. Just map the Event ID (or not), the same as you would map any other field. This option will be hidden in a future update.
- Tags must be separated by commas (,).
- Event start times are mandatory; end times are not mandatory. If no end time is provided, in the React Native calendar, the event is displayed as taking one hour (although no end time is included in the label of the event).
The following is an example (with a "Start Date Format" of "MMMM DD YYYY HH:mm:ss"):
{
"eventId": "event-test-1",
"title": "Welcome To Our Sample Event",
"description": "You'll be able to do lots of fun things."
"startDate": "February 29 2028 12:00:00",
}
]JSON Field Mapping
Unlike RSS feeds, JSON as a data structure supports nested objects. For example, in the following JSON code, "name" is a top-level attribute, and "name2" is a nested object under "nestedExample." Nonetheless, the JSON endpoints in the Events PI only support mapping top-level attributes. We do not currently supported nested attribute values, or values inside nested arrays. Thus, in the example below, the top-level attribute "name" can be imported but the nested attribute "name2" cannot be imported.
Check-in using a QR code:
- Users can scan a QR code to check-in to an event. This feature works with events imported using an RSS feed or JSON API that specifies the event ID. Events that have an "autogenerated" Event ID are not compatible. The event ID should be an alphanumeric value and can include "-".
- The contents of the QR must be as follows, where "Event1" is the event ID:
{"eventId": "Event1"}
- Scanning a QR code is only available for mobile phones. When this feature is enabled, the user can manually input the event ID on the web.
Configuration
This section explains how to create an Events product integration and configure it.
- In the App Manager, select Product Integrations. The Product Integration Instances page opens.
- Select Add Product Integration Instance. A Product Integration Type list opens.
- Select Events. The Manage Integration page opens.
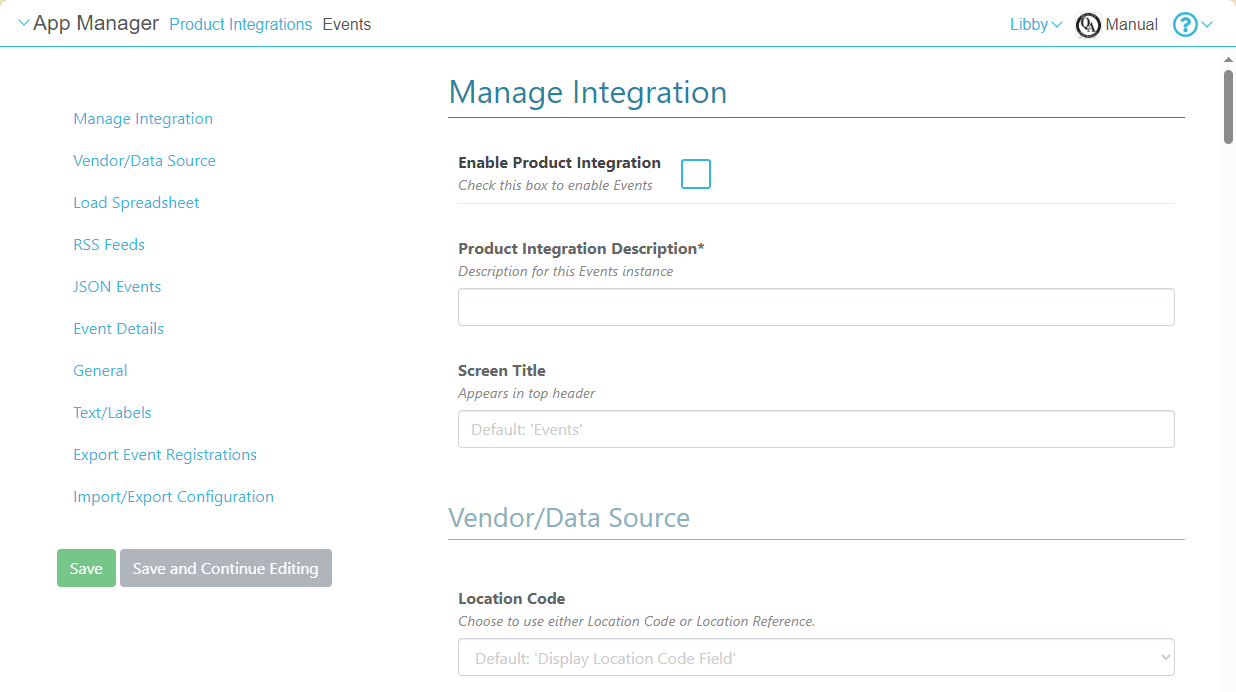
- Configure the settings as explained in the table below.
- To save the settings you have configured, select Save or Save and Continue Editing.
Event Configuration Settings
URLs that contain special characters may need to be ASCII encoded to work as intended.
| Configuration Option | Description | Mandatory | Data Type | Default | Example |
|---|---|---|---|---|---|
| Enable Product Integration | Select to enable the product integration on the user's app. | No | Checkbox | Unselected | |
| Product Integration Description | A description of the product integration for internal use. | Yes | String | ||
| Screen Title | The title that appears in the header of the service. | No | String | Events | My Events |
| Vendor/Data Source | |||||
| Location Code | Choose to use either display the Location Code or the Location Reference field. | No | String | Display the Location Code field | |
| Load Spreadsheet | |||||
|
Imported Data Time Format
|
Select the time format for events for the import file from the drop-down list. All dates in the Excel file must match the chosen time format exactly. For information on creating formats, see Date and Time Patterns.
The options are: hh:mm a HH:mm
|
No
|
Drop-down List
|
HH:mm
|
|
| Imported Data Time Zone | A timezone ID for the date and time. | No | Drop-down List | UTC | |
| Import your File Here | Select Choose File to select a file to import data; maximum size: 10MB. | No | Button | ||
| Import File | Select this button to import your file. | No | Button | ||
| Export File | Select this button to export your existing data in the DB. If there is no data for the specific instance in the DB, an empty template is exported. | No | Button | ||
| Export Template | Select this button to generate an empty template file. Only shown if no Excel data has been imported. | No | Button | ||
| RSS Feeds | |||||
| Feeds | A list of RSS feeds for the integration to use. | No | Object | See "RSS Feed Configuration", below. | |
| RSS Feed Configuration | |||||
| API Configuration | |||||
| URL to retrieve the information | The base URL must include path parameters | Yes | URI | https://myDomain.com | |
| URL Query Parameters | Any additional query parameters required by the vendor (defined as specified below). | No | Array | ||
| Parameter Name | Enter the query parameter name as specified in the base URL. For example, if the URL is https://someHostName/serviceName?username=1234, the parameter name is username. | No | String | username | |
| Parameter Type | Query Parameter type: Choose a parameter type that matches your needs. For example, select Username to use the username attribute associated with the end-user. | No | Object | Username | |
| Token Property Name | Query Parameter token-property name: Enter the property name to be retrieved from the token ({ USERNAME, MAIL, GIVEN_NAME, SURNAME, FULL_NAME } or as named in the integration profile). | No | String | USERNAME | |
| Constant Value | Query Parameter constant value: The value to use if Constant is selected as the parameter type. | No | String | ||
| URL Path Parameters | Any path parameters required by the vendor (defined as specified below). | Yes | Object | ||
| Parameter Name | Enter the path parameter name as specified in the base URL. For example, if the URL is https://someHostName/serviceName/username, the parameter name (to replace with the actual value) is username. | No | String | username | |
| Parameter Type | Path Parameter type: Choose a parameter type that matches your needs. For example, select Username to use the username attribute associated with the end-user. | No | Object | Username | |
| Token Property Name | Path Parameter token-property name: Enter the property name to be retrieved from the token ({ USERNAME, MAIL, GIVEN_NAME, SURNAME, FULL_NAME } or as named in the integration profile). | No | String | USERNAME | |
| Constant Value | Path Parameter constant value: The value to use if Constant is selected as the parameter type. | No | String | ||
| General Headers | Any additional headers required by the vendor. | No | Object | ||
| API Authentication | |||||
| Authentication Type | Defines the authentication required for this feed, if any.
Select one of the following options:
|
No | String | No Auth | |
| Fields | |||||
| Mandatory Fields | |||||
| Generate EventID from GUID | Gets the event ID from the guid field. If this field has no value, defaults to a randomly-generated UUID. | No | Checkbox | Unchecked | |
| Event ID | The event ID. | ||||
| Code (Event ID) | The RSS key that defines the event ID. | No | String |
"EVENT12345" The event ID should include only alphanumeric chars and '-', '_' |
|
| Title | The event name. | ||||
| Code (Title) | Note: Mandatory for RSS feeds | Yes | String | title | |
| Start Date | The event start date. | ||||
| Code (Start Date) | Note: Mandatory for RSS feeds | Yes | String | date | |
| Start Date Format | The format in which the date is returned in the response. | No | String | YYYY-MM-DDTHH:mm:ss.sssZ | |
| Start Time | The event start time. | ||||
| Code (Start Time) | Note: Mandatory for RSS feeds | Yes | String | startTime | |
| Start Time Format | The format in which the start time is returned in the response. | No | String | HH:mm | |
| End Date | The event end date. No need to map if the end date is the same as the start date. | ||||
| Code (End Date) | Note: Mandatory for RSS feeds | Yes | String | endDate | |
| End Date Format | The format in which the date is returned in the response. | No | String | YYYY-MM-DDTHH:mm:ss.sssZ | |
| End Time | The event end time. | ||||
| Code (End Time) | Note: Mandatory for RSS feeds | Yes | String | endTime | |
| End Time Format | The format in which the end time is returned in the response. | No | String | HH:mm | |
| Timezone Conversion | If the API date or time response is adjusted for a time zone that is not specified in the date format, select the zone from the list. | No | String | UTC | |
| Non Mandatory Fields | |||||
| Tags | |||||
| Code (Tags) | No | String | tags | ||
| Location | The location of the event. | ||||
| Code (Location) | No | String | location | ||
| Location URL | The URL of the location. The location appears as an external link to this URL. | ||||
| Code (Location URL) | No | String | locationURL | ||
| Location Code | App location code (Number). The location appears as an internal link to the position that has this code. The location code is the number at the end of the URL of the change position page in the App Manager, for example: https://appmanager.ombiel.com/app-se...sition/123456/. | ||||
| Code (Location Code) | No | String | locationCode | ||
| Description | The description of the event. | ||||
| Code (Description) | No | String | description | ||
| Image | Image for the event. | ||||
| Code (Image) | No | String | image | ||
| Image Alt Text | Alternative text to display if the image fails to render. | ||||
| Code(Image Alt Text) | No | String | imageAltText | ||
| External Link | External link for the event. | ||||
| Code (External Link) | No | String | link | ||
| Additional Fields | |||||
| Fields | Any extra fields other than the ones defined above. | ||||
| Code | The code for the field. | No | String | example | |
| Label | The label to use for this field on the event details page. | No | String | Example | |
| Expect HTML Content | Enable the field in the API response returns HTML content. | No | Checkbox | Unchecked | |
| JSON Events | |||||
| API Response Type | Whether the API response returns an array, or an object, at the top level. | No | Drop-down list | Array | |
| Get Time From Date Values | Enable this to generate event start- and end-times from the start- and end-date values in the API response.
Note: The start and end dates must contain time data for this to work. |
No | Checkbox | Unchecked | |
| Events Configuration | A list of JSON endpoints for the integration to use. | No | Object | See JSON Endpoint Configuration, below. | |
| JSON Endpoint Configuration | |||||
| API Configuration | |||||
| URL to retrieve the information | The base URL must include path parameters. | Yes | URI | https://myDomain.com | |
| URL Query Parameters | Any additional query parameters required by the vendor (defined as specified below). | No | Array | ||
| Parameter Name | Enter the query parameter name as specified in the base URL. For example, if the URL is https://someHostName/serviceName?username=1234, the parameter name is username. | No | String | username | |
| Parameter Type | Query Parameter type: Choose a parameter type that matches your needs. For example, select Username to use the username attribute associated with the end-user. | No | Object | Username | |
| Token Property Name | Query Parameter token-property name: Enter the property name to be retrieved from the token ({ USERNAME, MAIL, GIVEN_NAME, SURNAME, FULL_NAME } or as named in the integration profile). | No | String | USERNAME | |
| Constant Value | Query Parameter constant value: The value to use if Constant is selected as the parameter type. | No | String | ||
| URL Path Parameters | Any path parameters required by the vendor (defined as specified below). | Yes | Object | ||
| Parameter Name | Enter the path parameter name as specified in the base URL. For example, if the URL is https://someHostName/serviceName/username, the parameter name (to replace with the actual value) is username. | No | String | username | |
| Parameter Type | Path Parameter type: Choose a parameter type that matches your needs. For example, select Username to use the username attribute associated with the end-user. | No | Object | Username | |
| Token Property Name | Path Parameter token-property name: Enter the property name to be retrieved from the token ({ USERNAME, MAIL, GIVEN_NAME, SURNAME, FULL_NAME } or as named in the integration profile). | No | String | USERNAME | |
| Constant Value | Path Parameter constant value: The value to use if Constant is selected as the parameter type. | No | String | ||
| General Headers | Any additional headers required by the vendor. | No | Object | ||
| API Authentication | |||||
| Authentication Type | Defines the authentication required for this feed, if any.
Select one of the following options:
|
No | String | No Auth | |
| Fields | |||||
| Mandatory Fields | |||||
|
|
Not supported by this vendor (will be removed in the future). | No | Checkbox | Unchecked | |
| Event ID | The event ID. | ||||
| Code (Event ID) | The key that defines the event ID. | No | String |
"EVENT12345" The event ID should include only alphanumeric chars and '-', '_' |
|
| Title | The event name. | ||||
| Code (Title) | Note: Mandatory for the event to display at all. | Yes | String | title | |
| Start Date | The event start date. | ||||
| Code (Start Date) | Note: Mandatory for the event to display at all. | Yes | String | date | |
| Start Date Format | The format in which the date is returned in the response. | No | String | YYYY-MM-DDTHH:mm:ss.sssZ | |
| Start Time | The event start time. | ||||
| Code (Start Time) | Yes | String | startTime | ||
| Start Time Format | The format in which the start time is returned in the response. | No | String | HH:mm | |
| End Date | The event end date. No need to map if the end date is the same as the start date. | ||||
| Code (End Date) | Yes | String | endDate | ||
| End Date Format | The format in which the date is returned in the response. | No | String | YYYY-MM-DDTHH:mm:ss.sssZ | |
| End Time | The event end time. | ||||
| Code (End Time) | Yes | String | endTime | ||
| End Time Format | The format in which the end time is returned in the response. | No | String | HH:mm | |
| Timezone Conversion | If the API date or time response is adjusted for a time zone that is not specified in the date format, select the time zone from the list. | No | String | UTC | |
| Non-Mandatory Fields | |||||
| Tags | |||||
| Code (Tags) | No | String | tags | ||
| Location | The location of the event. | ||||
| Code (Location) | No | String | location | ||
| Location URL | The URL of the location. The location appears as an external link to this URL. | ||||
| Code (Location URL) | No | String | locationURL | ||
| Location Code | App location code (Number). The location appears as an internal link to the position that has this code. The location code is the number at the end of the URL of the change position page in the App Manager, for example: https://appmanager.ombiel.com/app-settings/CampusM/position/123456/. | ||||
| Code (Location Code) | No | String | locationCode | ||
| Description | The description of the event. | ||||
| Code (Description) | No | String | description | ||
| Image | Image for the event. | ||||
| Code (Image) | No | String | image | ||
| Image Alt Text | Alternative text to display if the image fails to render. | ||||
| Code(Image Alt Text) | No | String | imageAltText | ||
| External Link | External link for the event. | ||||
| Code (External Link) | No | String | link | ||
| Additional Fields | |||||
| Fields | Any extra fields other than the ones defined above. | ||||
| Code | The code for the field. | No | String | example | |
| Label | The label to use for this field on the event-details page. | No | String | Example | |
| Expect HTML Content | Enable the field if the API response returns HTML content. | No | Checkbox | Unchecked | |
| Event Details | |||||
| Display Tags Field | Controls the display of tags. | No | Checkbox | Checked | |
| Display Location Field | Controls the display of location details. | No | Checkbox | Checked | |
| Display Location URL Field | Controls the display of the location link. | No | Checkbox | Checked | |
| Display Location Code Field | Controls the display of the location code. | No | Checkbox | Checked | |
| Display Description Field | Controls the display of event descriptions. | No | Checkbox | Checked | |
| Expect HTML Content in the Description | Tells the product integration whether or not to expect HTML content in the description. | No | Checkbox | Checked | |
| Display Image Field | Controls the display of images from the feed. | No | Checkbox | Checked | |
| Display External Link | Controls the display of any external link. | No | Checkbox | Checked | |
| Display All Event's Details | If unchecked, three fields appear together with a show more button | No | Checkbox | Unchecked | |
| Display Event Duration | If unchecked, the DURATION section is not visible. | No | Checkbox | Unchecked | |
| General Settings | |||||
|
Default Locale
|
No
|
String
|
en-gb
US-based customers must use Default Localeen-us.
|
||
| Time Format | No | String | LT | ||
| Date Format (short) | No | String | ll | ||
| Date Format (long) | No | String | LL | ||
| DateTime Format (short) | No | String | llll | ||
| DateTime Format (long) | No | String | LLLL | ||
| Show Past Events | Select this box to show past events. | No | Checkbox | Unselected | |
| Enable Registering to Events | Select this box to enable registering to events. | No | Checkbox | Unselected | |
|
|
Select this box to enable checking into events.
|
No
|
Checkbox
|
Unselected
|
|
|
|
Select this box to enable checking into events using QR codes.
|
No
|
Checkbox
|
Unselected
|
|
|
Check-in Window |
|||||
|
Check-in Window Start |
Number of minutes before or after the start of the event | No | Number | -5 | |
|
Check-in Window End |
Number of minutes before or after the end of the event | No | Number | 5 | |
| Event Duration Format | No | String | h[h] m [mins] | ||
| Events Home Page Image | No | URL | https://defaultImage.jpg | ||
| Text/Labels | Enter replacement text for the default titles and labels listed below. | ||||
| Events Home Page Title | No | String | Events on Campus | ||
| Events Home Page Subtitle | No | String | Recommended events just for you, anytime, any topic you want | ||
| Filters Title | No | String | Broaden your mind | ||
| Browse Events Title Text | No | String | Discover unique events at anytime | ||
| Showing Text | No | String | Showing: | ||
| Events Text | No | String | events | ||
| Event Text | No | String | event | ||
| Results Text | No | String | results | ||
| Result Text | No | String | result | ||
| Favorites Text | No | String | favorites | ||
| Favorite Text | No | String | favorite | ||
| All Text | No | String | All | ||
| No Text | No | String | No | ||
| Events Tab Title | No | String | Filter By | ||
| Clear Button Text | No | String | Clear | ||
| When Text | No | String | When | ||
| Tags Text | No | String | Tags | ||
| Show events button Text | No | String | Show events | ||
| No Events Found Text | No | String | No events found. Keep digging! | ||
| No Events Found Subtitle Text | No | String | Clear your filters and try again. | ||
| Maximum Events Displayed Message Text | No | String | There are more events available. Please use filters to narrow your search. | ||
| Event Description | No | String | OVERVIEW | ||
| When and where Heading Text | No | String | When & where | ||
| Event Start Time | Yes | String | Start Time | ||
| Event End Time | No | String | End Time | ||
| Duration Text | No | String | DURATION | ||
| Event Link | No | String | LINK | ||
| Event Location | No | String | LOCATION | ||
| Show More Text | No | String | Show More | ||
| Show Less Text | No | String | Show Less | ||
| Register to Event Button Text | No | String | Register to event | ||
| Registered Text | No | String | Registered | ||
| Check-In to Event Button Text | No | String | Check-In | ||
| Incorrect Code Error Text | No | String | The code you entered is invalid | ||
| Checked-In Text | No | String | Checked-In | ||
| Import/ Export Configuration You can configure product integration and then export it to another environment, for example, from sandbox to production or from preview to production. | |||||
| Export | Create a JSON file with all product integration configurations. | No | |||
| Import | Use this option in order to load configuration from JSON of an exported product integration. | No | |||
Page tags: article:topiccontent:Documentationproduct:campusmlang:english